MENU

The Largest Textile I’ve Blocked to Date: A Knit Lace Chuppah

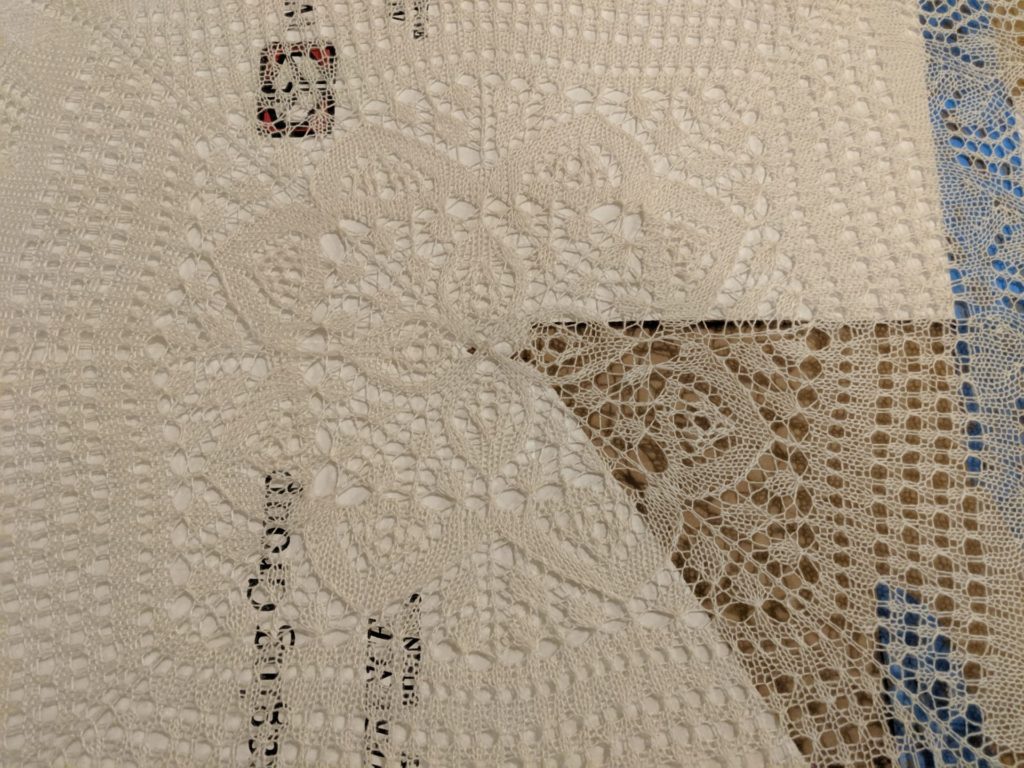
detail of lace star in middle of chuppahA while back I was contacted by a young woman getting ready for her wedding.  She had a rather unusal request: she needed a lace knit chuppah for her wedding blocked.  Part of a traditional Jewish wedding is the chuppah: a canopy under which the couple stands during the wedding cerenony.  The chuppah has a lot of symbolism.  Some chuppahs can be very plain, but many of them are passed through the family, and are elaborate family herilooms made of lace and embroidery are not uncommon.

When I first spoke to the young lady, she admitted that she had gotten in touch with a few other finishers, and none of them could take on an item so large.  She estimated that the finished piece would be about 10 by 10 feet.  I have to admit, I went through the house with a measuring tape, measuring each room in my house to see if I could fit something so large.  Luckily, our kitchen with all the furniture out would work.  It was 14×14 feet – which would give me just enough room to be able to walk around it when the piece was laid out.

[Read more…]

Long time, no see

Getting Ready to do a repair

Getting Ready to do a repair

It’s been nearly a year and a half since I blogged last. That isn’t to say I haven’t been doing things… quite the contrary. But… I haven’t had the mental ablity or bandwith to blog.

After Turtle #2 was born, I cut my hours with the business back. Way back. There were a variety of factors, but a lot of it turned into wanting and needing to spend more time focused on family and other goals, and less on the business. Tinking Turtle went into matinence mode. I was doing just enough to keep the business going, but a lot of things, including blogging, got cut back.

It wasy the right choice at the time, but we’ve shifted to a new time, and the plan is to bring the business back from life support to more solidly into part-time. I’ve missed devoting time to Tinking Turtle, and I’m really glad to be getting back.

Meanwhile, I’ve got a bunch of different projects I worked on while I was away that I want to share. Call it a highlights reel of the past two years. A lot of it is going to focus on repair work, because that’s where a lot of my time has been devoted, but I hope it will be interesting!

All About Yarn Online Workshop

I’m proud to announce the release of my class All About Yarn with Interweave.  This class has been a long time in coming!  It’s a version of one of my most popular topics to talk about: why yarns act the way they do.  I’ve been working to get this information to a wider audience, and I feel that this fits that niche.  Let me tell you a little bit more about the class:

 Ever find what you think is the perfect yarn for the perfect project, only to find that they are not perfect together at all? Ever fret over substituting one yarn for another? Join Jennifer Raymond and discover why a yarn that is luscious for lace can be a fail when it comes to cables. Look at your stash with fresh eyes, and visit your LYS knowing how to choose and use the right yarn for whatever you want to make. Prepare to learn All About Yarn.

In this Online Workshop you’ll:


  • Learn about the 3 building blocks of all yarns–ply, weight, and fiber content—and how they work together.
  • Determine the weight of any yarn, from handspun to those mystery yarns in your stash.
  • Explore a whole menagerie of fiber animals–from angora to yak–along with cotton, linen, silk and more.
  • Gain new confidence in choosing and using yarns, whether for a new pattern or for your own design
  • Get tips on how to care for your finished projects.


Lesson Outline:


  • Introduction
  • Meet Your Instructor
  • Understanding Ply:


  • Singles
  • 2 Ply Yarns
  • 3 & 4 Ply Yarns
  • A Weighty Matter: Yarn Weights Explained
  • Yarn Weight Standards
  • Wraps per Inch
  • A Small Detour: Worsted vs. Woolen Yarns
  • Fiber: Protein, Cellulose, and Other Types of Fiber
  • Quick Guide: Types of Wool
  • Quick Guide: Other Animal Fibers
  • Quick Guide: Cotton, Linen, & Silk
  • Quick Guide: Synthetic Fibers
  • Fiber Care


  • Wrapping Up


Skill Level: Beginner on up. Though aimed at knitters, this workshop is also appropriate for crocheters or any maker interested in yarn.

Materials required: None! Though you may find it helpful to rummage through your yarn stash while watching.


About the Instructor:
Jennifer Raymond is a knitter, crocheter, and spinner based in Ashland, Virginia, with more than 20 years of stitching experience. A teacher and designer, she also has a business repairing and restoring heirloom knit and crochet pieces.

Back from Maternity Leave!

Photographing a project

Hello from the Turtle Household!

Monday marked the end of my self-imposed maternity leave.  I’ve been taking the last month to sort through emails and triage what I needed to do for the business.  If everything goes as planned, the remainder of August and the month of September will be marked by an increased amount of activity as I learn what the new normal for the business and our family is.

The intent is to begin to contact individuals on the waiting list for finishing and repair services and begin taking in items again.  I’m so looking forward to burrying my hands in yarn!

I’m hoping for the ability to return to a little more blogging, a few news emails if you’re on the newsletter, and a somewhat regular teaching schedule.  We’ll see how ambitious this will be!

Meanwhile, I’ll leave you with this picture, of a project I worked on during my maternity leave for an article that will be published later this year.

Welcome Turtlette

The Tinking Turtle family would like to welcome Turtelette, aka Morgan Winfield, into our family!  Turtlette joined us Friday, February 16th, and both she, her big sister Little Turtle, and Jennifer are doing fine.

Turtlette

Turtlette


Going Forward

As previously announced, Jennifer will be taking time away from the business to focus on bringing Turtlette into our family.  We anticipate returning to teaching, finishing, and designing sometime mid-summer.  You can always sign up to our Newsletter on our home page to be informed when services will be resuming.  If you have a finishing or repair project you would like to add to our waiting list, please use our Finishing Contact Form to be added to the waitlist.

While she is out,  Jennifer will be responding to a very limited amount of emails, as she learns how to balance the business with two small children.

As such, please direct requests or email to info@tinkingturtle.com, rather than jennifer@tinkingturtle.com.  This ensures that I (Mr. Turtle) will also get a copy of the email, as I will be aiding in answering emails to clients as I am able.

Thank you for your understanding!

~ Mr. Turtle

Important Updates and News

Balloon LogoMuch has been going on behind the scenes of Tinking Turtle recently, but it’s left me with precious little time to update the blog!  I’m going to be endeavoring to fix this oversight in the next few days with a series of updates, since some exciting things are happening this fall.

But the biggest news that Mr. Turtle and I would like to share is that we will be adding another small member to our family in late February – a second girl.  We’re very excited to share this news with you!

How will this affect the running of Tinking Turtle?  Well, following the end of the year I’ll be starting to wind things down in anticipation of going on maternity leave.  What we discovered last time was that I didn’t give myself enough time to wrap things up before Little Turtle’s birth, and it left me having to tie up the ends of a few projects after she was born.  We’re trying to avoid that situation this year.  There’ll be the normal holiday pricing for finishing and repairs, and we’ll have a waiting list for people interested in my services after I finish my maternity leave.  Going into the New Year, I’ll be cutting back my teaching obligations too.  I’ll keep you posted with more updates as we get closer to February!

Thank you so much for supporting Tinking Turtle and our growing family.

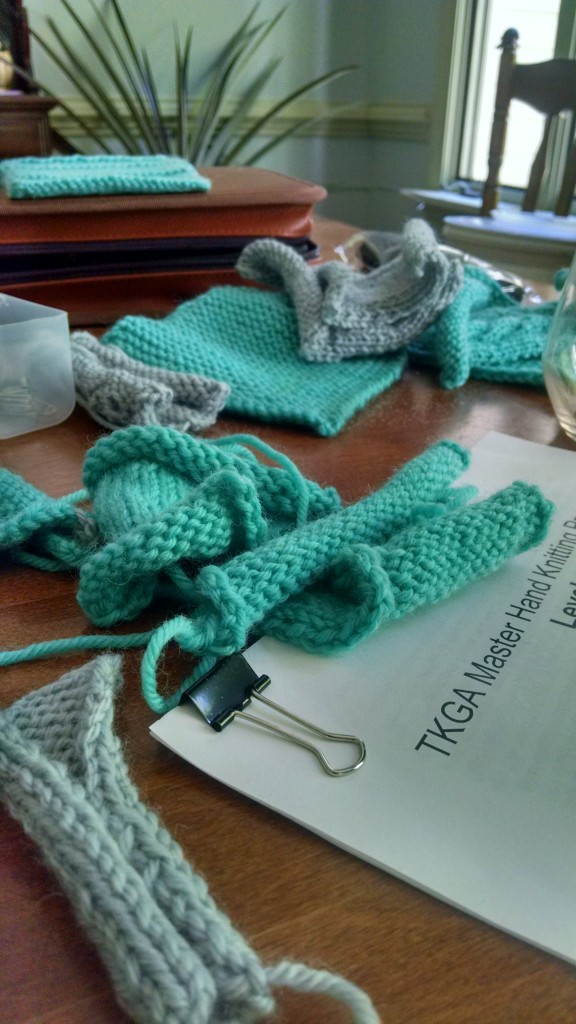
Mastering the Master Hand Knitter Program

IMG_20170517_154215159_HDRI’ve been considering doing the Master Knitter program for a while now.  Rather halfheartedly, because I wasn’t really sure where I would find the time, and I wasn’t sure of the benefit the designation would give me.  However, after Unwind, Mr. Turtle decided it was time to give me the push and sign me up for the Master Hand Knitter program.  Then I’d be committed.  The theory being, is that even at 30 years of age (with a child now!) I’m often still perceived as being younger and thus less experienced. (Ageism, anyone?)  The Master Hand Knitter certification would be a way for me to have outside validation that I know my stuff – and hopefully open more doors for teaching and other opportunities.

So I’ve been working on the swatches and reports for the first level, and it’s an interesting process.  Let me be clear before I write the next part: I have the utmost respect for the TKGA Master Hand Knitter Program.

Saying that, I’m finding doing the swatches and the work utterly boring and frustrating and counter-intuitive to my personality. Hint: I’m not that great a rule-following, and I tend to think I know better than the directions.

Part of this may improve with time as I get to the more difficult levels.  But part of me wishes that there was a way to “test out” of the lower levels – these swatches of garter stitch, stockinette, and basic lace are driving me BONKERS.  I understand that you need to follow the directions exactly – so that they can tell that you can follow directions, so that you can demonstrate that you can do various skills like yarn-overs and decreases without twisting stitches.

The whole thing is terribly tedious.

Then, I need to write reports about various techniques, citing sources and answering questions.  I need to be able to write directions on how to do the various skills to demonstrate that I can explain things clearly.

And the whole time I feel like this work is pulling me away from things I would rather do with my leisure or work time.  I’m trying to keep my eye on the prize – that big shiny pin and the proof that I’m able to do this work.  But… I’m finding it hard.  Part of it is I’m not entirely convinced that the time I spend on the Master Hand Knitter Certification will actually have any affect on my marketability.  And part of it is I feel like my accomplishments should be able to speak for themselves, instead of doing what feels like busywork.

But!  Continuing education is a good thing.  And who knows, maybe I’ll get my ego checked a little bit, and find things that I need to improve on.

Anyone else looked at or done the Master Hand Knitters Program?  What were your thoughts?

Restoring Harmony to a Household with a Crochet Repair

I had a client get in touch with me a couple of weeks ago.  In my client’s words the situation was this:

I got your name from the local yarn store.  I have a blanket my wife made for my daughter.  My daughter’s dog put a hole in it (see photos) and now I need a repair to restore peace and civility to my family.  Is this something you could do (I hope)?

Clearly I had to help!

IMG_20170427_151351804

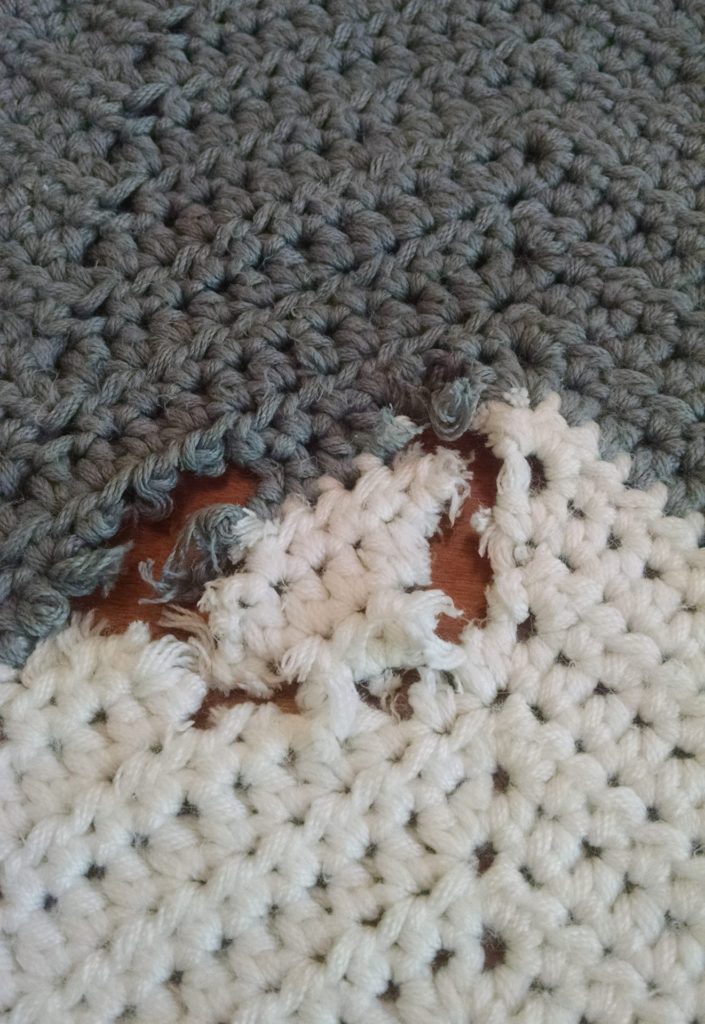
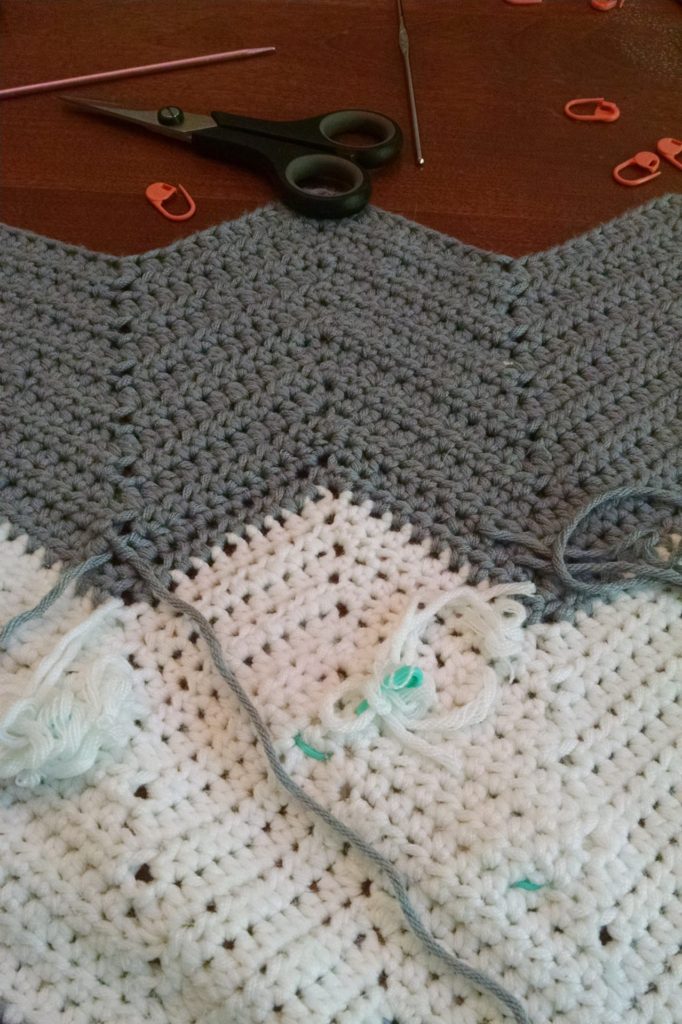
The hole was oriented across two of the different colors in the blanket, spanning 5-6 rows, depending on how you want to count it.  On a big plus, the person who crocheted the blanket had kept all the yarn that was leftover, giving me plenty to work with when making the repairs – a true luxury! I was able to dive into the repairs right away.

IMG_20170427_162743653_HDR

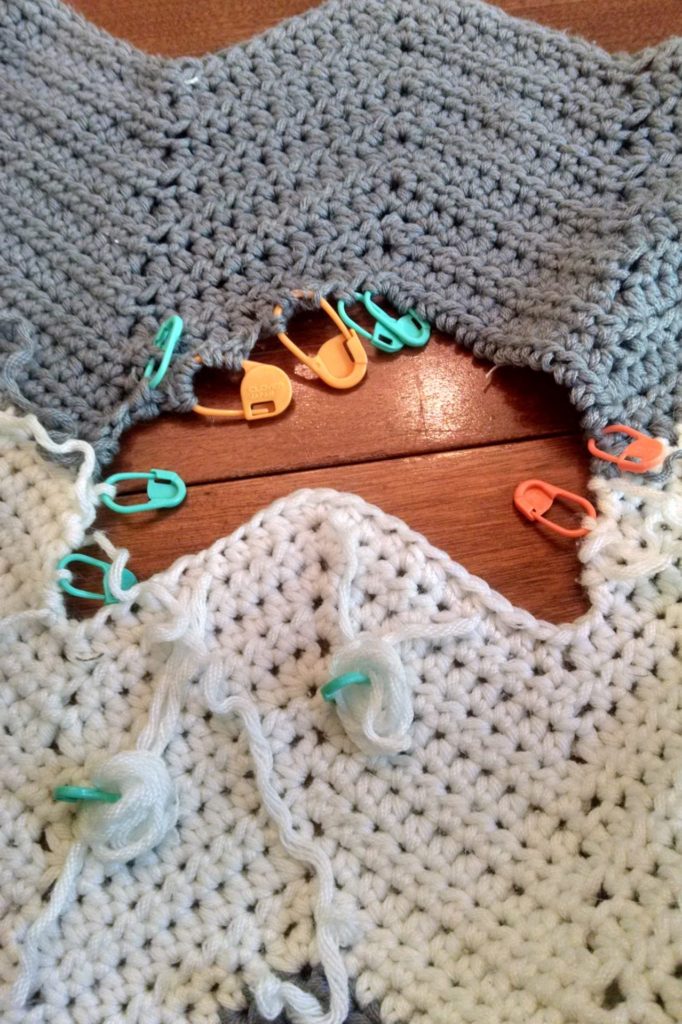
In most cases it’s better to make the hole bigger to make the repair, as long as you have a good amount of yarn to work with.  This way you aren’t working into damaged yarn, and you have enough of the ends to weave in.  Here, I’ve already worked the first row of the repair.  I like to pin my ends out of the way using locking stitch markers.  Because this was worked in rows and turned, I flip the entire blanket each time I repair a row, to work it in the direction of the repairs.  Re-crocheting each row isn’t the tricky part.  The tricky part is the last row when you have to connect the old rows with the new.  You’ll see I’m using stitch markers to hold the base of each of the half-double crochets that have been worked.


IMG_20170502_151107808_HDR

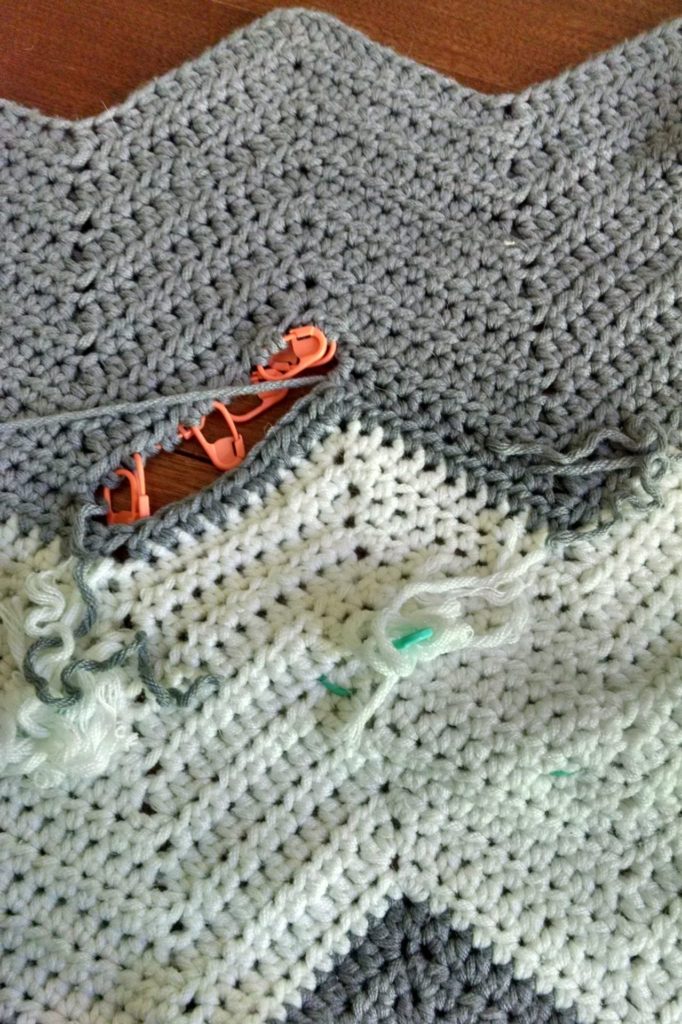
After working a couple of rows normally, it’s time to close up the hole and reconnect the old stitches to the new.  This takes some real patience, as each row you need to crochet a stitch, then take a needle and sew together the newly created stitch through the one above it.  I’m finding that the final row sometimes takes as much time as the entire rest of the repair, depending on how big the hole is!

IMG_20170502_151910461

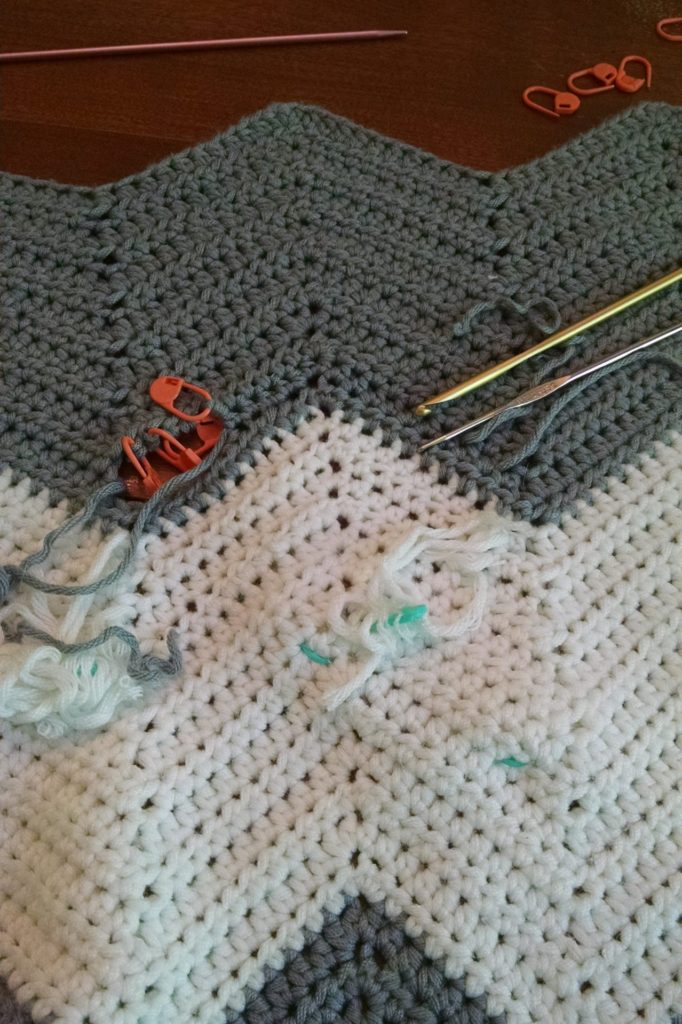
Getting to the end with all the tools I use in play.  A smaller crochet hook for maneuvering things right where I want them, and the larger crochet hook so I can match gauge.

At this point Mr. Turtle wanders through and asks what I’m doing.  “I’m restoring peace and civility to a client’s home,” was my response.


IMG_20170502_152906802

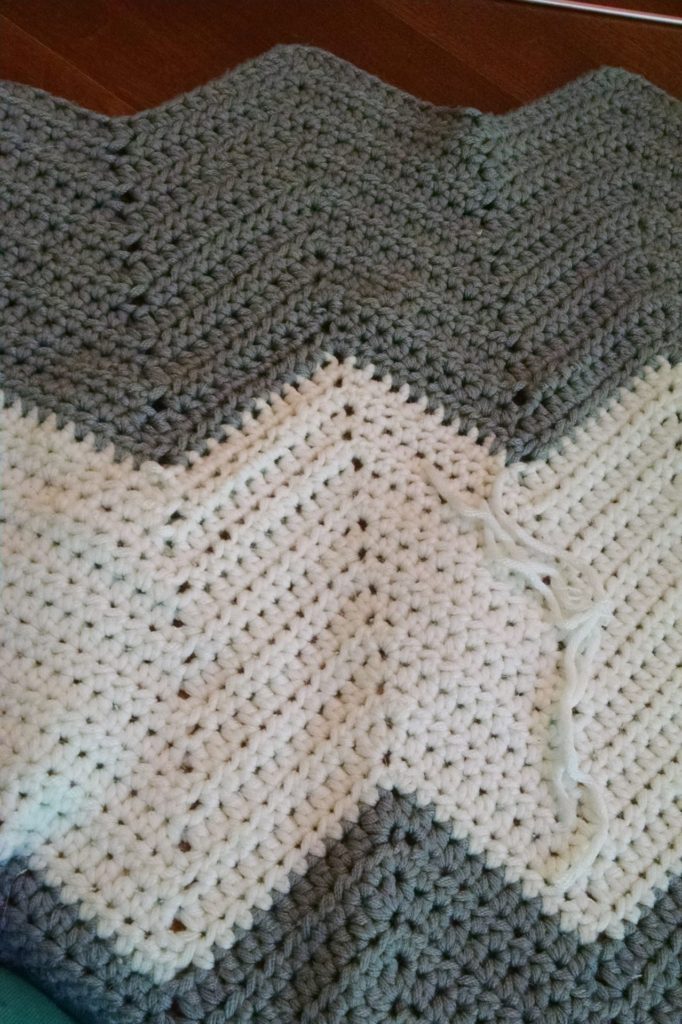
Finally finished weaving things together!  I was so pleased with how the repairs came out!


IMG_20170502_155002822

Now it’s time to finish weaving in the ends and this piece can go back to its owner.


Unique Sweater Pillows Tutorial

Lately I’ve been able to dig my teeth into some interesting projects like the hobbyhorse blanket I repaired a couple of weeks ago. Today I wanted to share with you another project I’m working on.  I was approached by a client interested in having six sweaters turned into pillows.  A dear friend of hers had passed away, and she wanted to take her friend’s distinctive sweaters and turn them into pieces she could treasure.

I’ve worked a few times with commercial made sweaters; although more often I’m taking them apart for teaching purposes or using them to practice techniques I’d like to teach.  While this isn’t a tutorial per-se, it’s an outline of my process and some tips and tricks I’ve discovered after working on other smaller projects similar to this.

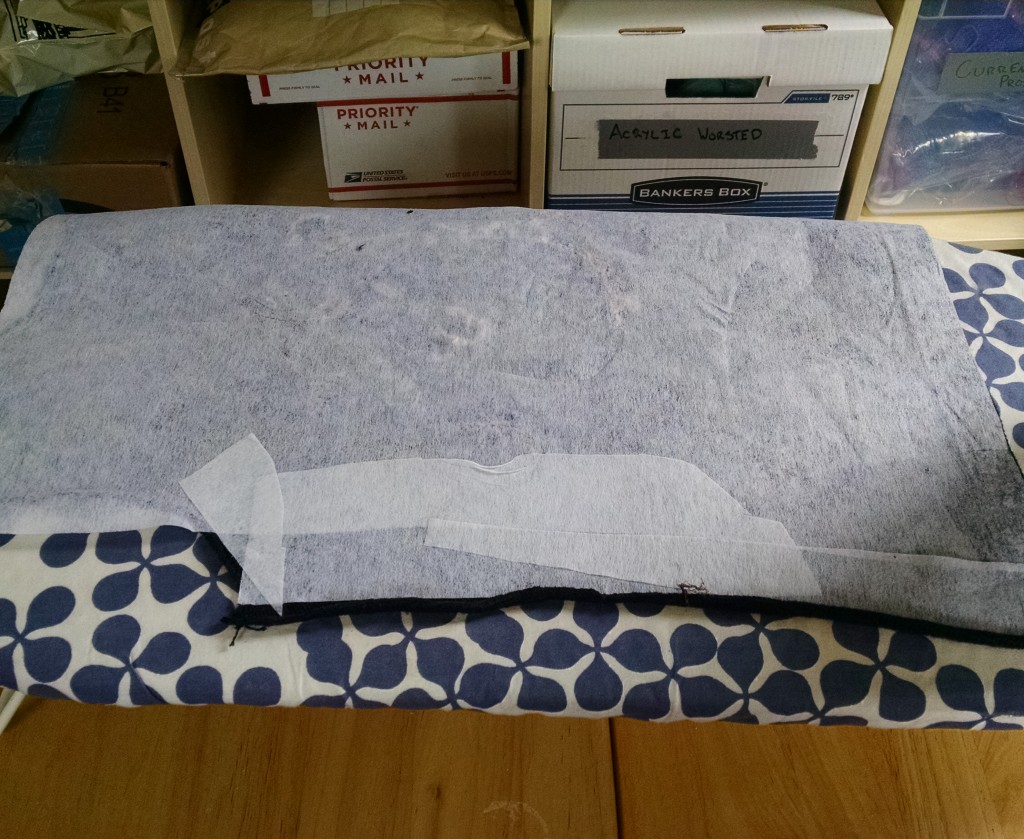
Stabilizer ironed onto the back of the sweater pieces

Stabilizer ironed onto the back of the sweater pieces

My first step was taking the sweaters apart.  All but one was chain-stitched together, which made disassembling them pretty easy once I got the hidden stitching undone. The last one was sewn together, which was a bit more of a pain to take apart. At least it was done in mattress stitch!

Next I ironed on stabilizer.  The stabilizer gave the knit fabric more woven qualities, which was needed for several reasons:

  1. It made sewing into the fabric infinitely easier.
  2. For colorwork or stranded knitting sweaters, it prevented unraveling.
  3. The stabilizer prevented the fabric from distorting by keeping lines straight and preventing stretching.
  4. For sweaters with button bands or zippers, it prevented them from accidentally opening.  It would allow some of the sweaters button bands to not be sewn, preserving some of the sweater-like qualities.
  5. It allowed the finished pillow to be sturdier.

On the very last piece of sweater I was just shy of covering the entire sweater.  Since I would be trimming most of the edges away, I pieced together a few extra scraps of stabilizer I had to finish it off (you can see this above).

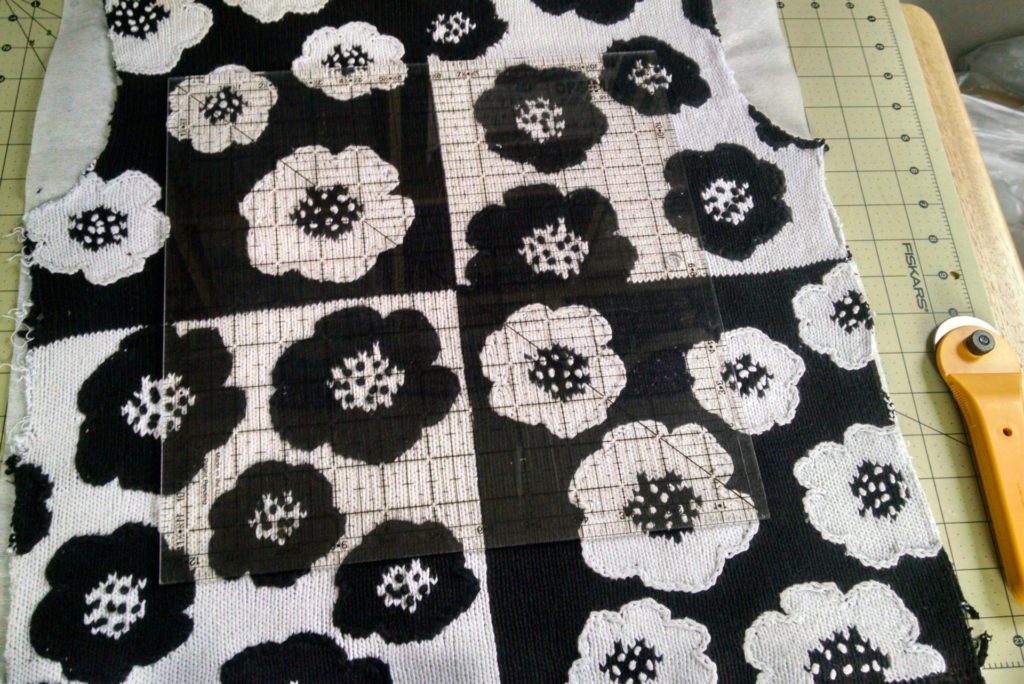
Figuring out the size of the pillow, and making sure all the lines are straight

Figuring out the size of the pillow, and making sure all the lines are straight

After the stabilizer was on, I began to look at each sweater, determining the notable features of the sweater – what made it distinct?  How could I choose a shape that complimented the look of the piece?  Would the pillow look better as a square or rectangular pillow?

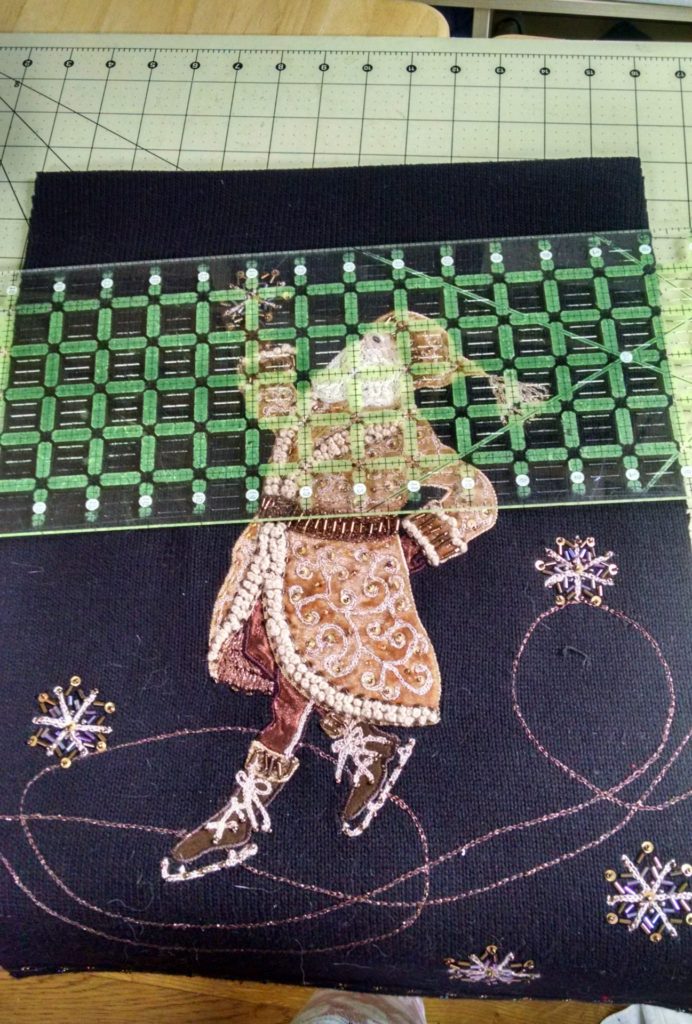
Cutting the pieces using a quilter's template and a fresh blade on my roller cutter

Cutting the pieces using a quilter’s template and a fresh blade on my roller cutter

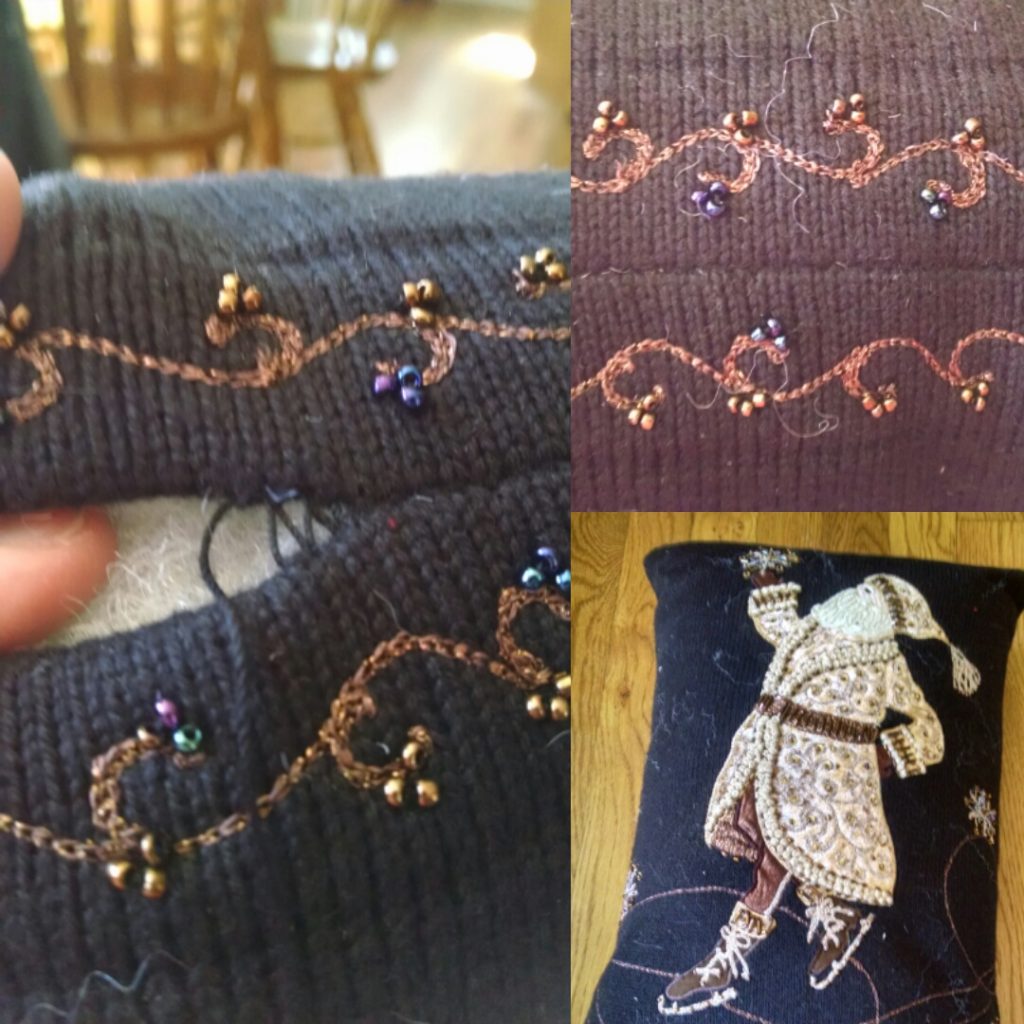
This tall ice-skating Santa would have gotten cut off as a square pillow. I also loved the beading on the edge of this sweater and the beaded snowflakes.  I had to fudge cutting this pillow out to make sure that I caught all the elements that made it interesting.

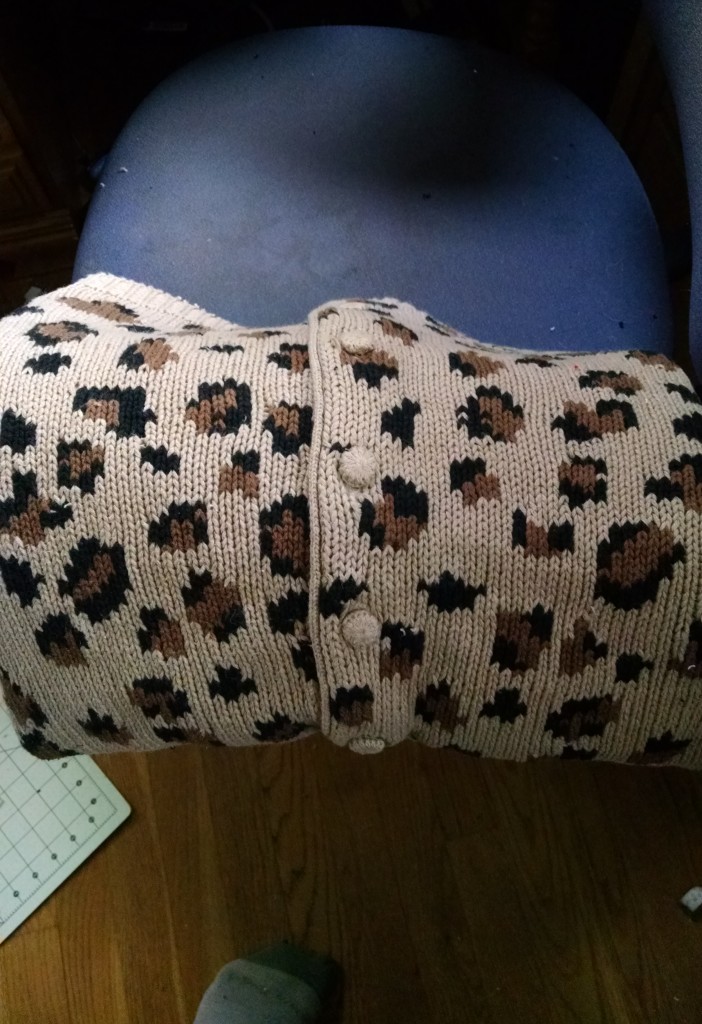
I cut pieces to preserve the button bands, then had to make sure the button bands were in the center of the pillow

I cut pieces to preserve the button bands, then had to make sure the button bands were in the center of the pillow

I thought it was important to keep the qualities of the sweater above that made it interesting – button bands and ribbing at the edge. This pillow had a really thick button band that was nearly impossible to sew through, needing a lot of hand stitching.

After cutting out all the pieces and making sure I’d gotten them to the correct size, it was time to pin them together.  For most of the pillows I was able to use my sewing machine to sew at least three of the sides.  For two of them I was also able to machine sew part of a fourth side, saving on a lot of time.

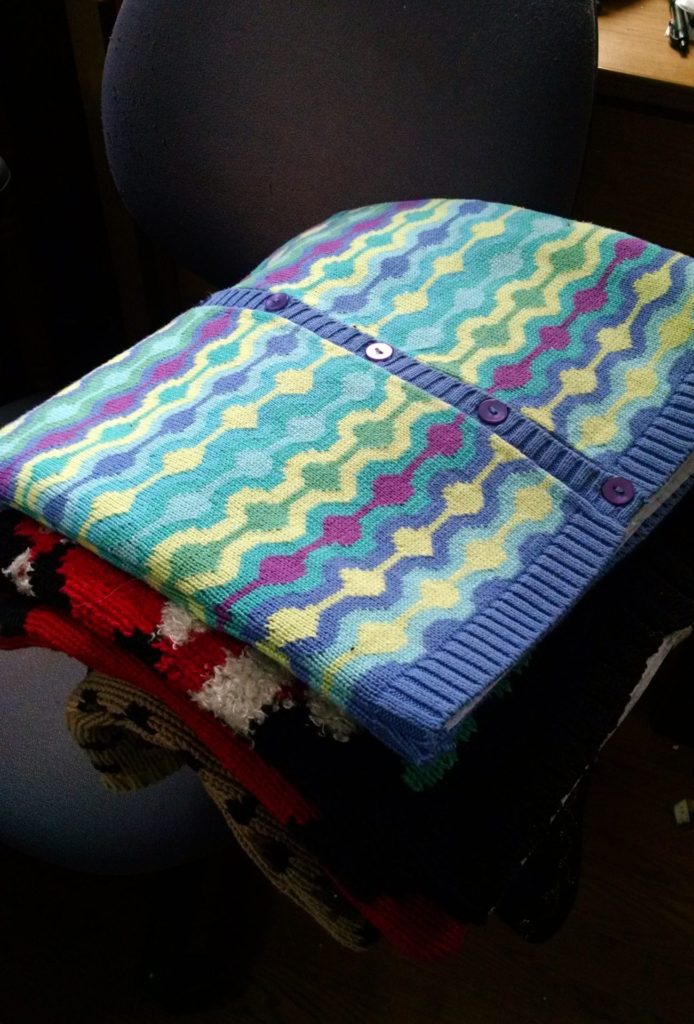
A stack of sewed pillows, awaiting stuffing

A stack of sewn pillows, awaiting stuffing

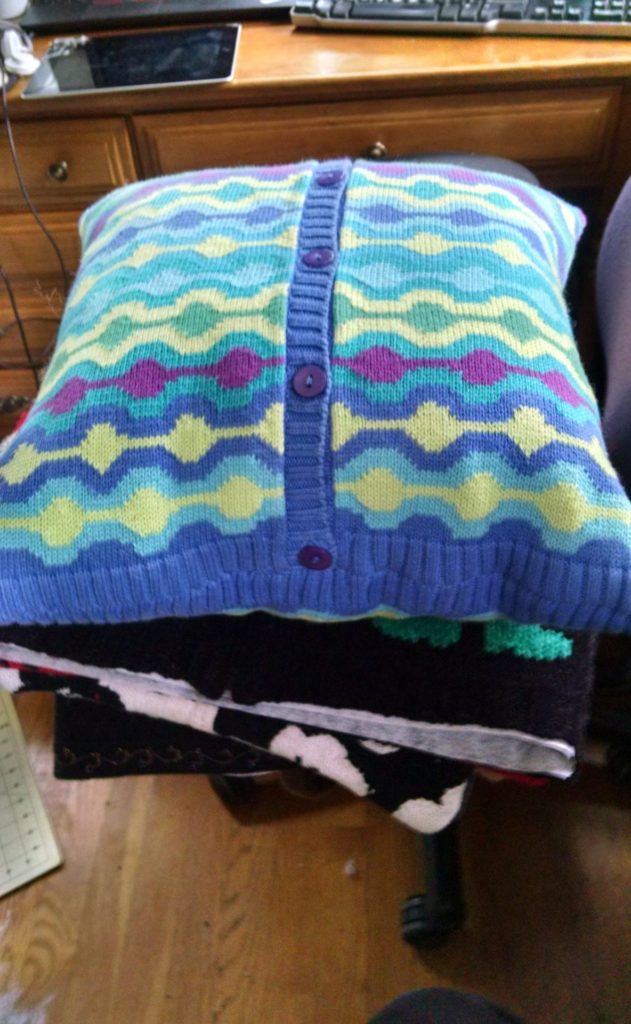
The top pillow above, with the blues and greens, ended up being a favorite. I love the buttons on the button band!


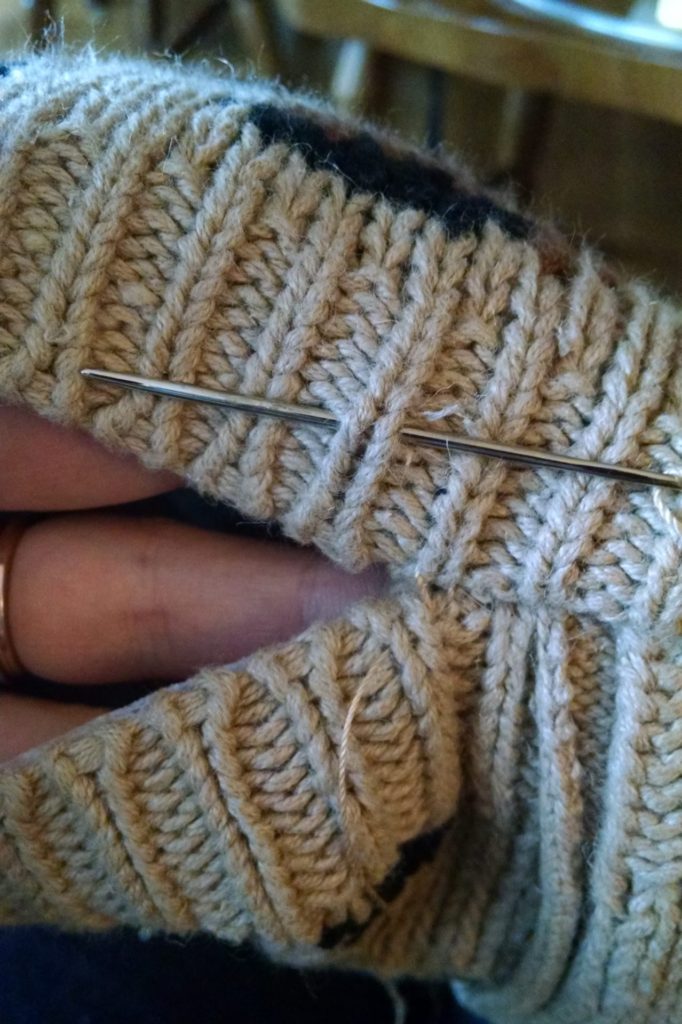
Mattress stitch is almost always a perfect solution to having two fabrics come together invisibly

Mattress stitch is almost always a perfect solution to having two fabrics come together invisibly

Next I began hand-sewing the final edge of the pillows. I used #10 crochet thread instead of normal sewing thread. This was becasue I was having to yank at the pillows to get them to look the way I wanted them. This was doubly true when sewing through the button bands, and getting three layers of very thick knit fabric to come together.  Even still, sometimes I wasn’t careful and had the thread break.  Not fun!

Mattress stitch (aka ladder stitch) was my stitch of choice.

Pillow made out of old sweater, button band showing

Pillow made out of old sweater, button band showing

The pillows are coming together now! I wasn’t always able to get the ribbing to come together evenly on the bottom.  It’s a nitpicky detail, and probably something only I could notice. It couldn’t always be helped though. I love here how I could keep the button band unsewn, so it looks like the button band on a normal sweater, with that dimensionality! The thick stabilizer unerneath will prevent stuffing from escaping.


33145457381_0ac00b5629_o

Some close shots of the lovely beadwork on the bottom of the Santa sweater. I just had to keep a detail like this. I’m already wondering how to replicate this in a handknit design.

This has been a fun project and a unique way to honor a passed friend. In the next few days I’ll wrap up with the final touches – removing lint, straightening edges and getting ready to send these pieces back to my client.

Getting Cocky on a Sweater

Remember how yesterday I said I had everything left but the seaming?  Well, dear stitchers, that’s what I get for being over-confident.

Yesterday, oh yesterday, the future was looking bright.  I had a sweater nearly done, a window in which to finish it, and a baby that would look adorable in said sweater.  Turns out, not so much.

You see, the problem starts with the sleeves.  I’d worked on the sleeves over the weekend, when I was teaching at Fibre Space.  I’d mentioned before how I was winging it, a little, on the sweater?  I mean, I’d worked out some rough numbers, and I knew basically how a sweater was supposed to look and fit.  I figured I could go from there.

Since I had a limited amount of yarn left (I was rather committed to only using one skein, since I’d technically “stolen” it out of my business inventory), I decided to knit the sleeves two at a time.  That way, I wouldn’t have to remember the shaping decisions I made when I went to work the second sleeve.  Also, that way if I ran out of yarn, and the sleeves ended up a little short, I could just claim they were meant to be three-quarter sleeves.  Not a big deal.IMG_20170128_195444[1]

My first downfall would have probably been leaving the rough numbers and calculations I made at home.  My second downfall was deciding I’d just eyeball things.

And my third downfall was ignoring my little niggling feeling in the back of my mind when I looked at the sleeves two-thirds of the way through, and wondered if they would be wide enough.  Instead, I allowed myself to feel smug when I finished the sleeves with only a few yards left to go.  “Just enough to seam,” I thought.

I think you know where this is going.  The sleeves?  They’re really, really small.  See those sleeves?  Yes, they’re curling up, but even when they’re spread out, they’re still small.

Still, I was in enough denial (it’s the yarn fumes, I swear), that I managed to seam one of the sleeves together, and pin it to the body of the sweater.  And then, just to verify, I shoved my child’s arm down the sleeve to truly see if there was any hope of salvaging things.IMG_20170130_094404459[1]

If you can’t tell, that’s my child, with her arm out, rather puzzled as to why she can’t bend it.  Hint: the reason is the stitches are so stretched out in order to get her arm thru the sleeve that she can’t bend her arm.

So the sweater, is in timeout where I decide if I want to unravel and re-knit the sleeves or raid the business for another skein to finish things off.

And to look at my numbers to see where I went wrong.  Wish me luck.