MENU

Getting Back to Things!

It’s been a while since I updated this space, and let everyone know what was going on. What’s happened in the last while?

-Mr. Turtle went on his second training deployment, and it was better than when we was gone for basic training, but mostly because I had some really wonderful friends to help out. I got both COVID and tested positive for both types of flu, all at the same time.

-Summer 2023 came and was filled with summer camps, family get-togethers, one trip to the NC mountains with one side of the family, one trip to VA mountains with the other side of the family.

-My brother closest to me in age donated a kidney to my father. It took up a lot of the family’s attention. They both recovered well, thank you for prayers and help during that time.

-Fall 2023 came around. Michael left for his third, final, and longest Navy training deployment. It started less than a month after school started for the girls. Little Turtle #2 started Kindergarten. Turtle #1 was going to PT and therapy twice a week. I spent all fall driving back and forth.

-We visited Mr. Turtle in Colorado, had a wonderful time, came home, and I came down with COVID and Flu again while Turtle #1 had strep. Recovery from all of that was slow.

-Mr. Turtle surprised us by coming home 3 weeks early on Thanksgiving day. It was wonderful having him home. And hard.

– The holidays barreled into us like a freight train. It was lovely and exhausting, and I was weary in my soul.

-New Years was spent with friends, quietly.

– Post New years we got together with the other side of the family.


… And suddenly now it’s nearing the end of January, and I finally feel like my feet are getting under me. There’s a lot of customers that are on the waiting list for repairs. I’ll be working through them as fast as I’m able. I know a few of you felt like you were shouting into a void, as I was terribly slow to respond, if at all. I’ve been taking on limited clients, mostly repeat customers during the last 10 months or so. But my book-keeper, Mr. Turtle was away so much, and when we were together we were focused on family and children.

So I’ll be taking on as many clients as I feel like I can serve well. For some of you I may be pointing you at other repair businesses if I think they will serve your needs. I am so thankful that you all have been so patient.

Tinking Turtle Extended Leave through 2022 and 2023

Due to Mr. Turtle’s Extended Deployments in Fall 2022 and Spring 2023, Tinking Turtle will be halting Repair and Finishing submissions.

navy shoes and hat with knitting and crochet What does this mean if I already have a piece with you?

  • If you have already mailed a piece to me or I have issued you a codeword and you have submitted your Customer Intake form and plan to put your piece in the mail promptly, your return date for your piece will not be affected.
  • If you have been issued a codeword and have not submitted your Customer Intake form, please check in with me to ensure you can get your piece to me in a timely manner.
  • This announcement only affects outstanding estimates or new inquiries for repair or finishing services.

I’d still like to have you work on a piece for me!

Great! I’d love to work with you! We are currently booked out through the holidays, and I’m unsure of what my bandwidth will look like with both our children in school and Mr. Turtle being gone. Instead of accepting any more repair submissions and booking myself out through the summer of next year, we will be creating a waitlist like we did both times I went on maternity leave. I’m also working to arrange to have a few other businesses to point clients toward for more time-sensitive needs.

I’d like to know more about how you came to the decision to do this with your business.

Great! I’d like to explain to you more! Please read below the cut.

[Read more…]

Preparing a Hole For Swiss Darning in a White Knit Throw

One of the first steps when I get a piece is an initial evaluation to make sure everything is ready to be worked on.  It always helps when clients secure stitches and mark the areas that need to be worked on.  In this paticular case, a hole had developed in a supremely soft knit afghan… clearly it needed repairing to be used this winter!  I feel like the end of 2020 has been a year of wanting to snuggle under a blanket, especially as in the Northern Hemisphere it’s getting cold.

hole in white knit throw held together with safety pins

hole in white knit throw held together with safety pins

[Read more…]

Mending a Midwest Inspried Crochet Afghan

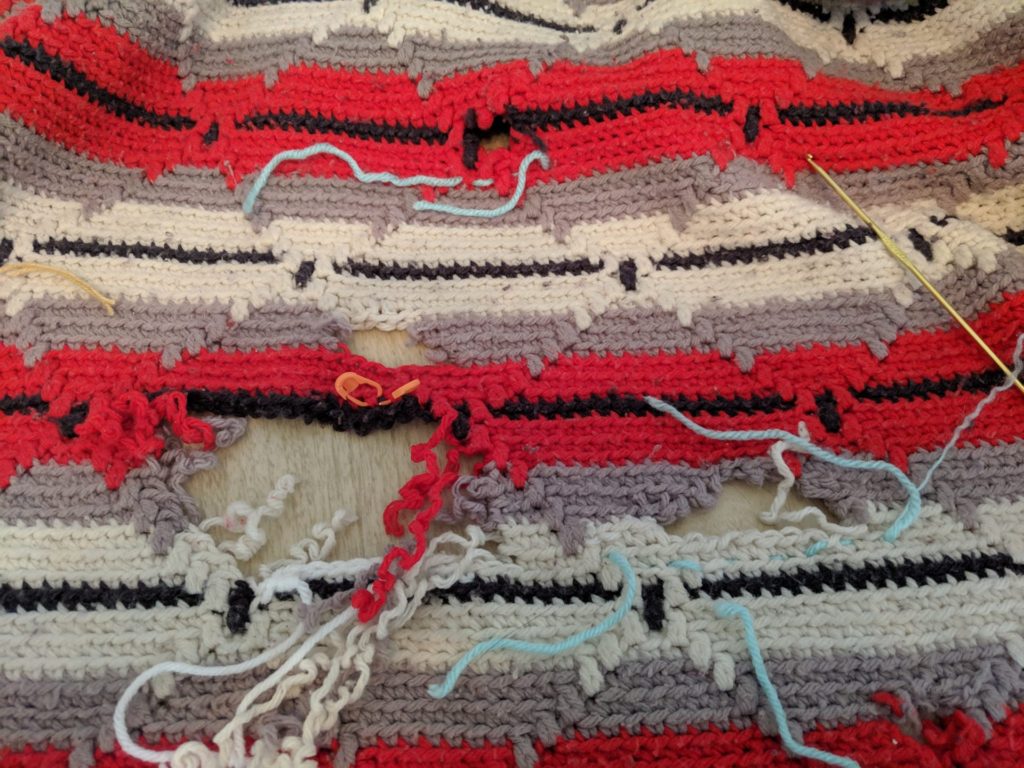
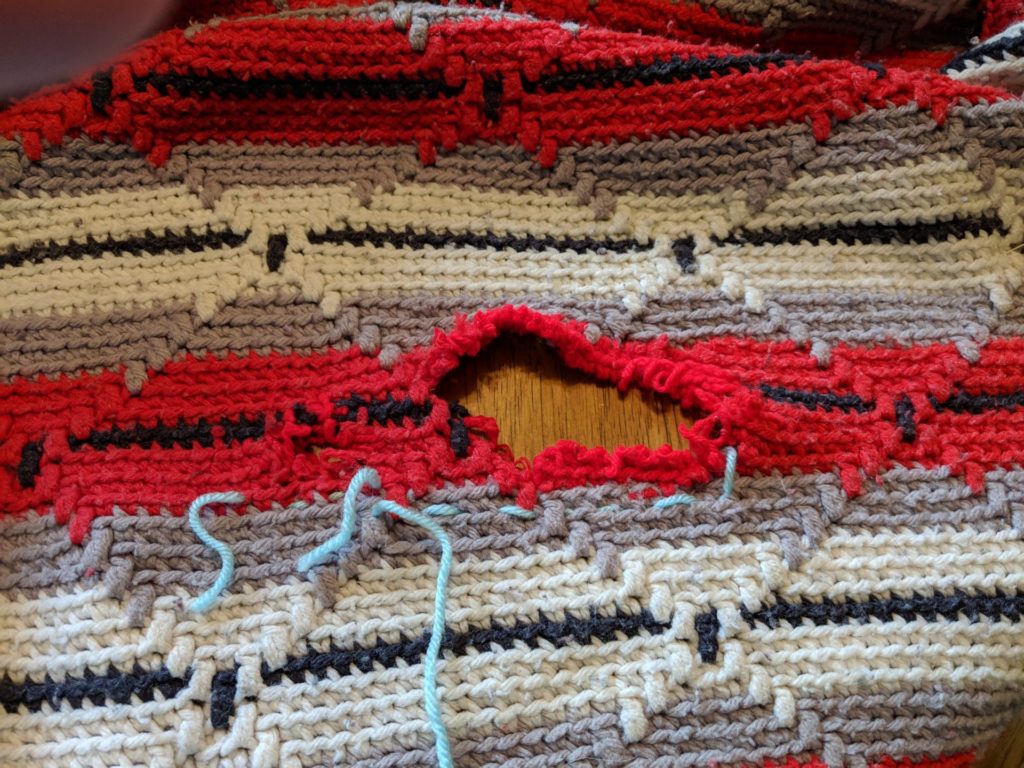
This midwest inspried afghan had a lot of damage done to it over the years, and the owner contacted me about doing some repairs and mending to bring it back up to shipshape! This was an interesting piece – each row was done through the back loop (hence the distinct ridges, and each row the yarn was cut on the end, resulting in the creator only ever going from right to left when working on it.  The cut ends became part of the fringe.

It did make the repairs a lot easier to do, as I didn’t need to flip the blanket over for each row. Working through the back loop does mean that the last row invoves a lot of sewing, though.

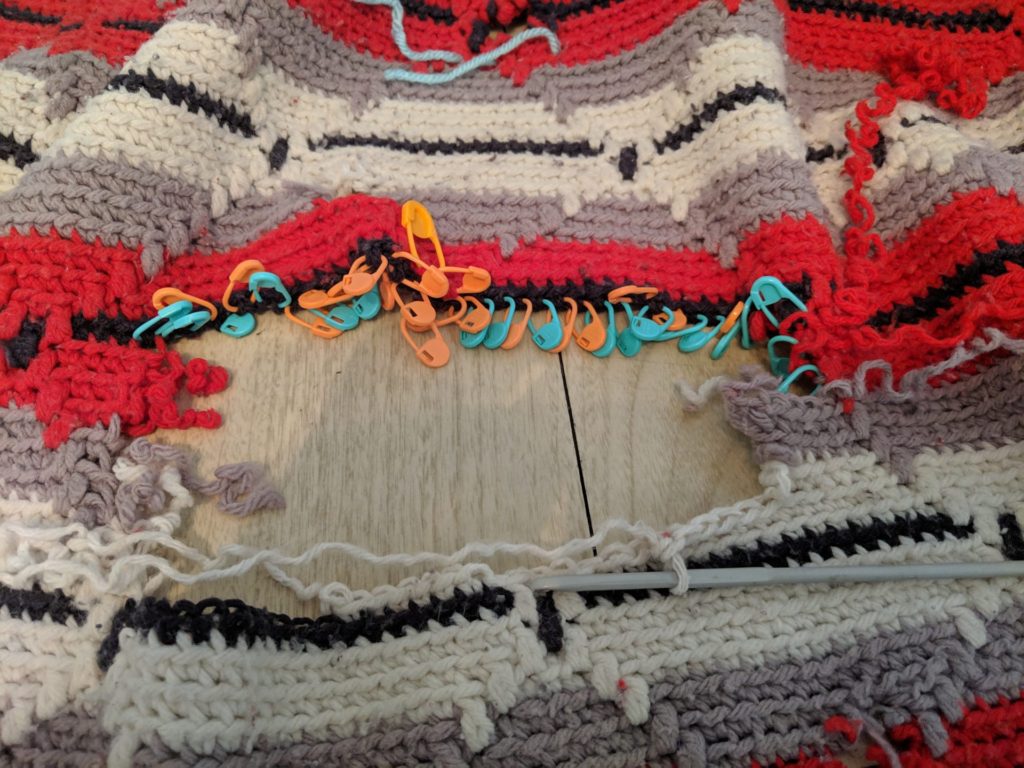
The two holes right above the the black line were so close together it made more sense to pull out the yarn between them and work them as one large hole. I decided to tackle that first.

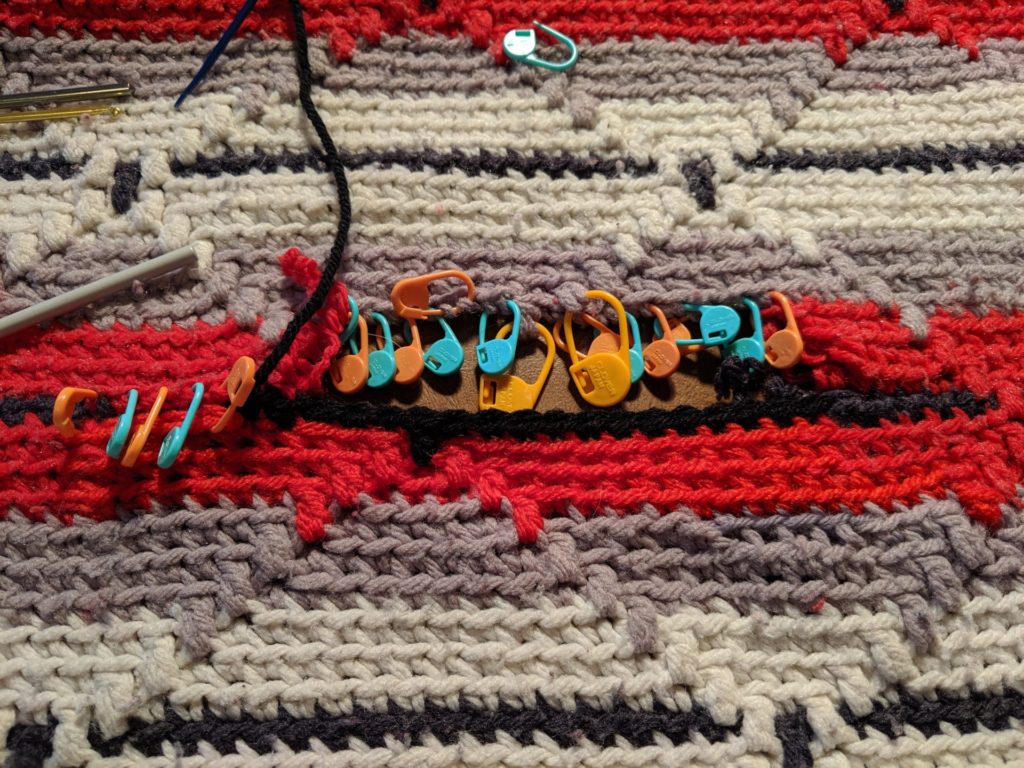
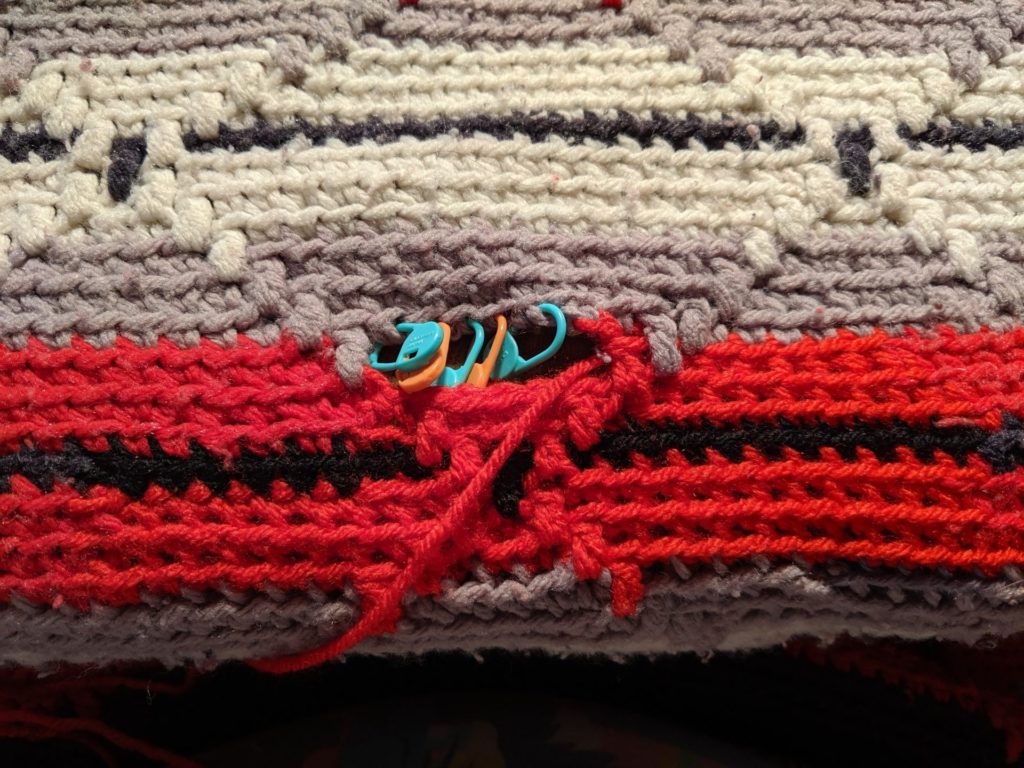
To keep track of each stitch, I used locking stitch markers to hold each leg of the single crochet together.  This will help when I reweave the last row. 

Nearly done! After working each of the rows, I’m finishing up by joining together the last row. I had to take out the black row later in the process as it had more damage to it than I realized.

Finally Done!

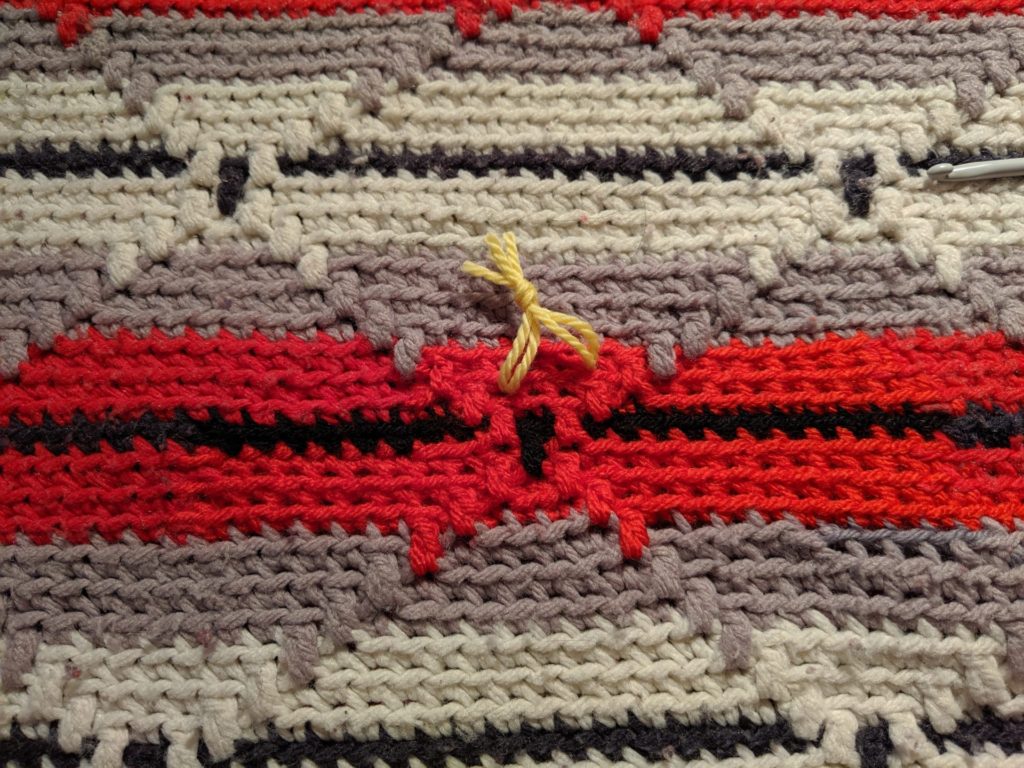
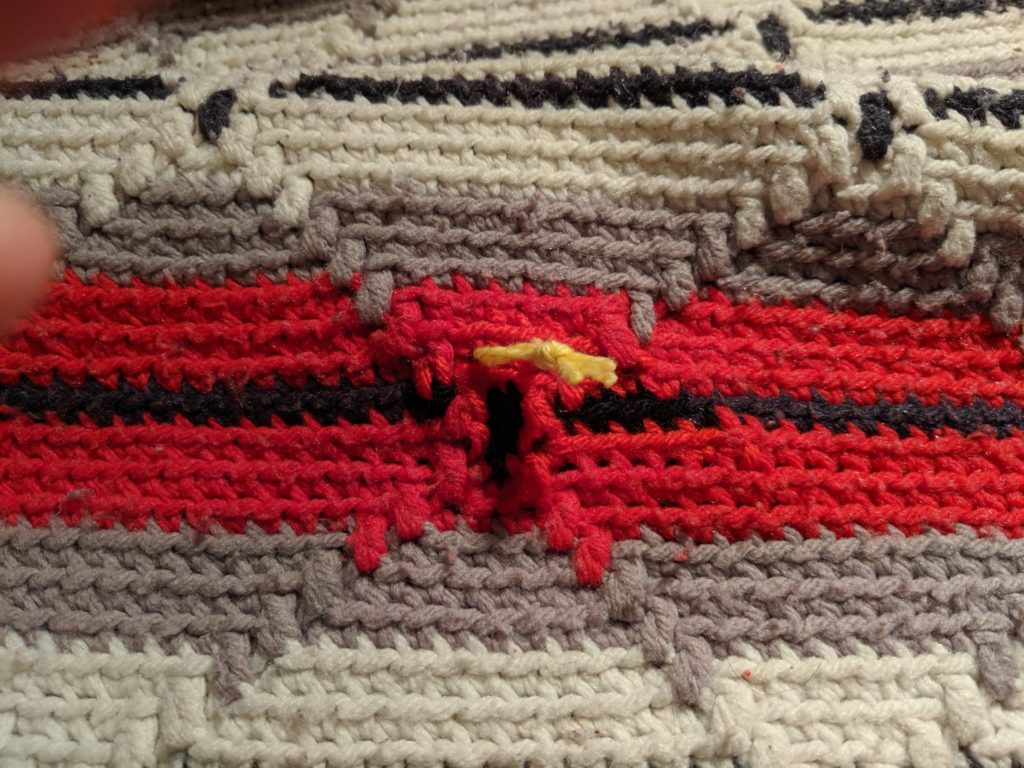
Now I’ve got everything worked up and the ends woven in. I mark each area of repair with a piece of yarn, so the repairs are easier to find. When the clients get the repaired piece they can take the markers out.

See that the stitches look a little more lively where I’ve done the repairs? This will improve as the piece gets used, and the newer stitches gain some wear.

Now I’m tackling the repair that is further up in the blanket. You’ll notice there’s the larger hole, and to the left, another smaller hole. It made sense in this case to also pull out and combine the holes. The yarn in between the two holes was worn away enough that I was concerned about its stablility.

As in many repairs, this is a slow process of just adding the new yarn to the old, crocheting across the row, and then sewing and reweaving the old to the new.  What you can’t see on the backside is all the ends I still need to weave in.

And now we’re at the end: the hole is closed up and the ends are woven in.  A bit of yarn to mark the spot.  Now it’s time for this afghan to have a quick wash before it leaves to go back to its owner.

Recent Repair of a Knit Afghan

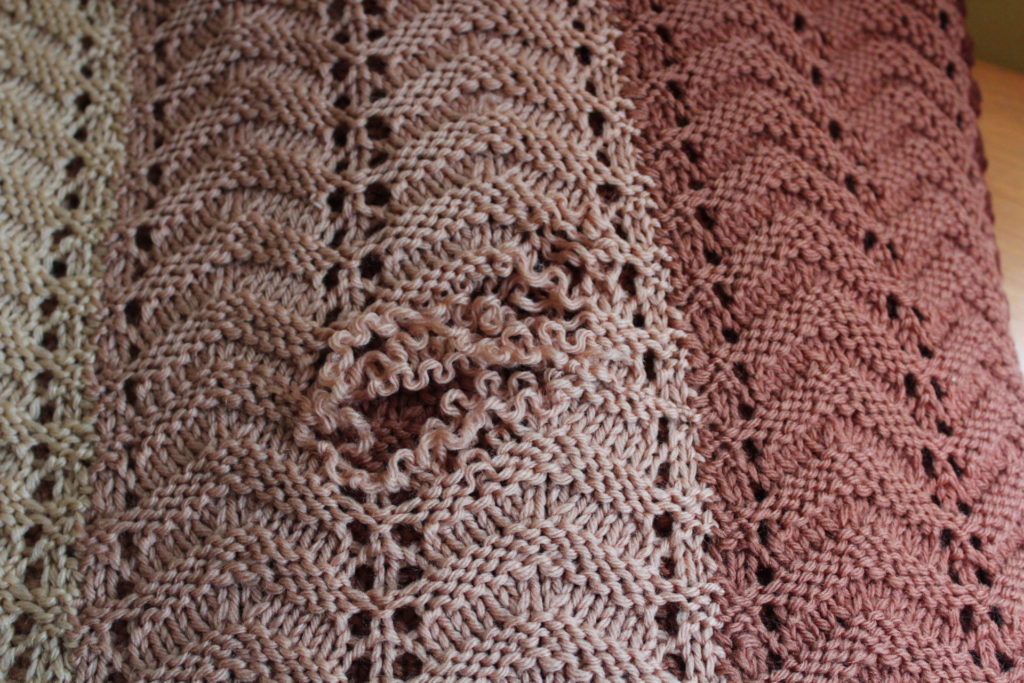
Now that I’m getting back into the swing of things, I wanted to document a unique repair that I worked on.  This 52-year old afghan was in need of some TLC before it got handed off to the next generation.  Working with this piece was a true pleasure, with the yarn in remarkably good condition for it’s age.  The afghan was a huge ripple pattern, with 9 panels joined together by intarsia.

INTARSIA. Think about that… it wasn’t seamed.  It was 9 balls of yarn that were worked on at the same time across the blanket.

But back to the repair!  There were several holes – mostly along the edge where ends had worked loose, but also one spot in the center of the piece.

[Read more…]

Upcoming Changes to Tinking Turtle Services

As Jennifer mentioned last week, the past several months (has it been that long?) have been very busy for us. Both with Little Turtle becoming more and more active and energetic as well as welcoming a future new addition to the family. All of this change has meant that we have been needing to take a more in-depth look at the level we are able to provide all of Tinking Turtle’s customer services.

Prior to Little Turtle’s arrival, we spent some time exploring maternity leave and how it could impact small fiber arts businesses. Learning from our own experiences, we are going to be making a few changes to Tinking Turtle’s services going into the Holiday season and New Year:

Effective November 1st, we will no longer be accepting standard turnaround service for finishing projects. Our goal is to ensure that we have everything with the business buttoned up prior to Turtle II’s arrival, and in order to do that we will need wo work through the projects that have already been committed.

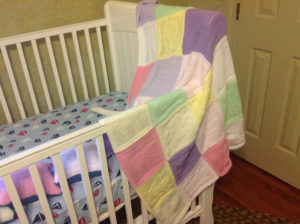
A crib with blankets waits for a new arrival

Awaiting a new arrival

We will still accept finishing projects through December 1st with Expedited turnaround time pricing for a 6 week turnaround, and then through January 1st for Rush turnaround time.

Afterthose deadlines, or if you do not desire to have your project expedited, you can use our Contact Form to sign up for our Finishing and Repair wait list.

We are going to look at providing a longer block of leave this time around, with an anticipated return to business operations mid to late summer 2018.

While we may be a bit slow to respond to inquiries after the New Year as we focus on growing our new family, our hope is to be able to continue to providing our exceptional service and balancing that quality with family obligations over the next many months.

Make Do and Mend: Recent Repair Projects

I’ve been working and plugging away at a number of repair projects, and while I’ve been posting them to Instagram, I thought I’d highlight a few here.  We’ve got one crochet piece and one knit piece.

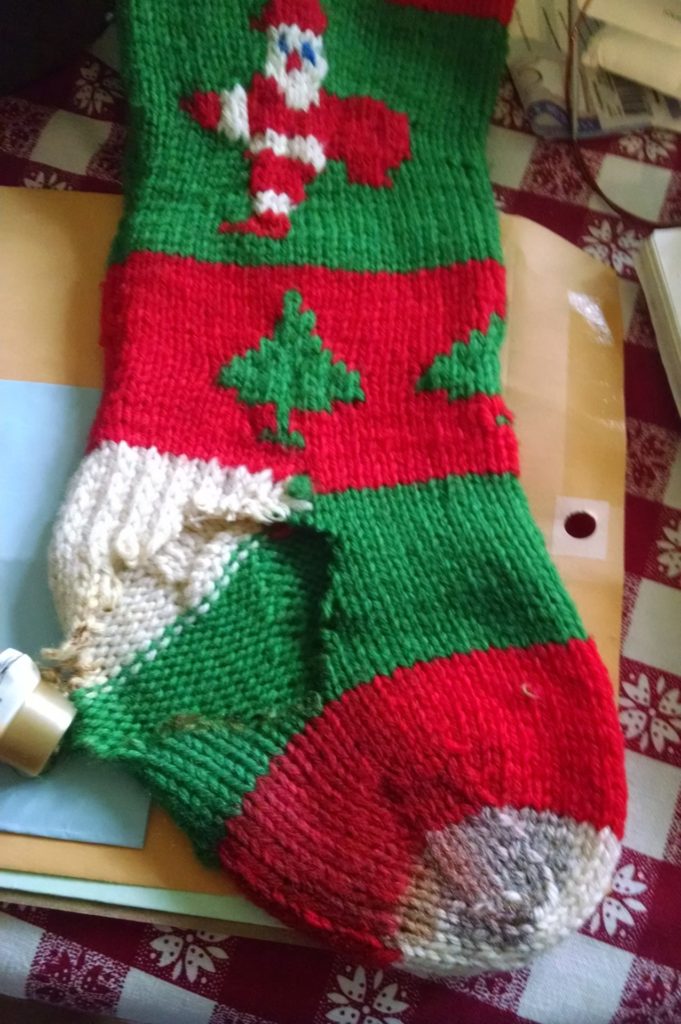
The knit piece features a stocking that was hung over the fireplace with care – but was hung a little too close to the flames!

a christmas stocking with a hole burned through it

a christmas stocking with a hole burned through it

Not only did the warmth of the fire burn through the stocking, but it melted one of the stocking stuffers to the fabric, causing the bottle to leak all over the fibers.  It was a mess!

A side note: this is a really good reason to use wool when making anything that will get anywhere near heat – wool does not melt or burn like acrylic or cotton.

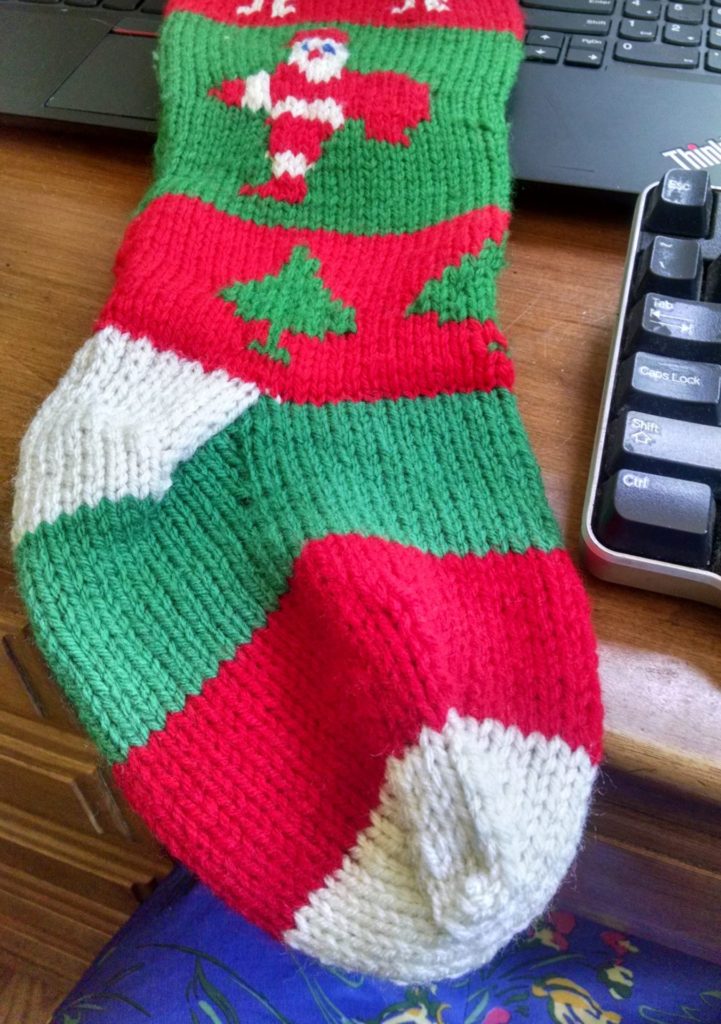
repaired christmas stocking ready to go back to its owners

repaired christmas stocking ready to go back to its owners

This stocking needed an overhaul – I pulled things out at the ankle and re-knit the foot.  I’m pretty pleases with the color matching – not perfect, but pretty close!


The other project I wrapped up was a crochet afghan that had developed a hole.  It was a nice diversion, since the last few repairs I’ve done of crochet afghans have been plain single crochet.

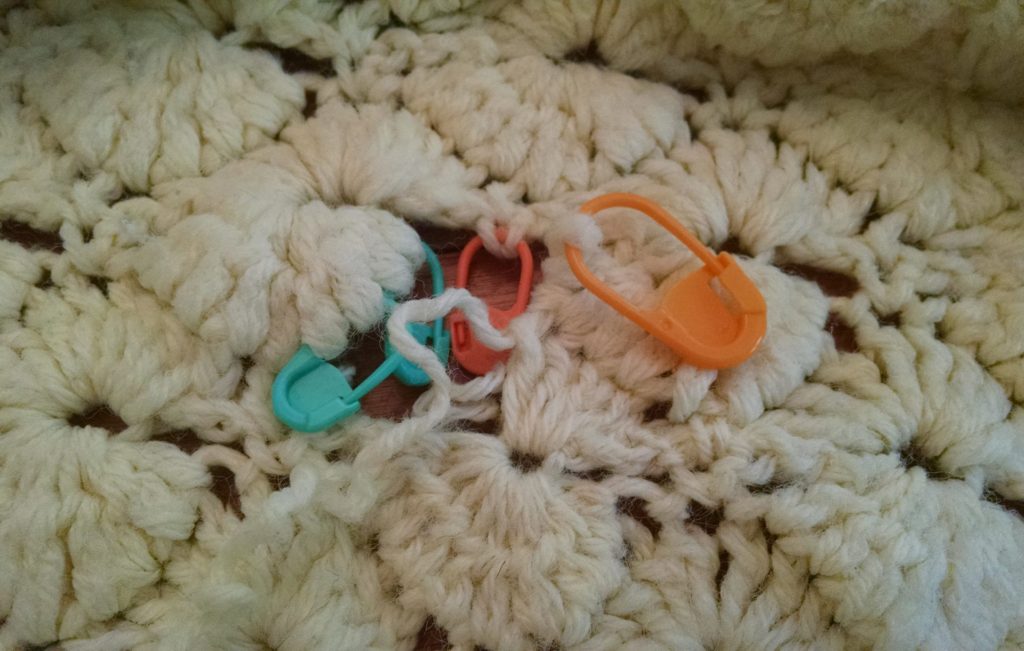
IMG_20170518_125831237

The first step was isolating the crochet stitches that were in danger of unraveling.  Because this pattern is a gathered stitch, things are a little more tricky – there isn’t a one-to-one ratio of stitches.

IMG_20170518_130232107

Then there’s the process of re-crocheting the area. I had a choice here: I didn’t have any of the blanket yarn I could harvest, so I could either use a closely matching yarn (which is tough to find with cream colored things), or I could crochet the piece in a slightly tighter gauge so I would have enough yarn to do the repairs (and weave in ends).

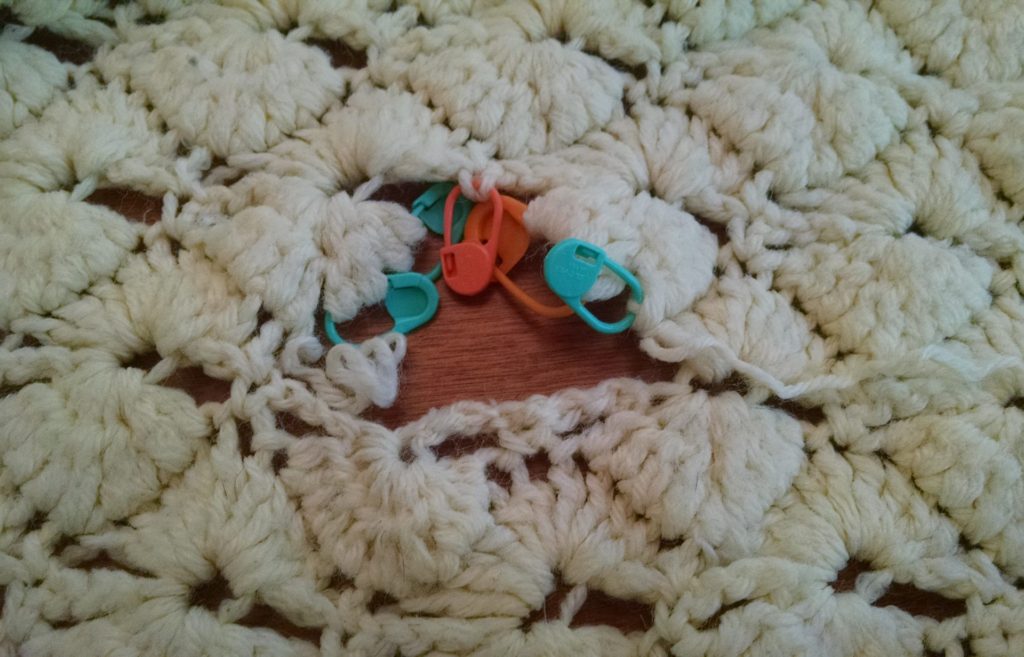
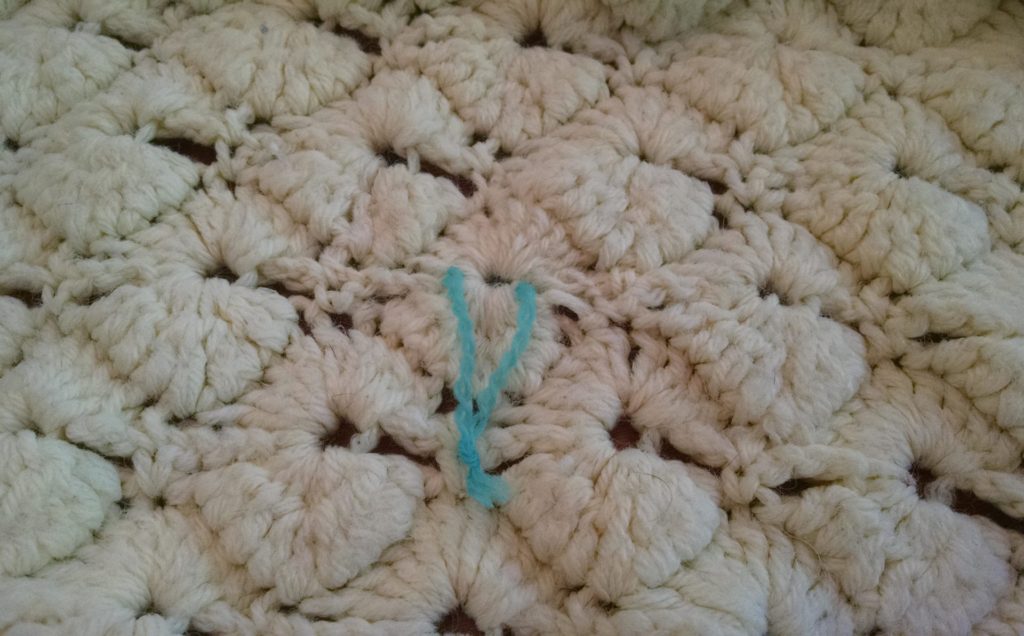
IMG_20170518_131004860

This is a strategy that works well over a small area – in this case, this one pinwheel (marked by the teal thread). Over larger areas this would cause the area to pucker.


And that is most of what I’ve been working on!  What projects have you gotten off the needles/hook?

Classes with Tinking Turtle

Golly, we’ve got a lot going on at the Turtle-Wrangling Ranch!  It must be spring, as my class schedule is picking up as I teach at Fiber Festivals and local venues.  Check out some of the highlights:


wp-1489607241853.jpegDances With Wool is located southwest of Richmond, VA in Midlothian.  I’ve got a bunch of classes I’ll be teaching there in the next few weeks:

  • Ravelry 101 (March 18) – Learn how to use the ever popular Ravelry website!
  • Stripes Three Ways (March 18) – We’ll cover three different types of colorwork, with a fun little twist!
  • Finishing Essentials (March 18) – This class is a must-take if you’re looking to learn to put a crochet or knit object together.

wp-1489607231169.pngFibre Space is one of my all-time favorite stores to teach in (partially because I love all the places to eat lunch in Alexandria… shhh!).

  • Padded Crochet (March 19) – I don’t teach this skill or this class often, so take it while it’s available!
  • Bind Offs (March 19) – We had such a great response to our Cast-Ons class, this one covers finishing your projects with intentional bind offs!

wp-1489607224330.jpegNext weekend I’ll be in North Carolina for the Carolina Fiber Fest. This’ll be my second time teaching at this fiber festival, and it’s at a new location!  I’ll be teaching:

  • Duct Tape Dress Forms – The first time I’ll be teaching it since my maternity leave – it was too hard on my body while pregnant.
  • Hairpin Lace Scarf in a Day – this crochet technique is great for quick projects!
  • Stripes Three Ways – This class is popular, and you’ll see why – it teaches some great colorwork techniques.


Unique Sweater Pillows Tutorial

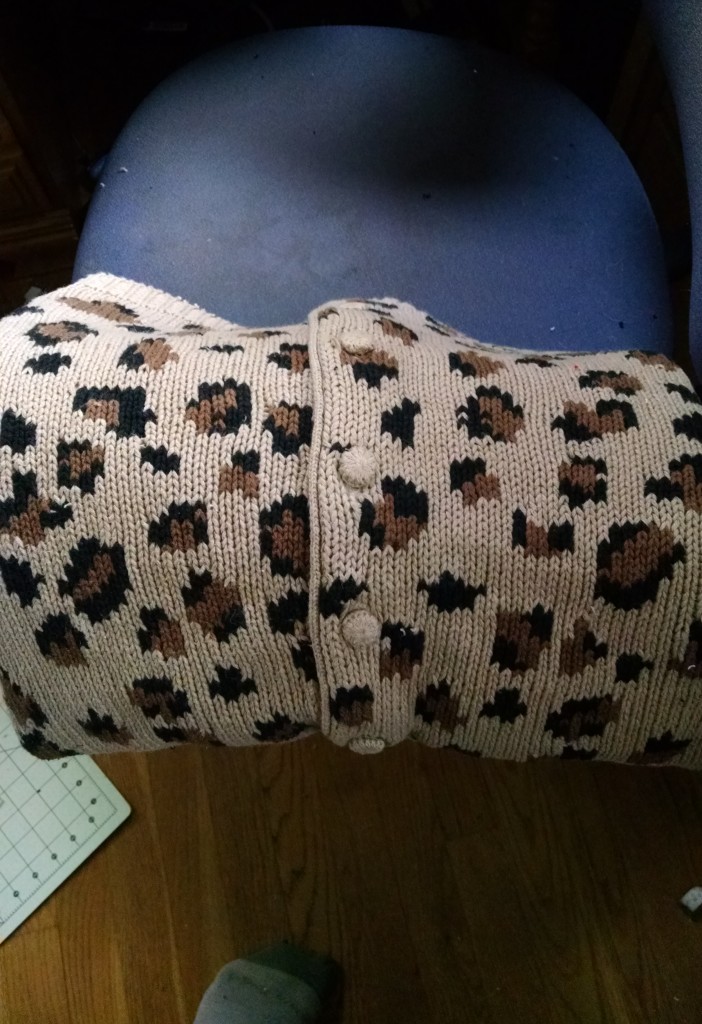
Lately I’ve been able to dig my teeth into some interesting projects like the hobbyhorse blanket I repaired a couple of weeks ago. Today I wanted to share with you another project I’m working on.  I was approached by a client interested in having six sweaters turned into pillows.  A dear friend of hers had passed away, and she wanted to take her friend’s distinctive sweaters and turn them into pieces she could treasure.

I’ve worked a few times with commercial made sweaters; although more often I’m taking them apart for teaching purposes or using them to practice techniques I’d like to teach.  While this isn’t a tutorial per-se, it’s an outline of my process and some tips and tricks I’ve discovered after working on other smaller projects similar to this.

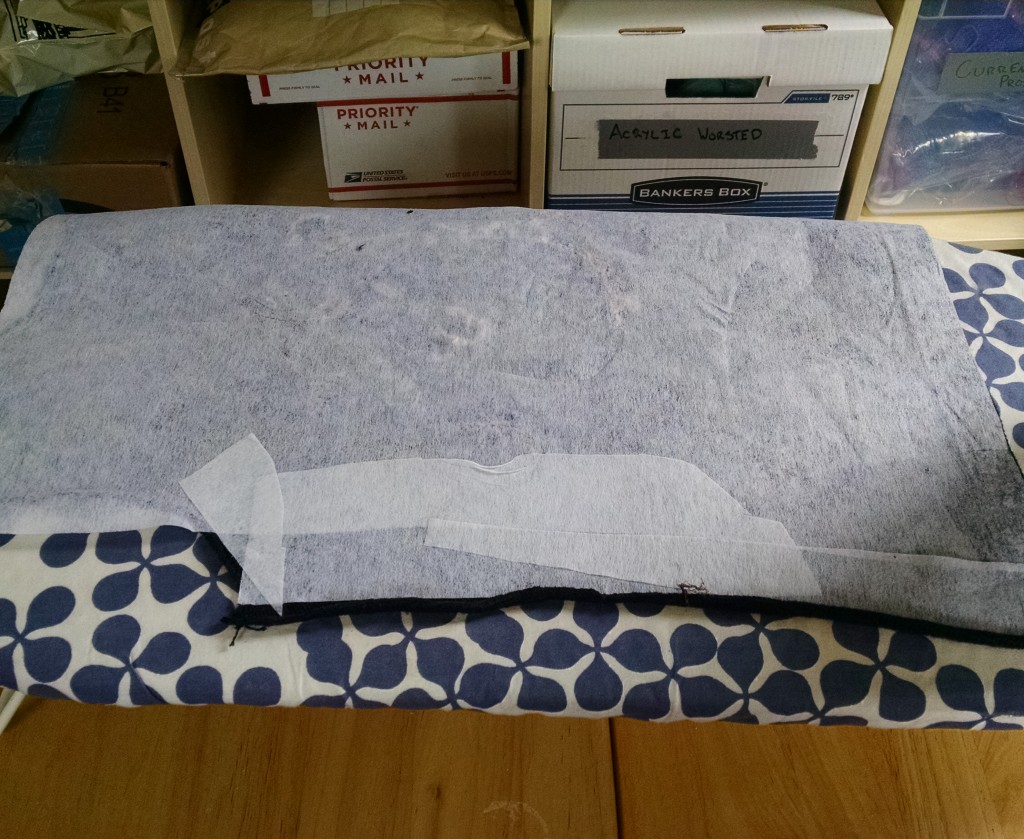
Stabilizer ironed onto the back of the sweater pieces

Stabilizer ironed onto the back of the sweater pieces

My first step was taking the sweaters apart.  All but one was chain-stitched together, which made disassembling them pretty easy once I got the hidden stitching undone. The last one was sewn together, which was a bit more of a pain to take apart. At least it was done in mattress stitch!

Next I ironed on stabilizer.  The stabilizer gave the knit fabric more woven qualities, which was needed for several reasons:

  1. It made sewing into the fabric infinitely easier.
  2. For colorwork or stranded knitting sweaters, it prevented unraveling.
  3. The stabilizer prevented the fabric from distorting by keeping lines straight and preventing stretching.
  4. For sweaters with button bands or zippers, it prevented them from accidentally opening.  It would allow some of the sweaters button bands to not be sewn, preserving some of the sweater-like qualities.
  5. It allowed the finished pillow to be sturdier.

On the very last piece of sweater I was just shy of covering the entire sweater.  Since I would be trimming most of the edges away, I pieced together a few extra scraps of stabilizer I had to finish it off (you can see this above).

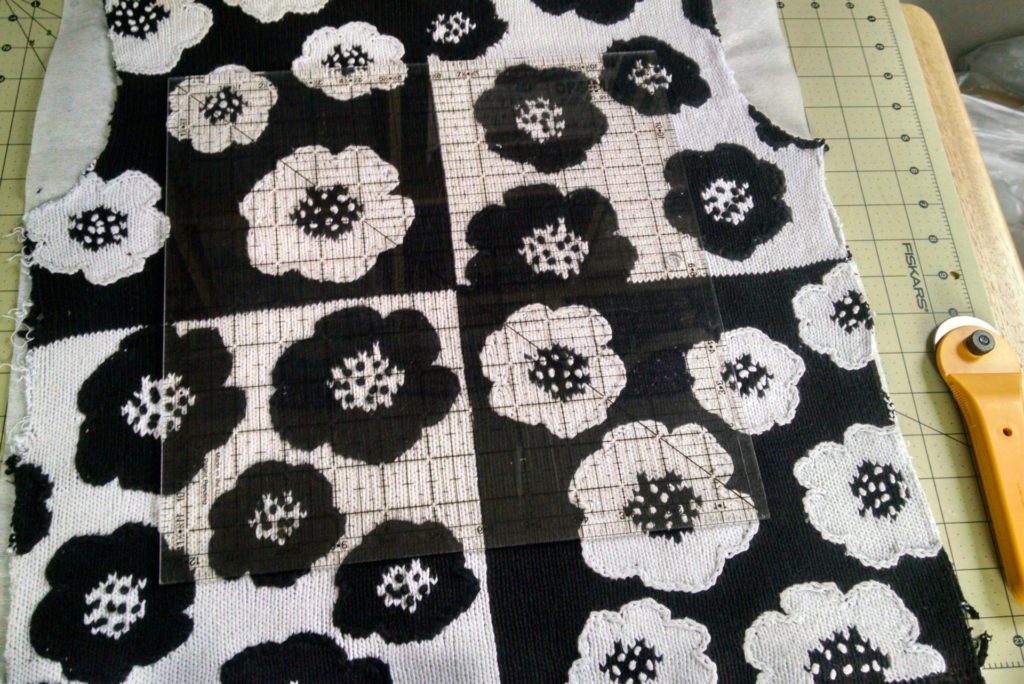
Figuring out the size of the pillow, and making sure all the lines are straight

Figuring out the size of the pillow, and making sure all the lines are straight

After the stabilizer was on, I began to look at each sweater, determining the notable features of the sweater – what made it distinct?  How could I choose a shape that complimented the look of the piece?  Would the pillow look better as a square or rectangular pillow?

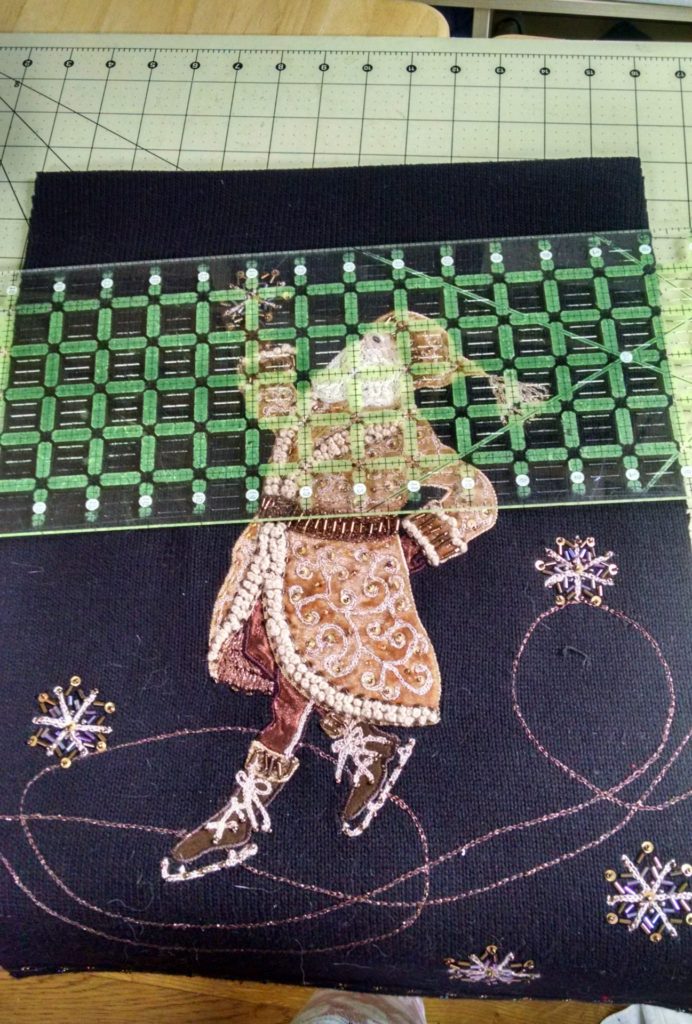
Cutting the pieces using a quilter's template and a fresh blade on my roller cutter

Cutting the pieces using a quilter’s template and a fresh blade on my roller cutter

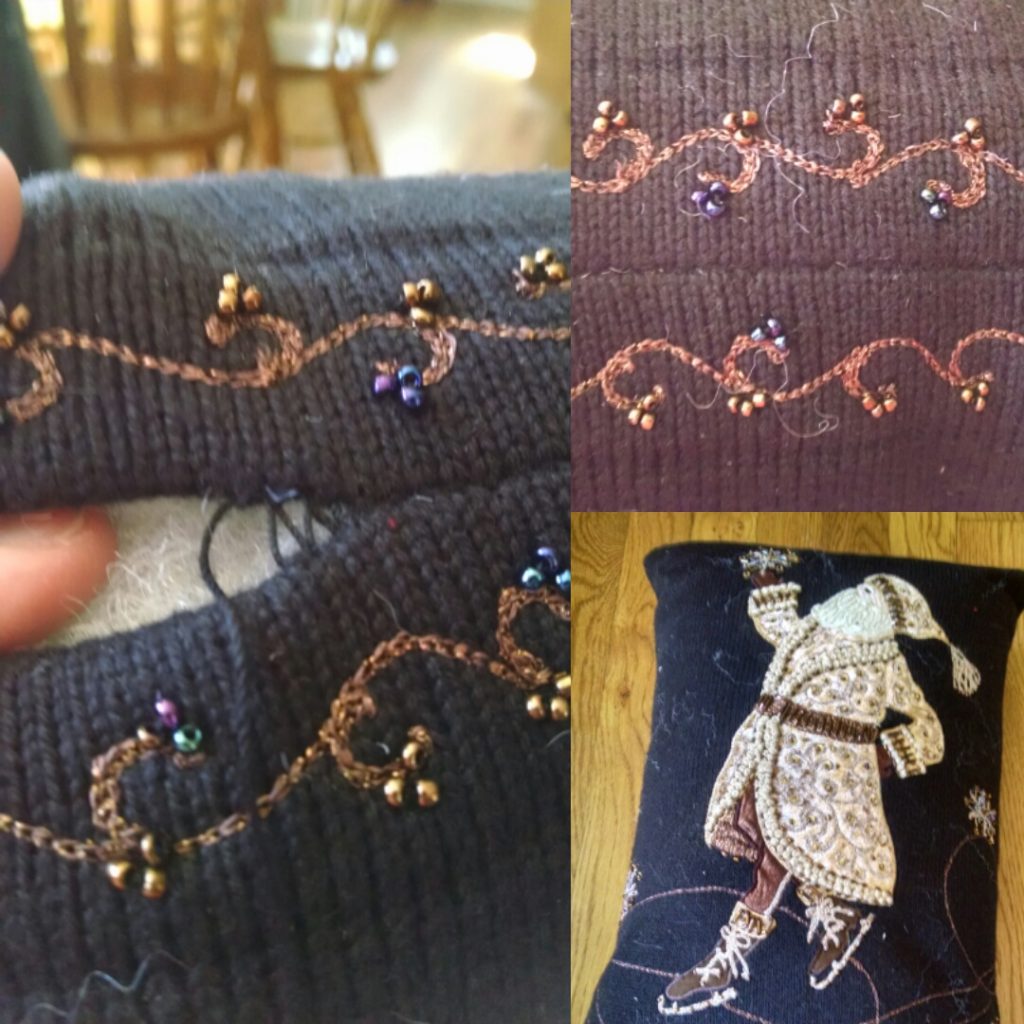
This tall ice-skating Santa would have gotten cut off as a square pillow. I also loved the beading on the edge of this sweater and the beaded snowflakes.  I had to fudge cutting this pillow out to make sure that I caught all the elements that made it interesting.

I cut pieces to preserve the button bands, then had to make sure the button bands were in the center of the pillow

I cut pieces to preserve the button bands, then had to make sure the button bands were in the center of the pillow

I thought it was important to keep the qualities of the sweater above that made it interesting – button bands and ribbing at the edge. This pillow had a really thick button band that was nearly impossible to sew through, needing a lot of hand stitching.

After cutting out all the pieces and making sure I’d gotten them to the correct size, it was time to pin them together.  For most of the pillows I was able to use my sewing machine to sew at least three of the sides.  For two of them I was also able to machine sew part of a fourth side, saving on a lot of time.

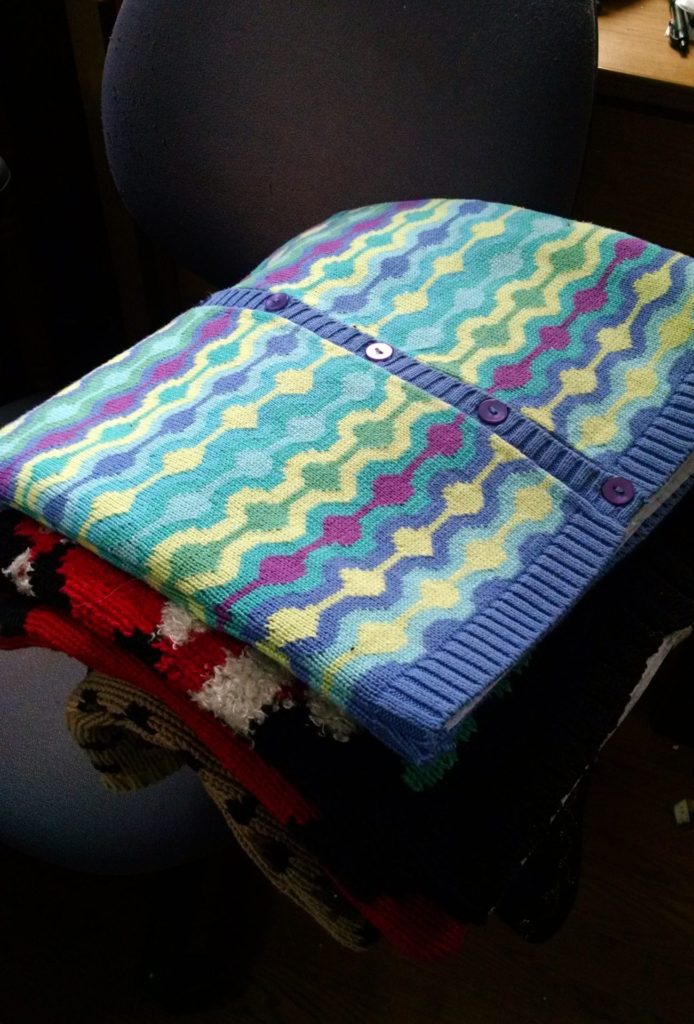
A stack of sewed pillows, awaiting stuffing

A stack of sewn pillows, awaiting stuffing

The top pillow above, with the blues and greens, ended up being a favorite. I love the buttons on the button band!


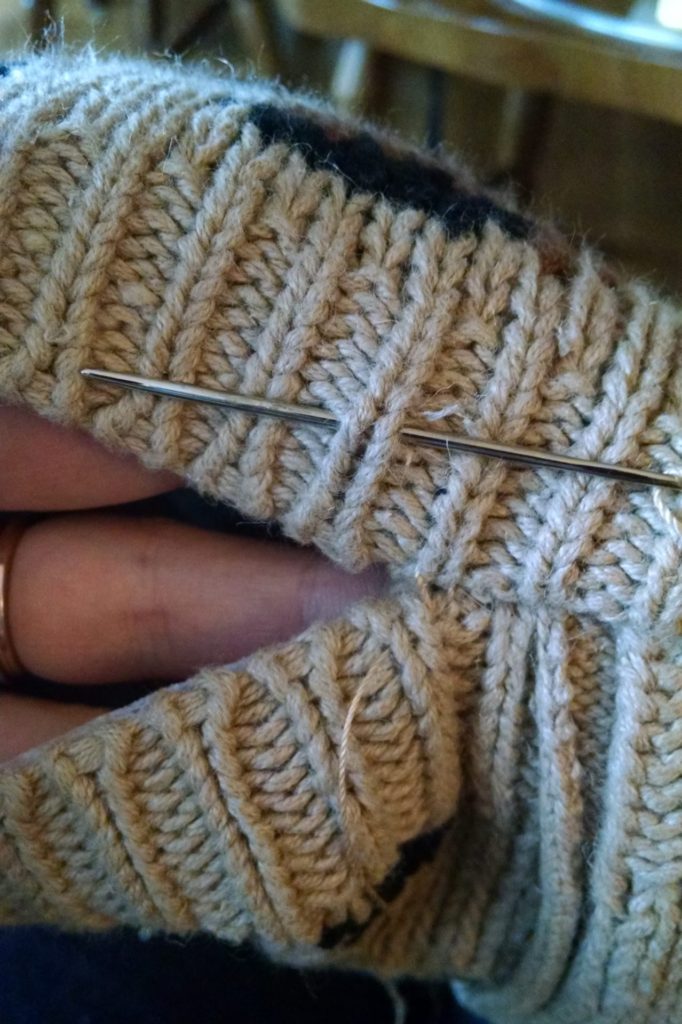
Mattress stitch is almost always a perfect solution to having two fabrics come together invisibly

Mattress stitch is almost always a perfect solution to having two fabrics come together invisibly

Next I began hand-sewing the final edge of the pillows. I used #10 crochet thread instead of normal sewing thread. This was becasue I was having to yank at the pillows to get them to look the way I wanted them. This was doubly true when sewing through the button bands, and getting three layers of very thick knit fabric to come together.  Even still, sometimes I wasn’t careful and had the thread break.  Not fun!

Mattress stitch (aka ladder stitch) was my stitch of choice.

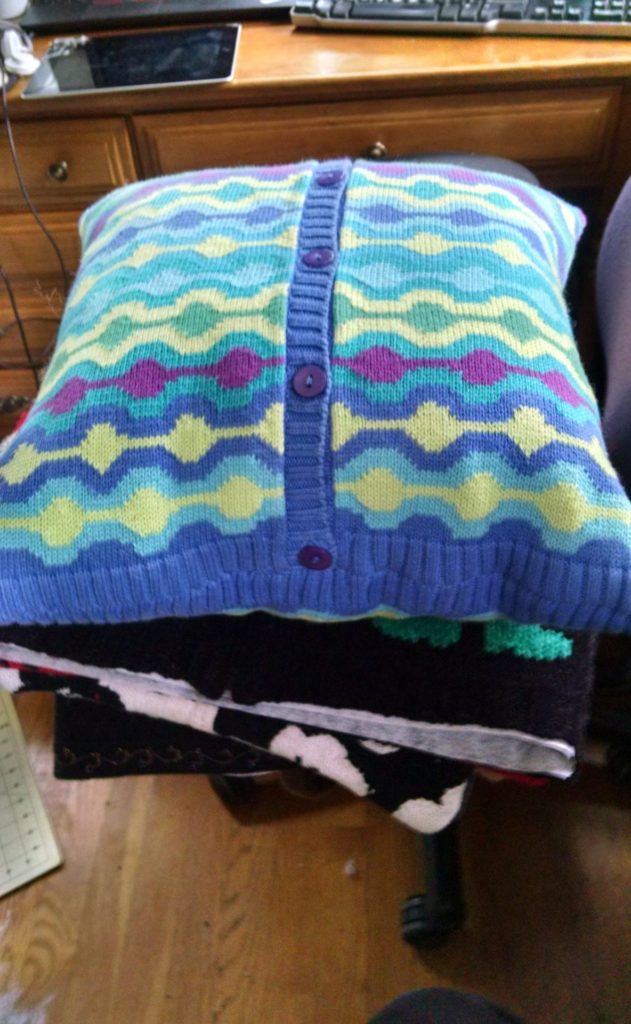
Pillow made out of old sweater, button band showing

Pillow made out of old sweater, button band showing

The pillows are coming together now! I wasn’t always able to get the ribbing to come together evenly on the bottom.  It’s a nitpicky detail, and probably something only I could notice. It couldn’t always be helped though. I love here how I could keep the button band unsewn, so it looks like the button band on a normal sweater, with that dimensionality! The thick stabilizer unerneath will prevent stuffing from escaping.


33145457381_0ac00b5629_o

Some close shots of the lovely beadwork on the bottom of the Santa sweater. I just had to keep a detail like this. I’m already wondering how to replicate this in a handknit design.

This has been a fun project and a unique way to honor a passed friend. In the next few days I’ll wrap up with the final touches – removing lint, straightening edges and getting ready to send these pieces back to my client.

Repairing and Reknitting a Lace Knit Blanket

It’s been a while since I’ve done a post on a repair project.  So today I’ve got a post walking you through my thought process as I reknit an unraveled section of the blanket.  I thought this Hobbyhorse Blanket repair project was a good one to talk about my process and how I go about tackling a big repair.

This is going to be a very image-heavy post, so be forewarned.

IMG_20170213_145143730[1]

This is the blanket right out of the box it was mailed in.  The piece looks to be a cotton and rayon blend?  Not quite sure, and I’m not sure I want to do a burn test on it.  But it’s got a drapey quality, and it is able to be machine washed.  Looking at the piece I was immediately struck by the construction: lovely, lovely edging, and very unique and intricate lace hobbyhorse worked on each of the four corner panels (it’s a 3×3 panel blanket).

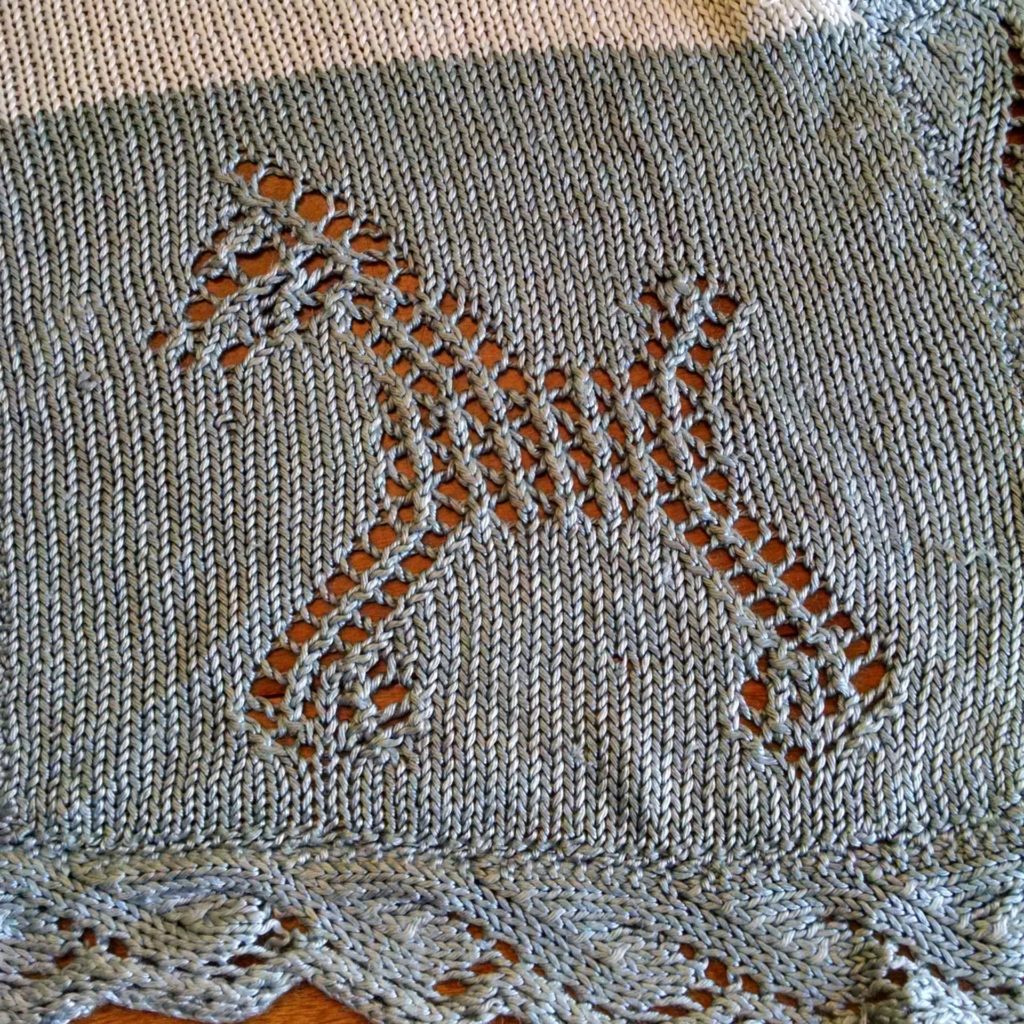
knit hobbyhorse

For reference, this is a hobbyhorse, looking how it’s supposed to look.  I’m actually assuming it’s supposed to be a hobbyhorse (based purely on the fact that it’s a crib blanket), I suppose it could also be a dog.  I think it’s a Barbra Walker lace pattern.  I’m actually not quite sure.  Now I’m going to have to go look it up. Anyone looking at this know the pattern? (I’ll update if I get a response)[Update: it IS a hobbyhorse, and WAS a Barbra Walker pattern. Ha!  I knew I’d seen it somewhere. It’s in Barbara’s Third Treasury of Knitting Designs pages 178 and 179].

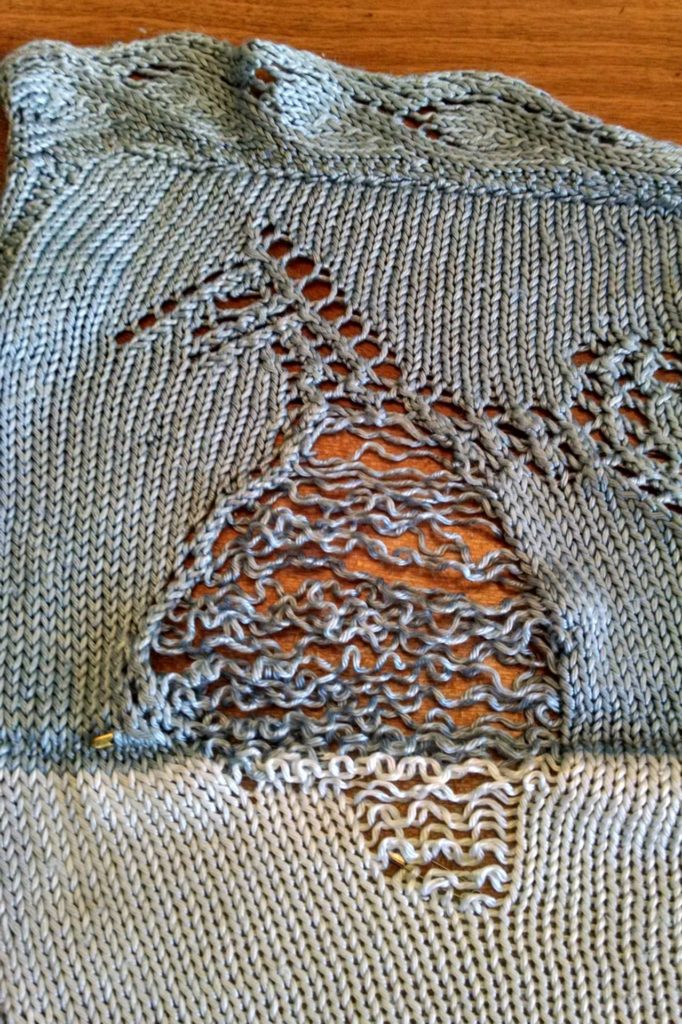
Hobbyhorse completely unraveled

This is the repair I need to make right.  We’ve got lots and lots of dropped stitches, and it looks like two different pulls – one right above the cream, and one about halfway up, on the righthand side thats a lot smaller.  Right away I’m a little disappointed about the pulls – fixing pulls is so fiddly!  And I didn’t notice these on the photos the client took.

IMG_20170213_145612480[1]

First step is finding all the dropped stitches, each one captured with its own stitch marker.  At first I thought it was eight dropped stitches, but after taking this picture I found a 9th one on the left-hand side, caught by the remaining safety pin.  looking at things, the first thing I want to do is fix everything until all the cream dropped stitches are done.  That’s just all easy stockinette, so I take my crochet hook and ladder all those suckers up.  In this case, i love that the blanket has been loved and washed so much, those kinks in the yarn make it really easy to space those stitches out.

IMG_20170213_150433116[1]

Okay, so we’ve gotten everything up to the cream, I want to tackle that massive pulled stitch.IMG_20170213_150454231[1]

This pull is massive.  Nearly 20 stitches affected on the right.

IMG_20170213_150459010[1]

And another 10 stitches to the left.  Fun fun fun.  Well, lets sort through the strings here for the one that’s pulled to see what I’m working with.

IMG_20170213_150719612[1]

Well now, that’s a lot of yarn that isn’t where it is supposed to be.

IMG_20170213_152532582_HDR[1]

I decided to pull a bunch of the yarn through to where the end of the pull was, and work backwards, redistributing the yarn along. Again, the kinks in the yarn here are helping me, because when I place things right, the kink lines up and settles into the spot it once was in.

… Lots of time later…

IMG_20170213_153216265[1]

Okay, we’ve got the yarn redistributed on both sides.  It still looks a little wonky, but that’ll even out over time.  Let’s start tackling the lace pattern.  One of the good things here is I’ve got another hobbyhorse to compare to on the blanket, so I’m using that as a template.

IMG_20170213_155107783_HDR[1]

The first five rows were plain stockinette, so so I knitted those up quickly with my needles.  I’m not worrying so much about gauge right now – I’ll go back and fuss with things when I’m finished.

IMG_20170213_164514165[1]

This is where I’ve stopped – I have to figure out the lace section for the last bit, and I may have made a mistake.  Since I’d been at things for quite a while, I decided to give things a rest while I think through where I want to go next.

Keep tuned, and I’ll record the rest of the work on this project.