MENU

An Example of a Great Repair Request

Have you ever wondered what goes on before I take on a project to repair?

Before I accept an item to fix, I like to have a dialogue with clients about the piece, their goals, and my ability. All of this starts with the Repair Request I have on my Contact Me Page.

So what makes a good repair request? I often have to clarify to potential clients what I need to come up with an accurate estimate to repair the item they’d like me to work on. When you, the client, fills out our contact form, it asks you a series of questions such as:

  • How important is matching color or matching fiber content?
  • How important is it to you that the repair be machine washable vs. needing to be washed by hand?
  • How are you intending to use the item?
  • How fragile does the fabric appear?
  • How important to you is cost?
  • How important is it for you to preserve as much of the textile as possible?

When you answer these questions, they help me understand where your priorities lie in the the repair. Some repairs can be functionally stable, but the color or fiber content might not be the best match. Finding a good color match can be time consuming – are you willing to reimburse me as I purchase different yarns to find the best match for the repair? If you are intending to put the item on display vs use it everyday, that may influence how much of the object needs to be repaired – daily use means I should also prioritize areas I see are going thin, because with more use they may easily become holes soon.

One of the best ways I can get a sense of the item (aside from sending it to me) is to take good photographs. Take a look at the photos below as I show what was really helpful about them.

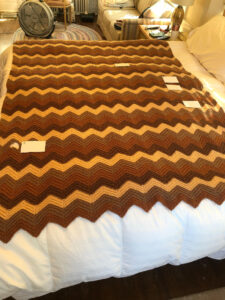
This is a great overall photo of the piece. I can see the pieces of paper that mark the holes, and I know where the holes are in relation to each other. It gives me a sense of the scale of the piece, the overall pattern, and if there are any edgings or other factors I have to take into account while working.

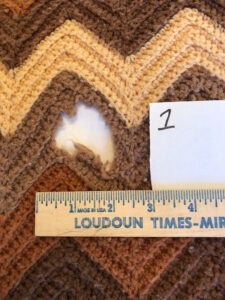
Great photo with a number. The ruler provides a lot of detail for me: I can tell the size of the yarn and how big the hole is. The hole is filling enough of the frame that I can zoom in to look at how the fibers are worn away (ie: frayed, cut, ragged).

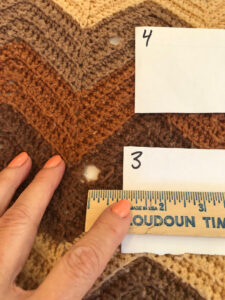
Again, the ruler is super helpful. I can also tell the customer had their hands on either side stretching the fabric slightly so I could see everything.

So helpful to have number 3 and 4, which are close together, numbered! In cases where holes are close together, the location of the holes can impact how I approach the repairs, so it’s helpful to see that relational information.

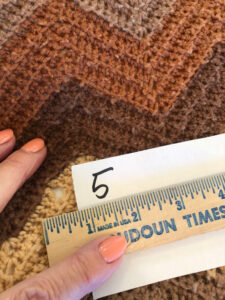
Here the hole was small enough that I couldn’t see it in the overall picture, but can see it here. It was so helpful!


One of the other things this client did was mark each hole with a piece of string. This really saves both of us time. While sometimes people don’t realize there is a hole that I catch, the time it takes for me to find holes that the client already knows about is time I could use on doing repairs. Ultimately it saves us both time, and in the end, the client money.

Got a piece you’d like me to look at? Now that you have a sense of what I’m looking for, head over to Let’s Connect, and get the conversation started.

Tinking Turtle Extended Leave through 2022 and 2023

Due to Mr. Turtle’s Extended Deployments in Fall 2022 and Spring 2023, Tinking Turtle will be halting Repair and Finishing submissions.

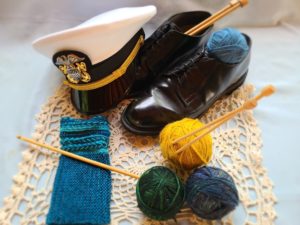
navy shoes and hat with knitting and crochet What does this mean if I already have a piece with you?

  • If you have already mailed a piece to me or I have issued you a codeword and you have submitted your Customer Intake form and plan to put your piece in the mail promptly, your return date for your piece will not be affected.
  • If you have been issued a codeword and have not submitted your Customer Intake form, please check in with me to ensure you can get your piece to me in a timely manner.
  • This announcement only affects outstanding estimates or new inquiries for repair or finishing services.

I’d still like to have you work on a piece for me!

Great! I’d love to work with you! We are currently booked out through the holidays, and I’m unsure of what my bandwidth will look like with both our children in school and Mr. Turtle being gone. Instead of accepting any more repair submissions and booking myself out through the summer of next year, we will be creating a waitlist like we did both times I went on maternity leave. I’m also working to arrange to have a few other businesses to point clients toward for more time-sensitive needs.

I’d like to know more about how you came to the decision to do this with your business.

Great! I’d like to explain to you more! Please read below the cut.

[Read more…]

Re-Imagining A Crochet Tablecloth

IMG_20200930_143126

Getting creative with clients to turn a piece from something that can’t be used to something that can is one of my favorite types of collaborations.

This tablecloth had major damage around various part of the outer edge. However, like many crochet pieces, this one was modular – both in that the motifs used could be pulled out and put other places, and that each round of motifs and edging was not dependent on the last piece.

The first step for me was laying the piece out so I could take a careful look and mark and note the places that needed attention. There’s the obvious two holes along the edge, but there were also multiple smaller places that would need attention and reinforcement too.

The client preferred to be able to use the piece – no matter that we’d have to take off quite a bit of the outer edging. We could then use it as a table runner instead of a table cloth.

IMG_20201001_072929_598

After taking a good close look at the piece, and multiple conversations with the client, we determined the place where we could take the least off. I’d still need to repair some small areas, but we had reduced the amount of work to something that was in the client’s budget.

IMG_20201001_072944_674

Taking the edging off involved the use of a sharp pair of scissors and some time where I didn’t need to be interrupted. There was no room for mistakes! After several hours of carefully removing the outer edge, it was time to take a step back, take some pictures and consult with the client again.

PANO_20201001_210520.vr

Here we have the piece with the edging taken off – it really changed the appearance and presentation of the finished product. I think the cleaner unadorned edge gives it a bit more of a formal and modern look.

IMG_20201001_210456

A quick and light steam press, shoring up some of the other areas, and it was ready to be sent on its way!

Challenges in Restoring Crochet Rag Rugs

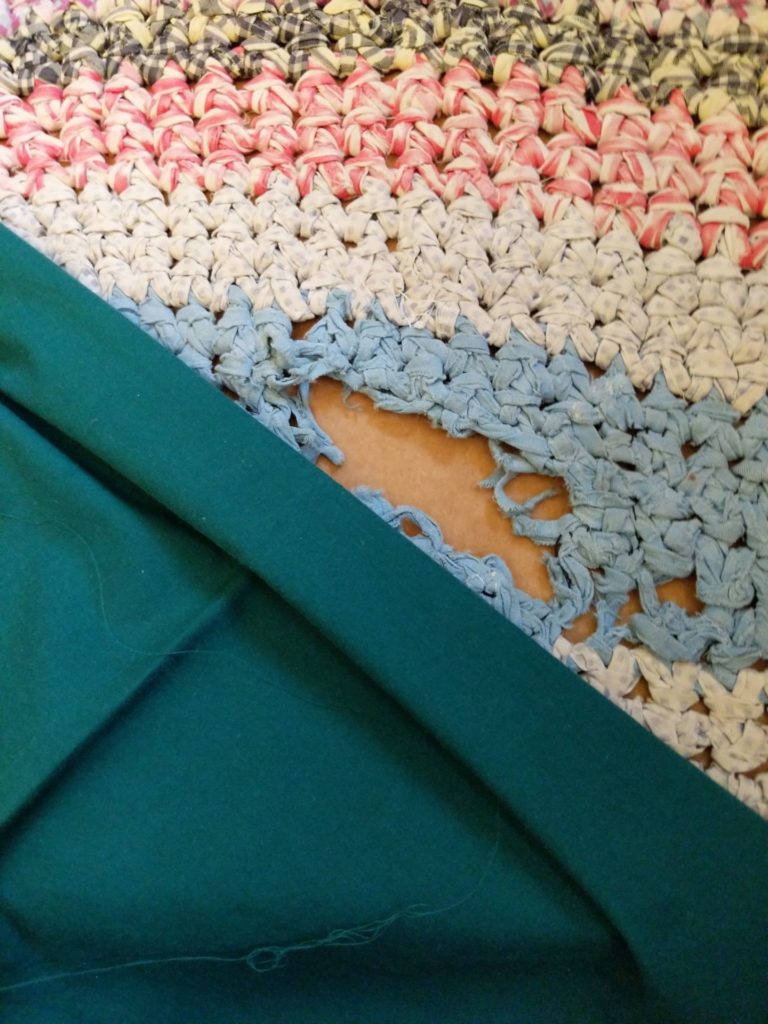
teal sheet fabric against damaged rag rug

Normally I’m all about the yarn, but the most recent repair I’ve been working on is a set of three crochet rag rugs.  Restoring these pieces took some real inguenuity and creativity, as I worked with the client to come to a solution.  Let’s take a look at these three lovely rag rugs, and how we approached repairing them for further use!

These rugs started out with some pretty significant damage.  Because they were made out of rags, some of the more delicate fabrics had worn out quickly, while much of the rug was still in really good shape.  I thought when the client first sent picture that the rugs were made out of quilting cotton, but it became apparent once I had a them in my hands that the quilts were made from garments – most notably, men’s button up shirts. [Read more…]

Mending a Midwest Inspried Crochet Afghan

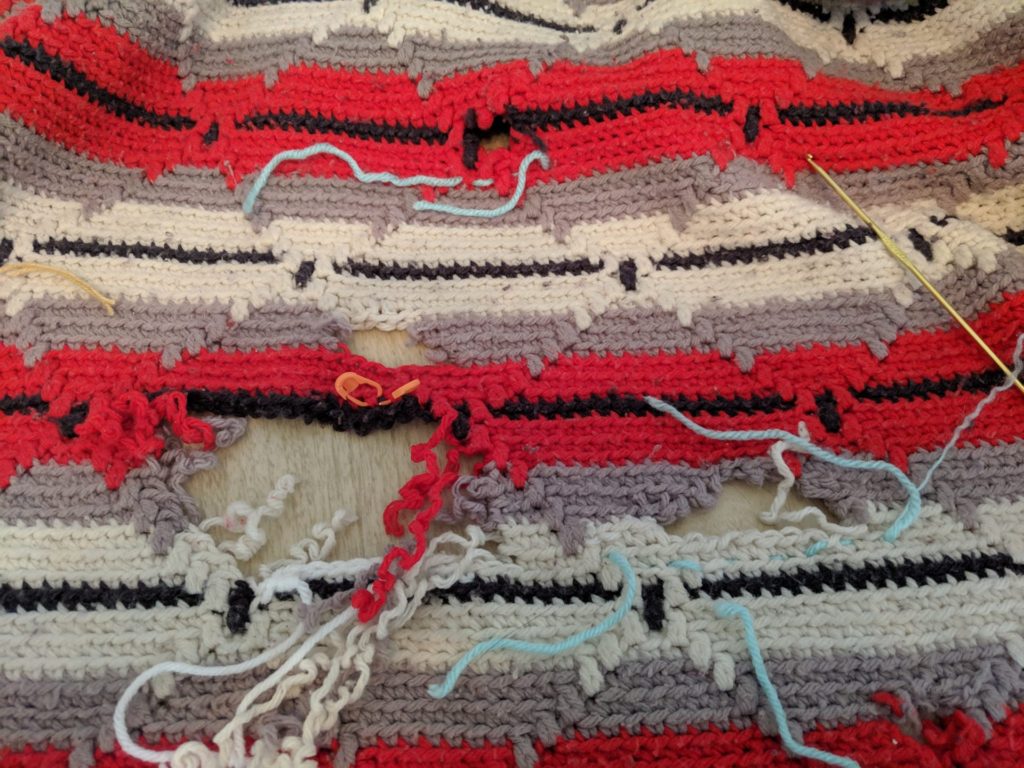
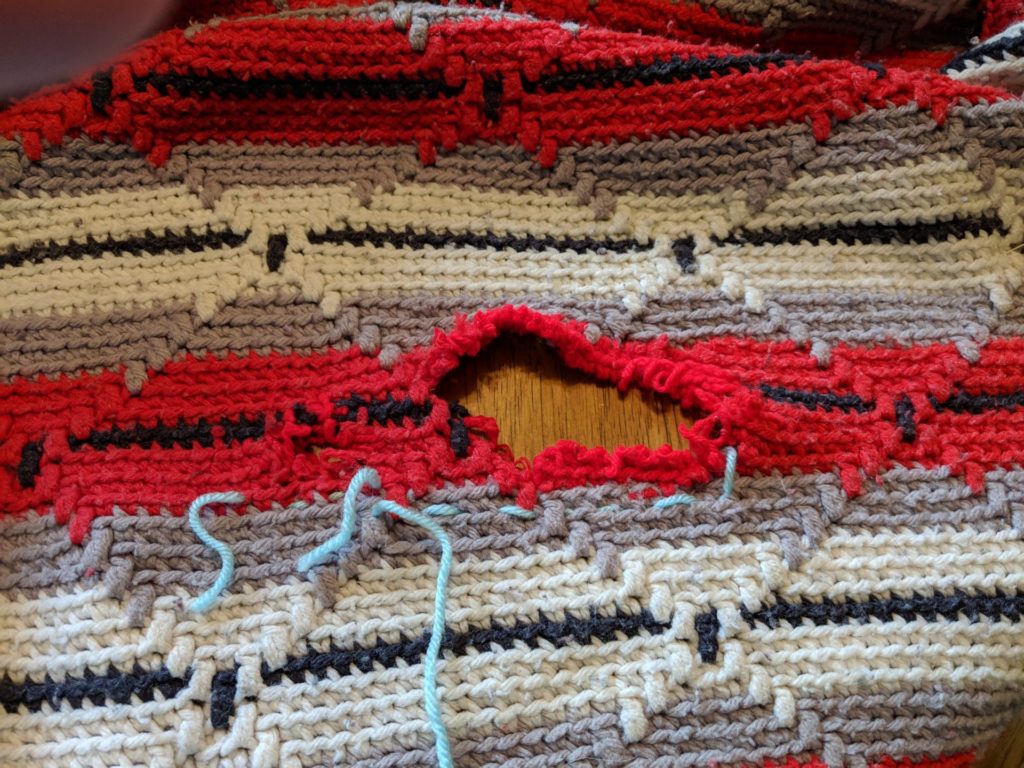
This midwest inspried afghan had a lot of damage done to it over the years, and the owner contacted me about doing some repairs and mending to bring it back up to shipshape! This was an interesting piece – each row was done through the back loop (hence the distinct ridges, and each row the yarn was cut on the end, resulting in the creator only ever going from right to left when working on it.  The cut ends became part of the fringe.

It did make the repairs a lot easier to do, as I didn’t need to flip the blanket over for each row. Working through the back loop does mean that the last row invoves a lot of sewing, though.

The two holes right above the the black line were so close together it made more sense to pull out the yarn between them and work them as one large hole. I decided to tackle that first.

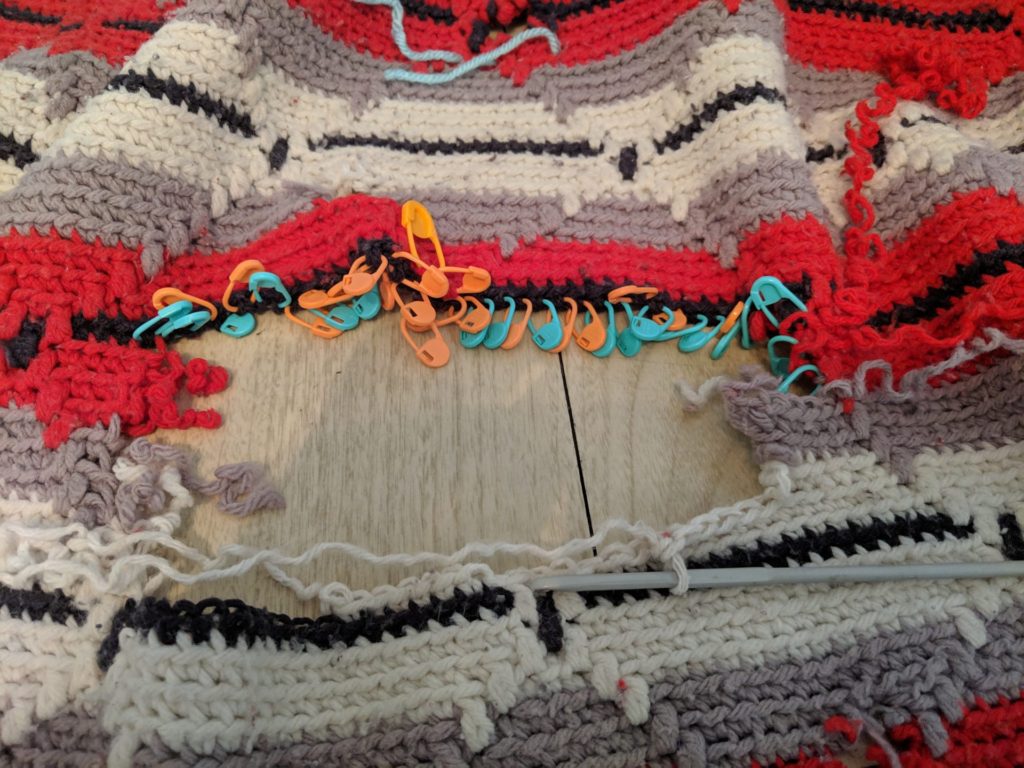
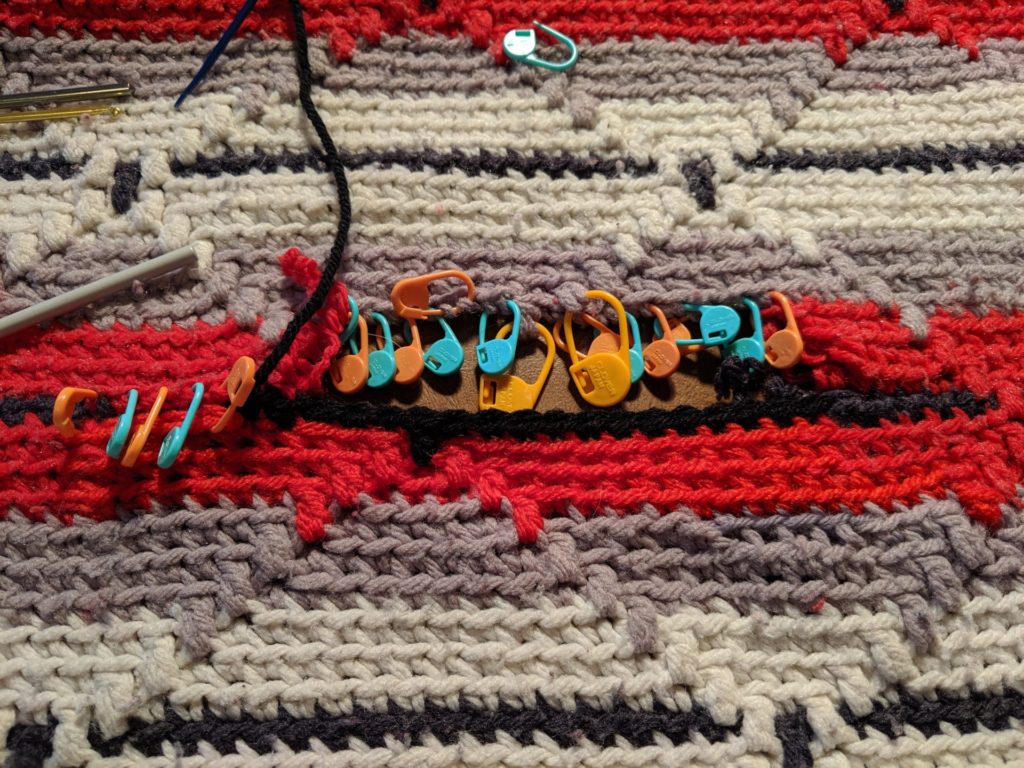
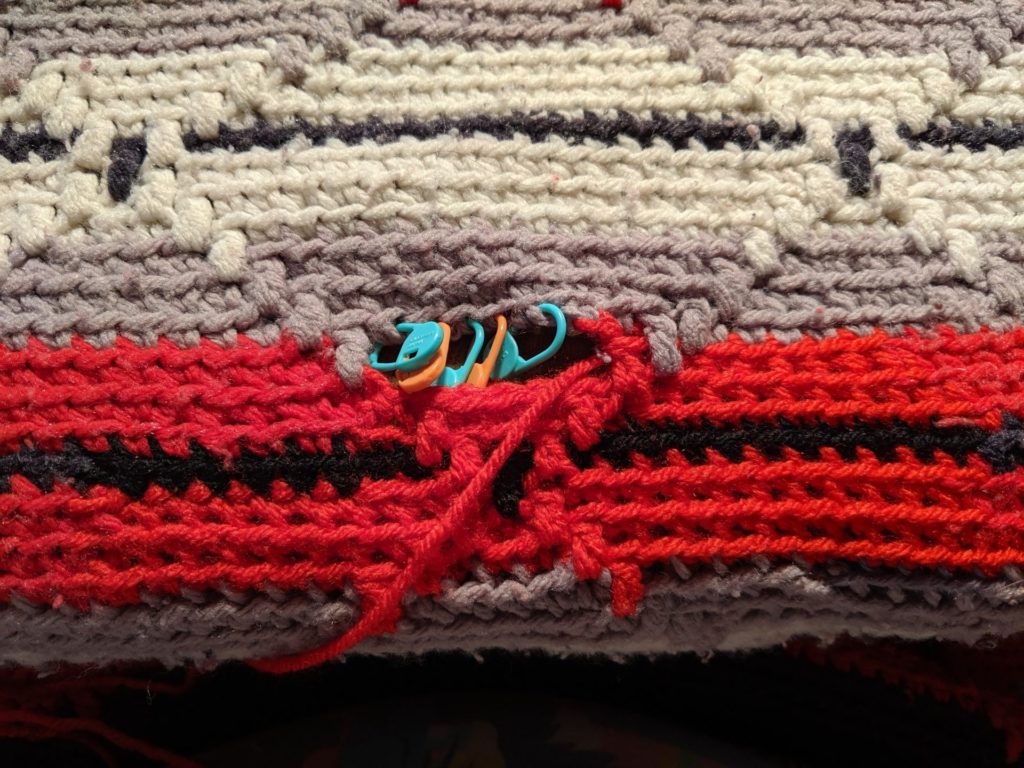
To keep track of each stitch, I used locking stitch markers to hold each leg of the single crochet together.  This will help when I reweave the last row. 

Nearly done! After working each of the rows, I’m finishing up by joining together the last row. I had to take out the black row later in the process as it had more damage to it than I realized.

Finally Done!

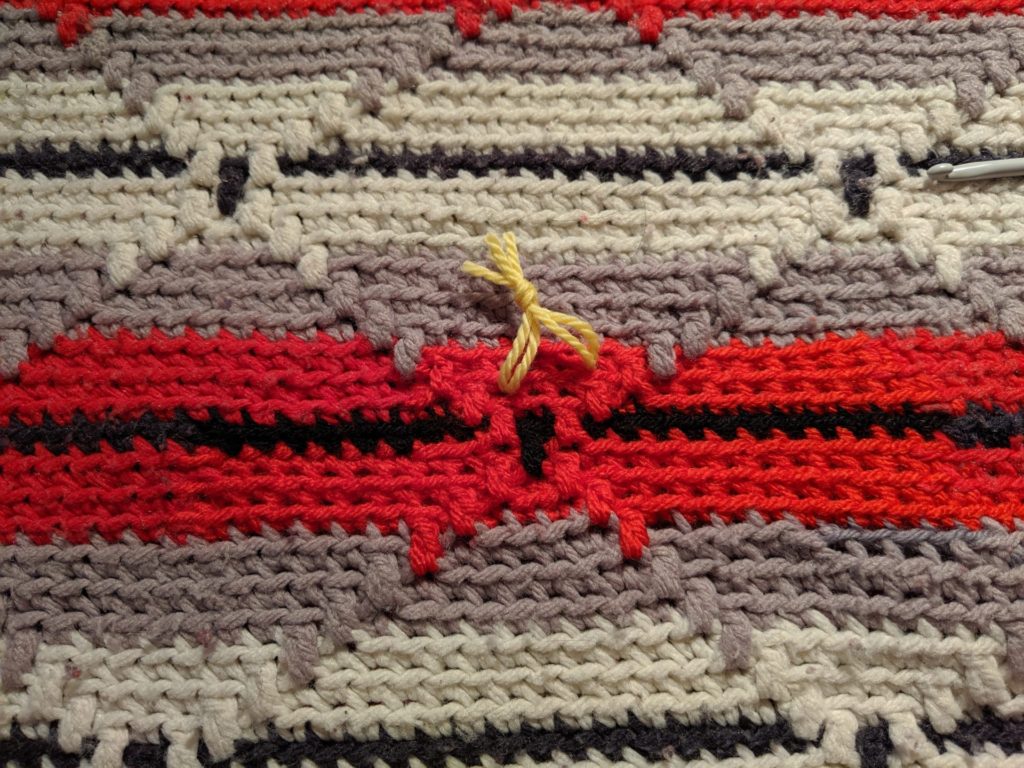
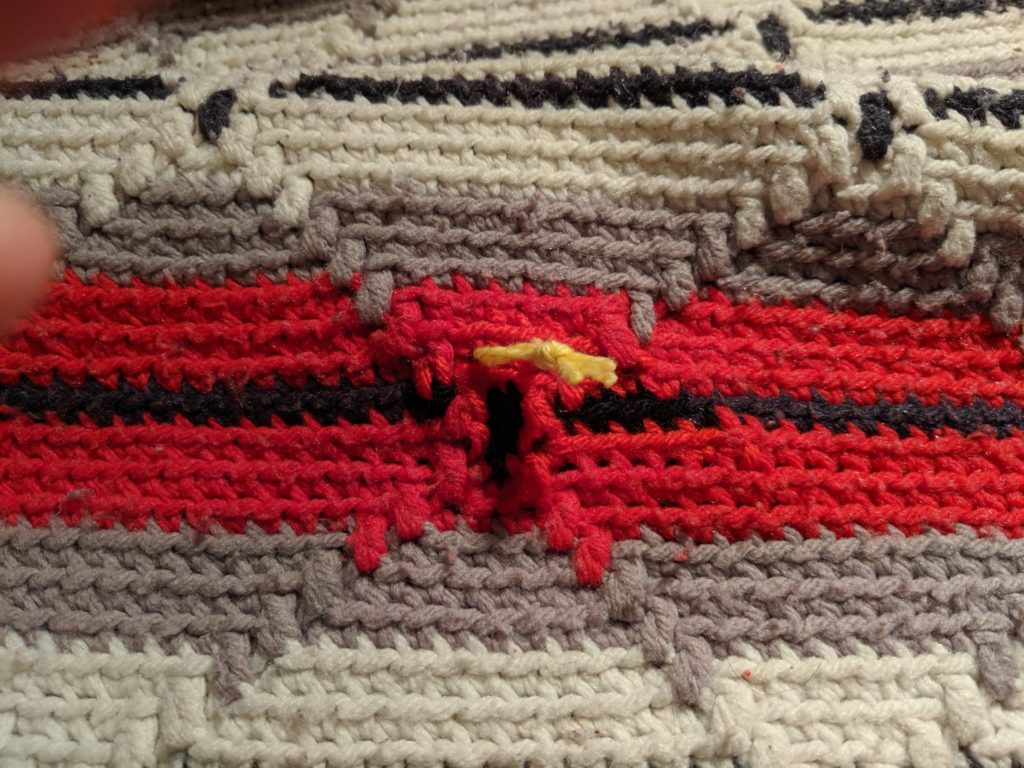
Now I’ve got everything worked up and the ends woven in. I mark each area of repair with a piece of yarn, so the repairs are easier to find. When the clients get the repaired piece they can take the markers out.

See that the stitches look a little more lively where I’ve done the repairs? This will improve as the piece gets used, and the newer stitches gain some wear.

Now I’m tackling the repair that is further up in the blanket. You’ll notice there’s the larger hole, and to the left, another smaller hole. It made sense in this case to also pull out and combine the holes. The yarn in between the two holes was worn away enough that I was concerned about its stablility.

As in many repairs, this is a slow process of just adding the new yarn to the old, crocheting across the row, and then sewing and reweaving the old to the new.  What you can’t see on the backside is all the ends I still need to weave in.

And now we’re at the end: the hole is closed up and the ends are woven in.  A bit of yarn to mark the spot.  Now it’s time for this afghan to have a quick wash before it leaves to go back to its owner.

Much Beloved Heirloom Crochet Tablecloth Made New

rectangular lace crochet tablecloth with center border and then outer border made up of flower motifs

rectangular lace crochet tablecloth with center border and then outer border made up of flower motifs

One of my favorite repairs, recently, has been a series of two different crochet lace tablecloths I took on.  These two pieces were both at least 30 or more years old, and were in pretty good condition.  Frank from Textile Restoration Inc in Chicago had sent the client my way.  I’ll highlight the first of the tablecloths today, and I’ll be highlighting the second of them a little later.

The first tablecloth, which I thought of as “Field of Flowers” when I worked on it, was a huge piece, at least 5 1/2 feet by 4 feet.  It was made of a center pannel of 4 x 12 motfs, an inner border of triangles, an outer set of motifs 4 deep, and then larger second outer border.

Most of the holes were areas where motifs that had been joined as the tablecloth was worked had come undone and unraveled – not uncommon, even in pieces where every single end is tightly woven in.  The areas where two motifs join together tend to be an area that recieves more stress.

[Read more…]

Make Do and Mend: Recent Repair Projects

I’ve been working and plugging away at a number of repair projects, and while I’ve been posting them to Instagram, I thought I’d highlight a few here.  We’ve got one crochet piece and one knit piece.

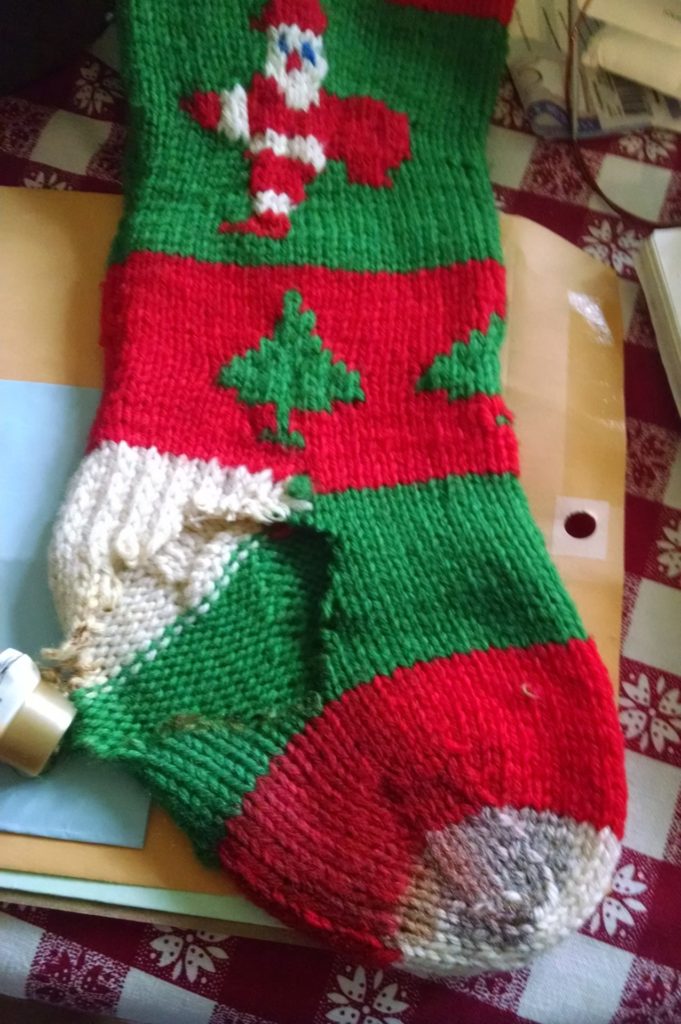
The knit piece features a stocking that was hung over the fireplace with care – but was hung a little too close to the flames!

a christmas stocking with a hole burned through it

a christmas stocking with a hole burned through it

Not only did the warmth of the fire burn through the stocking, but it melted one of the stocking stuffers to the fabric, causing the bottle to leak all over the fibers.  It was a mess!

A side note: this is a really good reason to use wool when making anything that will get anywhere near heat – wool does not melt or burn like acrylic or cotton.

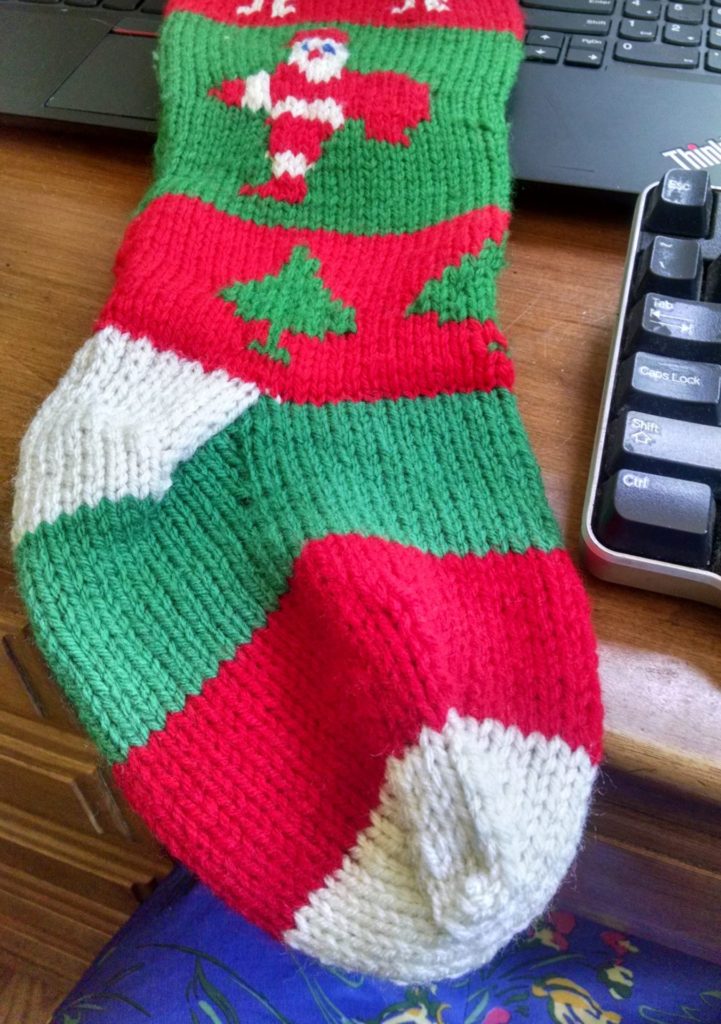
repaired christmas stocking ready to go back to its owners

repaired christmas stocking ready to go back to its owners

This stocking needed an overhaul – I pulled things out at the ankle and re-knit the foot.  I’m pretty pleases with the color matching – not perfect, but pretty close!


The other project I wrapped up was a crochet afghan that had developed a hole.  It was a nice diversion, since the last few repairs I’ve done of crochet afghans have been plain single crochet.

IMG_20170518_125831237

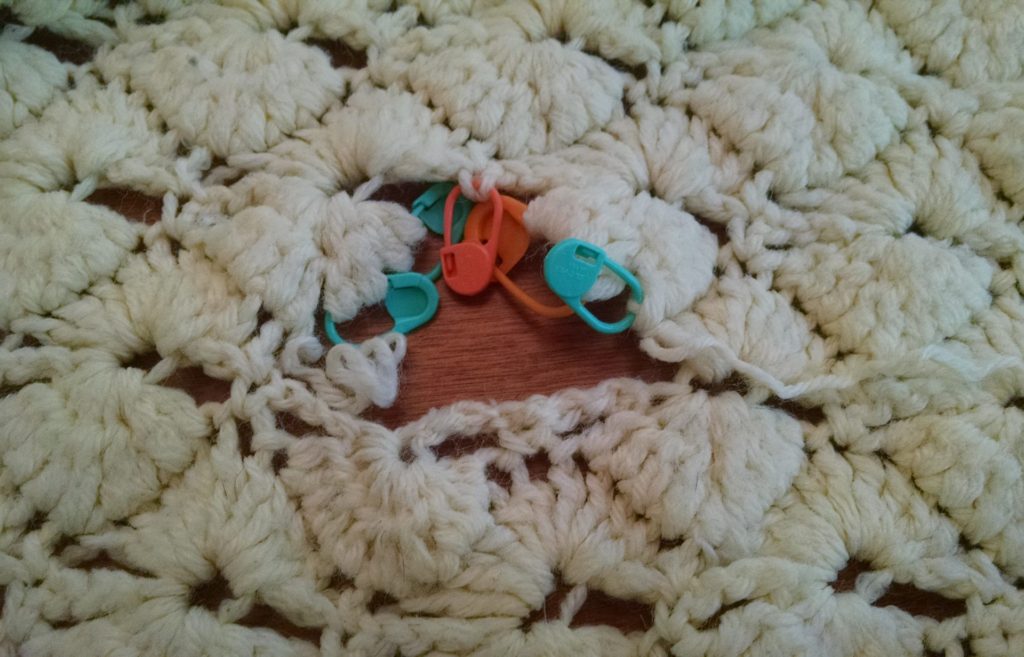
The first step was isolating the crochet stitches that were in danger of unraveling.  Because this pattern is a gathered stitch, things are a little more tricky – there isn’t a one-to-one ratio of stitches.

IMG_20170518_130232107

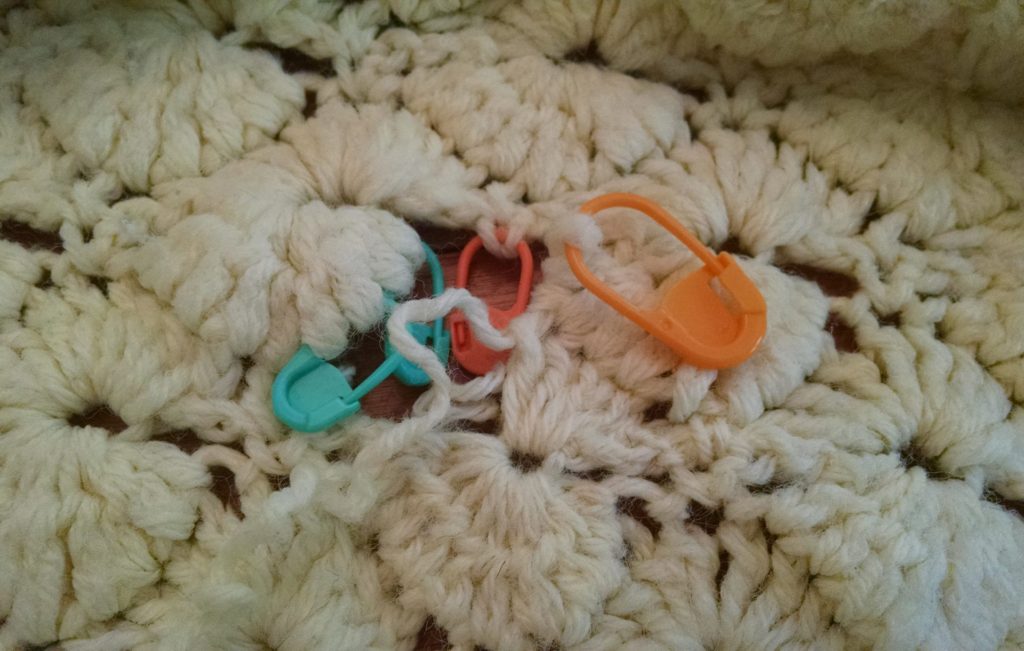
Then there’s the process of re-crocheting the area. I had a choice here: I didn’t have any of the blanket yarn I could harvest, so I could either use a closely matching yarn (which is tough to find with cream colored things), or I could crochet the piece in a slightly tighter gauge so I would have enough yarn to do the repairs (and weave in ends).

IMG_20170518_131004860

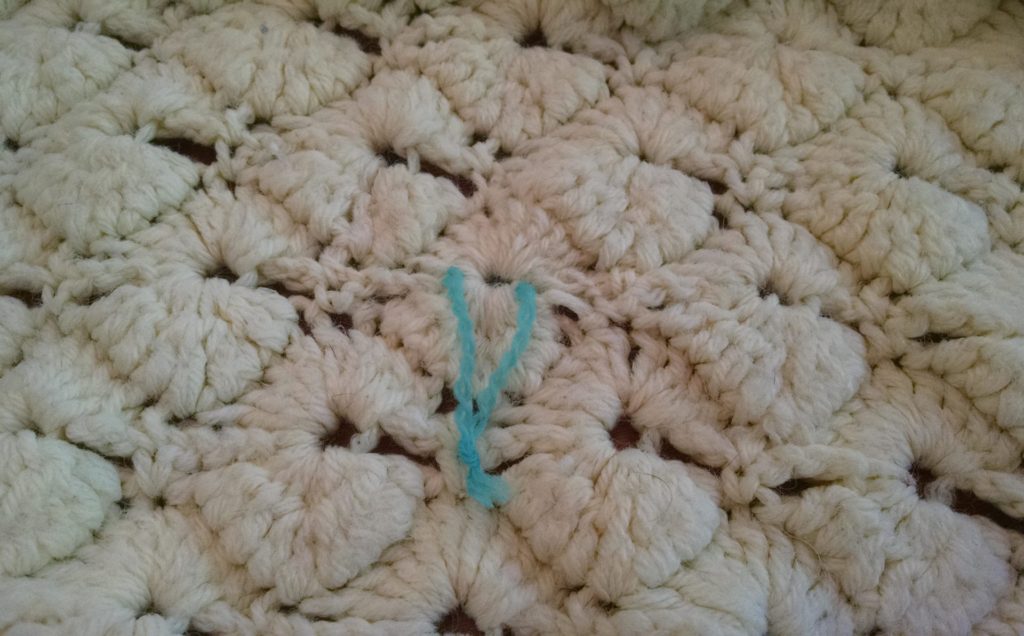
This is a strategy that works well over a small area – in this case, this one pinwheel (marked by the teal thread). Over larger areas this would cause the area to pucker.


And that is most of what I’ve been working on!  What projects have you gotten off the needles/hook?

Restoring Harmony to a Household with a Crochet Repair

I had a client get in touch with me a couple of weeks ago.  In my client’s words the situation was this:

I got your name from the local yarn store.  I have a blanket my wife made for my daughter.  My daughter’s dog put a hole in it (see photos) and now I need a repair to restore peace and civility to my family.  Is this something you could do (I hope)?

Clearly I had to help!

IMG_20170427_151351804

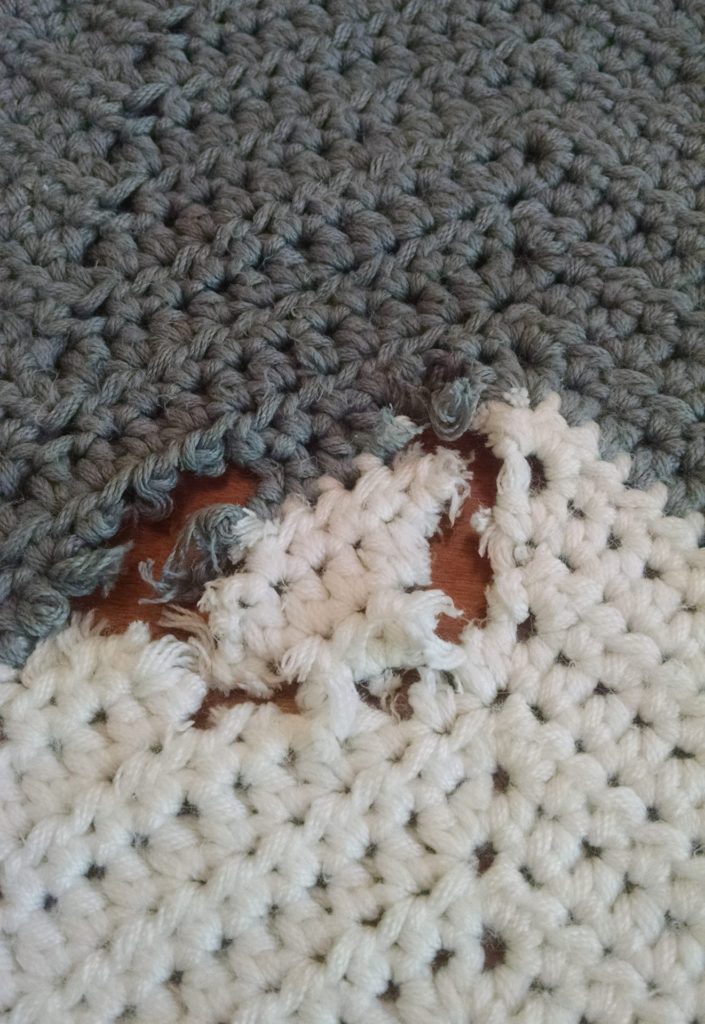
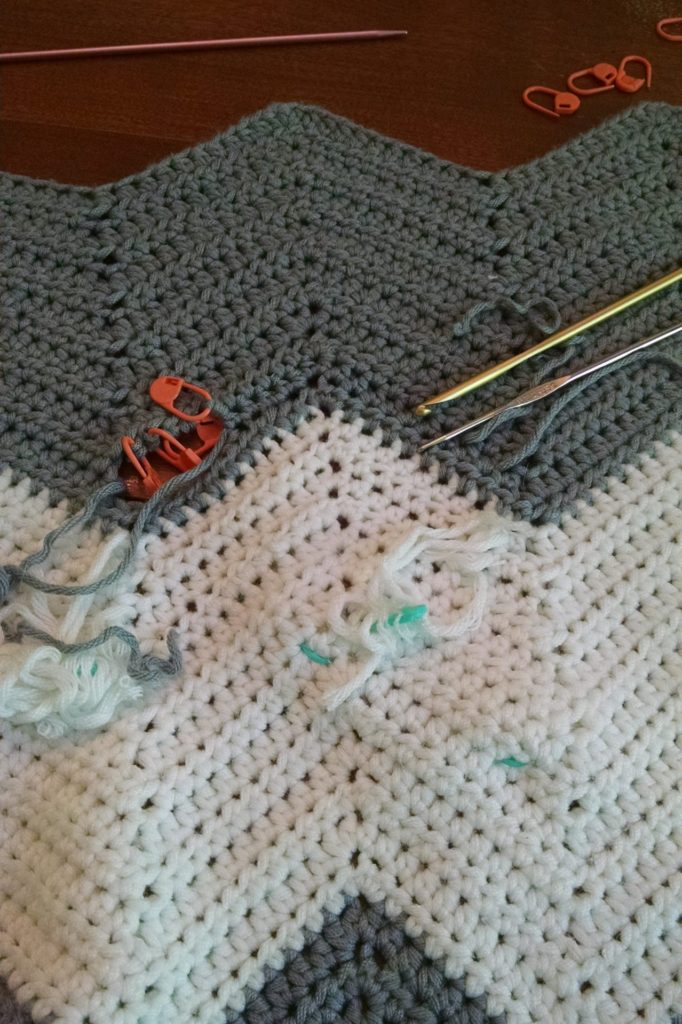
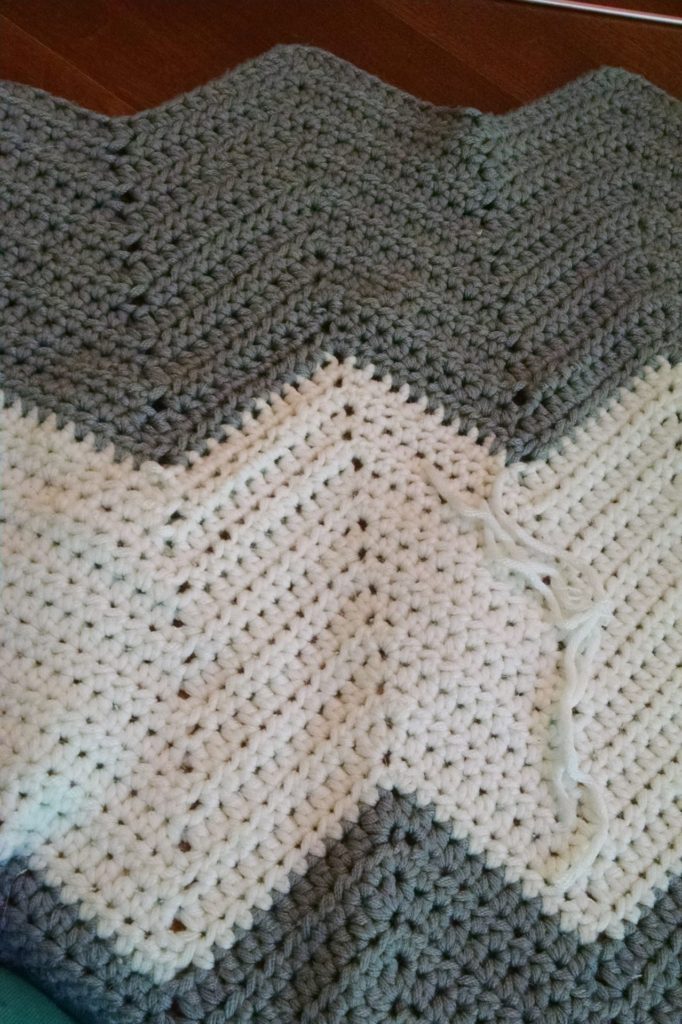
The hole was oriented across two of the different colors in the blanket, spanning 5-6 rows, depending on how you want to count it.  On a big plus, the person who crocheted the blanket had kept all the yarn that was leftover, giving me plenty to work with when making the repairs – a true luxury! I was able to dive into the repairs right away.

IMG_20170427_162743653_HDR

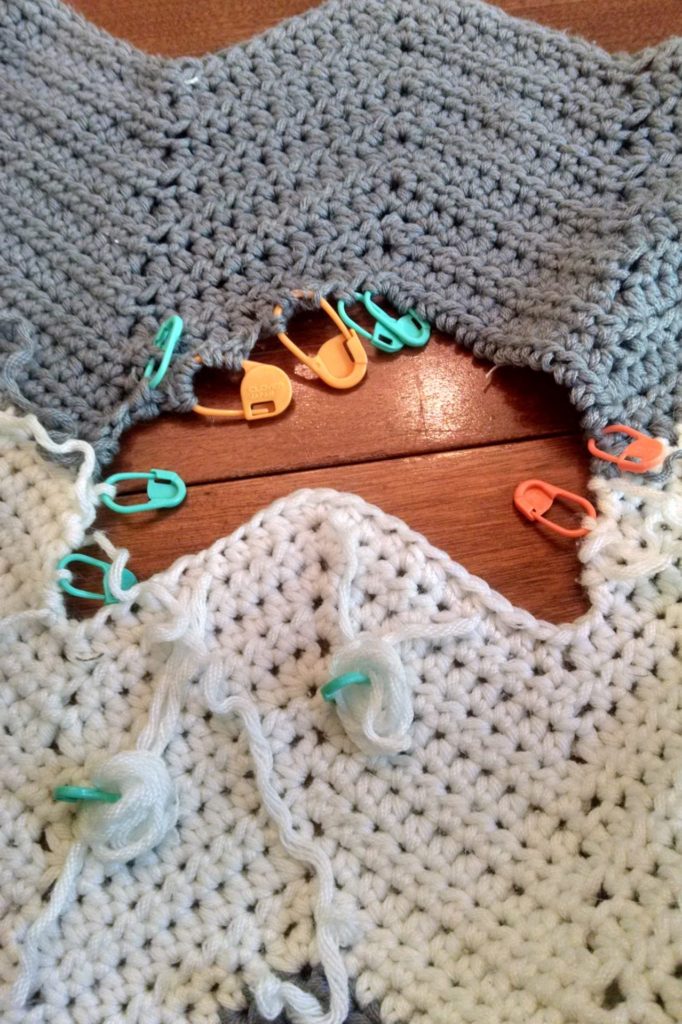
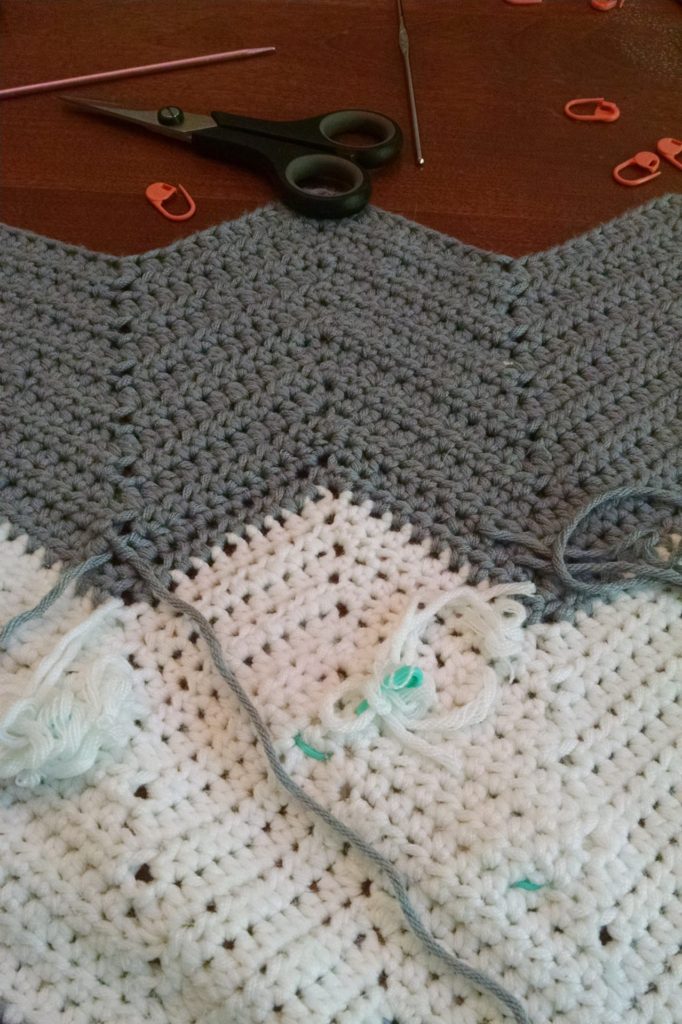
In most cases it’s better to make the hole bigger to make the repair, as long as you have a good amount of yarn to work with.  This way you aren’t working into damaged yarn, and you have enough of the ends to weave in.  Here, I’ve already worked the first row of the repair.  I like to pin my ends out of the way using locking stitch markers.  Because this was worked in rows and turned, I flip the entire blanket each time I repair a row, to work it in the direction of the repairs.  Re-crocheting each row isn’t the tricky part.  The tricky part is the last row when you have to connect the old rows with the new.  You’ll see I’m using stitch markers to hold the base of each of the half-double crochets that have been worked.


IMG_20170502_151107808_HDR

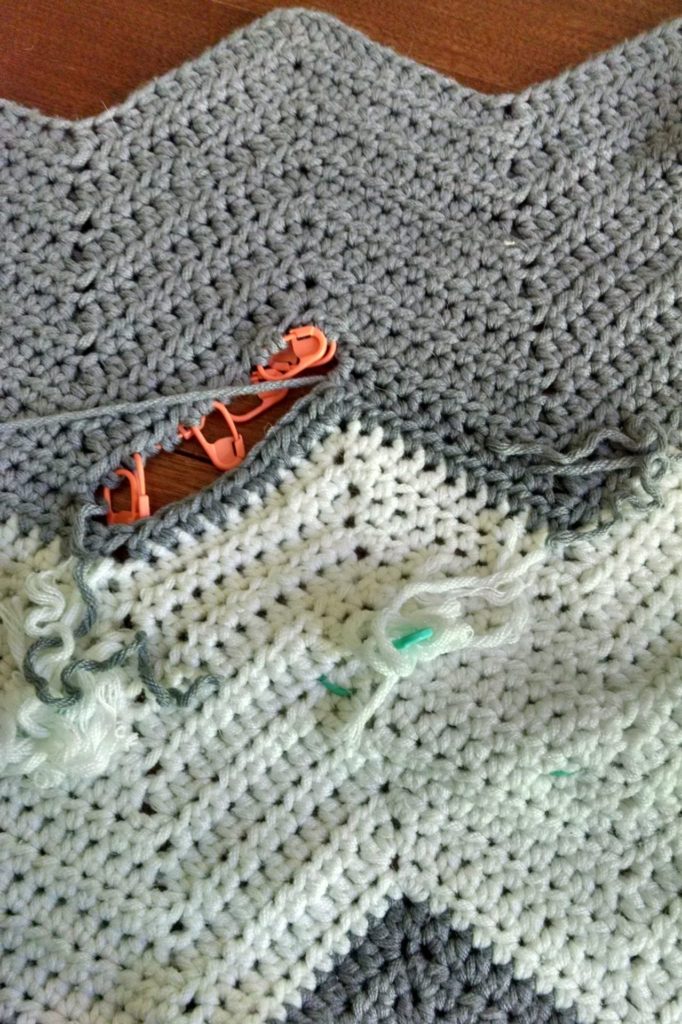
After working a couple of rows normally, it’s time to close up the hole and reconnect the old stitches to the new.  This takes some real patience, as each row you need to crochet a stitch, then take a needle and sew together the newly created stitch through the one above it.  I’m finding that the final row sometimes takes as much time as the entire rest of the repair, depending on how big the hole is!

IMG_20170502_151910461

Getting to the end with all the tools I use in play.  A smaller crochet hook for maneuvering things right where I want them, and the larger crochet hook so I can match gauge.

At this point Mr. Turtle wanders through and asks what I’m doing.  “I’m restoring peace and civility to a client’s home,” was my response.


IMG_20170502_152906802

Finally finished weaving things together!  I was so pleased with how the repairs came out!


IMG_20170502_155002822

Now it’s time to finish weaving in the ends and this piece can go back to its owner.


Plant Rooting Jars made with Crochet

I’ve set Rebecca’s sweater and sleeves aside until I have the space to give it more thought – hopefully this weekend when we’re going to be at the farm and have the inlaws around.  Instead I’ve embarked on another project that I’ve been meaning to get to for a while.  I’ve wanted a set of rooting jars to hang up in front of the window.  My sister has a model similar to this one from Vermont Nature Creations.  I’d intended to purchase one like it for a while, but always seem to have something better to spend my money on.  Meanwhile I don’t have anything to root my plants in that my cats can’t get to.

Well, that’s a lie. I have some winebottles held in socks that are hanging from a curtain rod, but they aren’t very sightly.

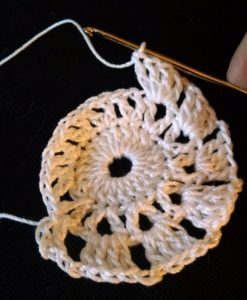
The beginnings of a crochet lace circleSo this weekend I’ve gotten busy with some crochet.

I started with a magic circle, size three crochet thread and a steel crochet hook (don’t ask me the size) and worked like this:

Round 1: 24 dc.

Round 2: V-stitch in every other stitch, 12 V stitches.

Round 3: 3 double crochets in each V stitch, with a chain in between each grouping.

Round 4, 5 and 6: Let’s rock the granny square pattern!

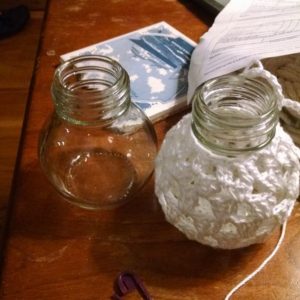
Round 7: Granny square pattern without the chains in between.  This is when i slip the bottle into the crochet piece, and the following rows are worked around the bottle… which is a pain, let me tell you.crochet lace around spice jar

Round 8: Only two double crochets in each of the spaces between the groups.

Round 9: a single crochet in each of the spaces between the clusters.

And then finally a chain to hang by: 60 chain stitches for the bottom two hanging, 100 chain stitches for the top one to hang off the railing.  Each of these little things takes me about 45 minutes – so they’re quite satisfying!

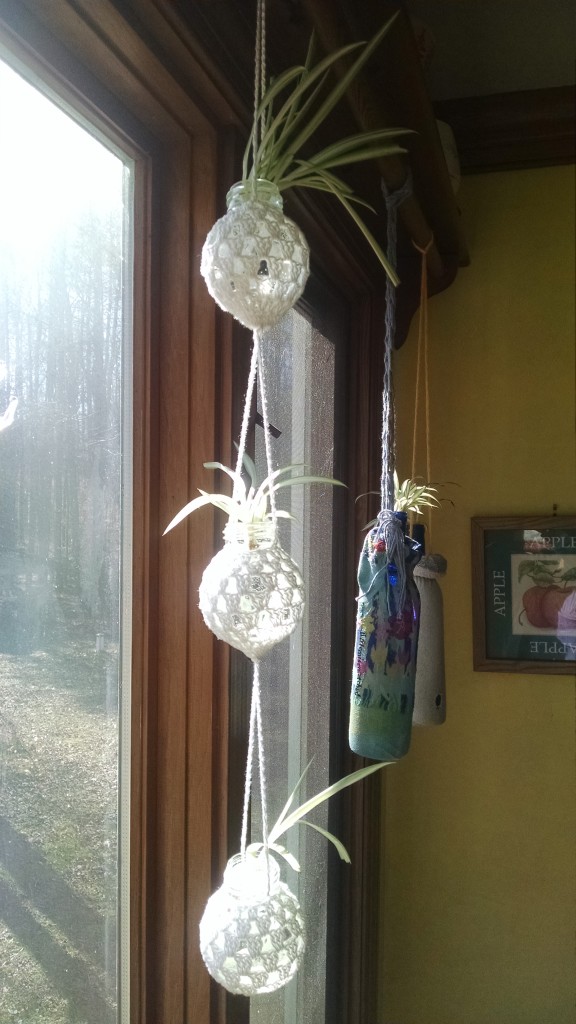
I decided that it was a good idea to only hang three in a row, since I don’t want them to hang too low… and I was concerned about how much weight a single row of chain stitches could take.  I mean, each of the jars doesn’t weigh that much… but I didn’t want to push my luck.

rooting jars before window

This is the final result – I love the way the sun streams through the stitches.  You can see in the background the original prototype of wine bottles in socks. The wine bottles in socks were nixed because the wine bottle with the water in it is quite heavy, and I’m not sure I want those hanging there long term.  I suppose I could have crocheted around a wine bottle, but that’s a lot of crocheting.

News about Upcoming Classes & a Sale

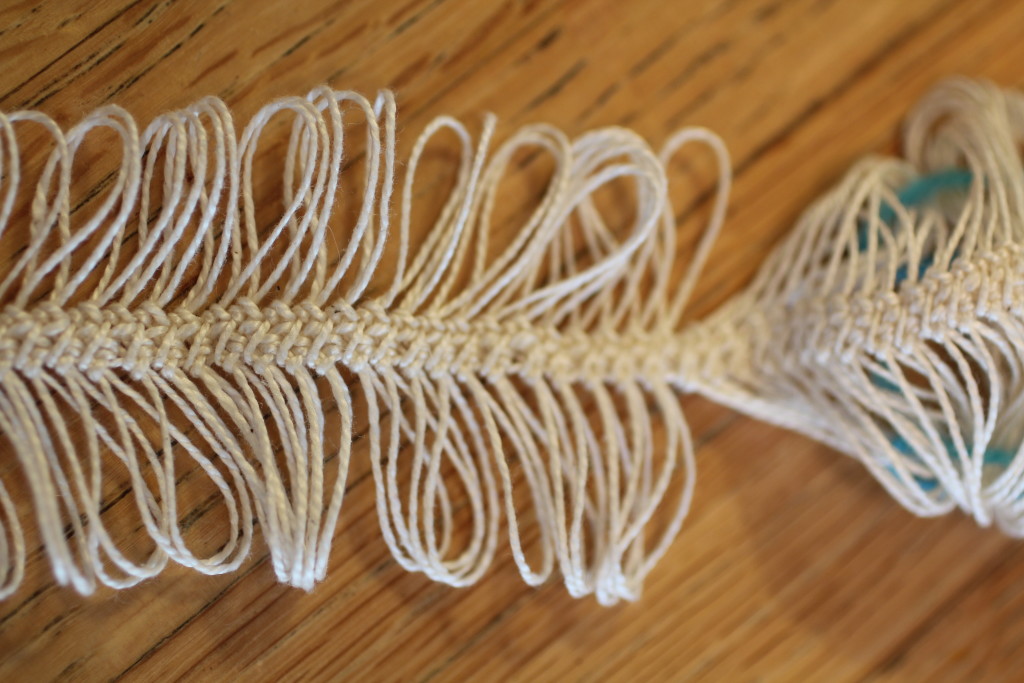
Hairpin lace against a table

Fibre Space Classes

This weekend on Saturday the 28th I’ll be at Fibre Space in Old Town Alexandria, VA to be teaching two different classes:

Ooops: Fixing Mistakes: If the sight of a dropped stitch, a mixed up cable, or a problem in your lace sends you scrambling for the LYS, this class if for you. Learn to fix your mistakes!

Hairpin Lace Scarf: This highlights a fun riff on Hairpin Lace by making a quick project that will teach you the basics of this stunning technique!

I also am trying out something a little new: I’m scheduling a few Private Lessons for students that miss the one-on-one attention or would like to discuss a topic outside of my normal class offerings!  I’d love to meet with you then!


Dances With Wool Classes

I’ve also been fostering a new relationship with Dances With Wool, in Midlothian, VA, just outside of Richmond.  I’ve got a number of classes coming up with them.sugar+maple+hat

Sugar Maple Hat is a great class for learning how to work in the round, working cables, and reading a knitting pattern with cables.  The class will run February 1, 8th and 15th.

If you want to learn how to work  socks, this next class is for you.  Toe-up socks: Time Traveler covers how to cast on for a toe-up sock, how to work a riverbed heel, a primer on intermediate lace (just enough to keep your interest!), and a folded over brim.  Classes are spaced out so that students have the time to work on the pattern before getting to the next place.  Dates are February 22, March 8th and March 22!

I’ve also got a new sort of class that I’m running at DWW, called Stitch Adventure.  Got a project that you want to work but want a bit of handholding along the way?  Need help on choosing yarns or tackling a new skill?  Want to be held accountable to get those projects done?  This is the type of class for you! And this week, we’re running a sale of the class – 25% off.  Signup here!


Classes at the Ashland Library

And now, finally one last opportunity I want to call your way.  If you live in Ashland, VA, I’ll be teaching a Beginning Knitting and Beginning Crochet class this month.  Volunteering and making needlework accessible to everyone is an important cornerstone of my personal values.  At the same time, I don’t often give my instruction away for free, as it’s one of my primary methods of income.  Still, sometimes I feel it is important to give back to my community.

Thus, I’ll be teaching two different events at the Ashland Library this month:

Beginning Knitting Workshop
Wednesday, February 1, Noon – 1:00 p.m.
Jennifer Raymond, owner of Tinking Turtle Designs will show you how to get started with your first knitting project. No experience necessary. Supplies provided. Call or visit the library to sign up.

Beginning Crochet Workshop
Wednesday, February 15, Noon – 1:00 p.m.
Jennifer Raymond, owner of Tinking Turtle Designs will show you how to get started with your first crochet project. No experience necessary. Supplies provided. Call or visit the library to sign up.