MENU

Reweaving and Grafting a Green and Gold Asymetrical Shawl

It seems like the entire fall has been consumed with white sweaters: I had three repairs of Irish Knit sweaters in a row, which is one of the more boring things to write about.  But my latest repair is a lovely green and gold shawl that I thought was paticularly interesting, and I thought I’d share it here in addition to writing about it on Instagram.

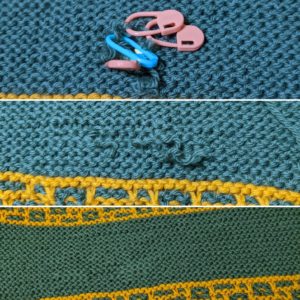
This piece had five rows of stitches ripped into a hole: it had caught on something (dryer? door?) and gotten the hole. Being that it was in the colors of the client’s daugther’s team, it needed to be repaired.

This is one of the repairs that is just a joy to work on: the client, D, had sent the piece to me with the loose stitches still on locking stitch markers.  She had taken my Darn It class with me at Rhinebeck, so she knew the drill: catch the stitches so they don’t drop and make the hole bigger.  It meant I could dive right into the repair without having to fish around ladering the stitches back into place.  (Which, have I mentioned lately that my Darn It class is both on Interweave and Craftsy?)

It was time to get to work.

Garter stitch is one of the prime times where I like to use a single long-ish strand of the repair yarn if I can.  While many of the orional techniques of doing swiss darning call for a new strand of yarn on each row, I find that leaves a lot of ends to weave in, and can make the fabric very dense in those areas.  Trying to keep the ends pretty short, I only opened up the hole a little, working duplicate stitch along the sides and then knitting across the hole before moving up to the next row.  I did that for the first few rows, and then grafted the last row together.
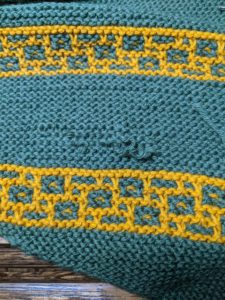
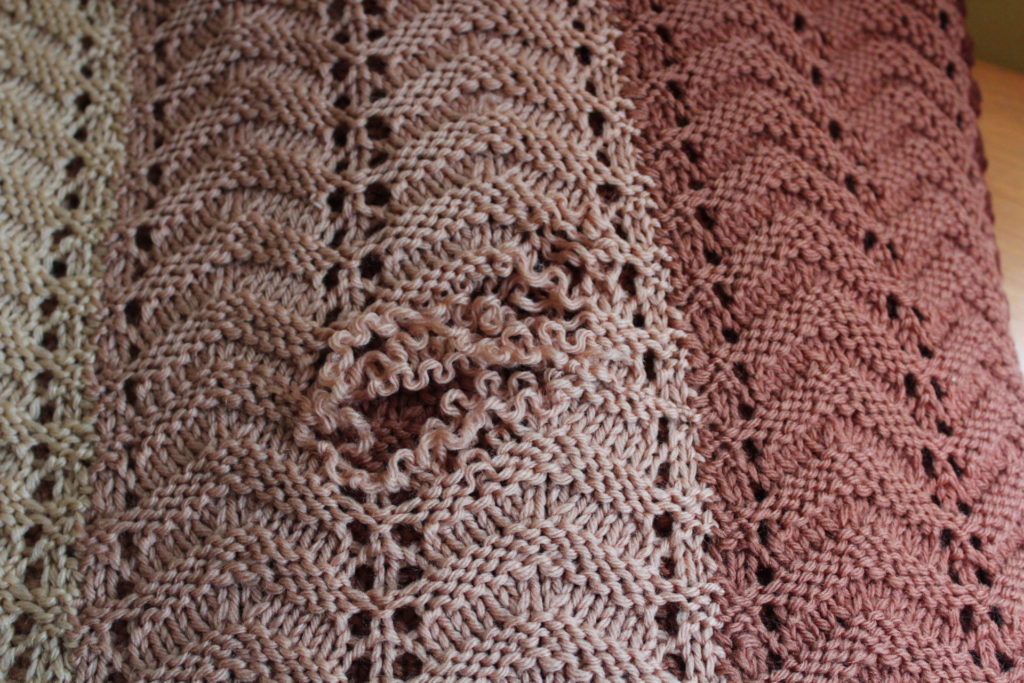
recently rewoven hole in garter stitch shawl in green and gold, threads are still visibleThen it was time to weave in the ends.


I feel like often most of the attention I give to pieces is the process of repairing the hole, which is important!  But, I find it equally as satisfying to weave in the ends – that’s when a hole is truly repaired.  I feel like sometimes garter stitch can be a little tricky to weave in all the ends, so I chose to split the yarn into smaller strands to try and hide the ends a little better and keep the fabric from getting too thick where the old and new yarn overlapped.
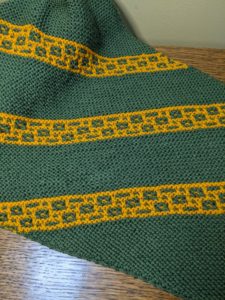
green and gold shawl with recently darned and rewoven hole

Finally, it was time to fuss with the tension to make sure that everything was laying flat and even.repaired hole in green and gold garter stitch shawl marked by waste yarn
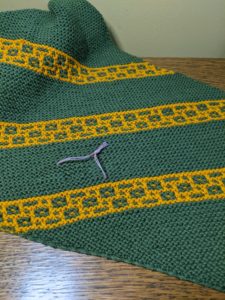
A blast of steam to “convince” the newly woven in ends that they should stay where I put them, and this piece was ready to send in the mail.  A satisfying way to leave things!

Recent Repair of a Knit Afghan

Now that I’m getting back into the swing of things, I wanted to document a unique repair that I worked on.  This 52-year old afghan was in need of some TLC before it got handed off to the next generation.  Working with this piece was a true pleasure, with the yarn in remarkably good condition for it’s age.  The afghan was a huge ripple pattern, with 9 panels joined together by intarsia.

INTARSIA. Think about that… it wasn’t seamed.  It was 9 balls of yarn that were worked on at the same time across the blanket.

But back to the repair!  There were several holes – mostly along the edge where ends had worked loose, but also one spot in the center of the piece.

[Read more…]

Darn It! How to Repair your Knitting Online Workshop Available

I’ve been working on my new class from Interweave, Darn It! How to Repair your Knitting for several years.  Since I began offering repair courses, I’ve wanted to find a way to get this information to students who were not in my geographic area.  This started when I posted about getting a copy of Rena Crockett’s Flawless Knit Repair.  People from all parts of the globe would email asking how they could get a copy, or asking if I’d be willing to scan a PDF version of the book.  (I was never comfortable with that solution, as I make my living off of my copyright, and I’ve never been able to contact Crockett or her realitives to see if they would be OK with that action.)

But in the back of my brain I was trying to figure out how I could create my own, readily available version of Crockett’s book.  Becasue as much as Crockett’s book was instrumental in my own start into repairing things, I’d found some other methods of working that I wanted to share with people.  More than a year ago I teamed up with Interweave to try and create a course that would answer the need I’d seen.

I’m proud to announce that Darn It: How to Repair your Knitting is finally available!  This class covers a lot of ground: repairing knit fabrics, purl fabrics, cables, lace and (my favorite!) colorwork (which has some special challenges).  It breaks down, step-by-step, how to approach various reparis, and how to make them nearly invisible (if that’s your desire).

Let’s look at what the class includes:

In This Online Workshop You’ll Learn:

  • A variety of repair techniques including duplicate and Kitchener stitch
  • How to fix holes before they even happen
  • Step-by-step repairs for stockinette, Fair Isle, cables, and lace knitting
  • The secret to weaving in ends invisibly
  • Tips for sourcing repair yarn and mimicking original yarns in older or heirloom pieces

Lesson Outline:

  • Intro
  • Darning vs. Reweaving
  • A Stitch In Time: Finding Holes Before They Happen
  • The Duplicate Stitch
  • Repairing Stranded Colorwork
  • Kitchener Stitch
  • Repairing Cables
  • Mending a Hole in Stockinette
  • Weaving in Ends
  • Repairing Lace
  • Conclusion

Skill Level:

Any! Students should have basic knitting skills and some knowledge of knitting cables and simple lace.

Optional Materials for Practice Swatches:

Small amounts of worsted-weight yarn in several colors for practice swatches and repair; Size 7 or 8 knitting needles; locking stitch markers; crochet hook; tapestry needle and sharp-tipped needle; Size 7 or 8 double-pointed knitting needles

Restoring Harmony to a Household with a Crochet Repair

I had a client get in touch with me a couple of weeks ago.  In my client’s words the situation was this:

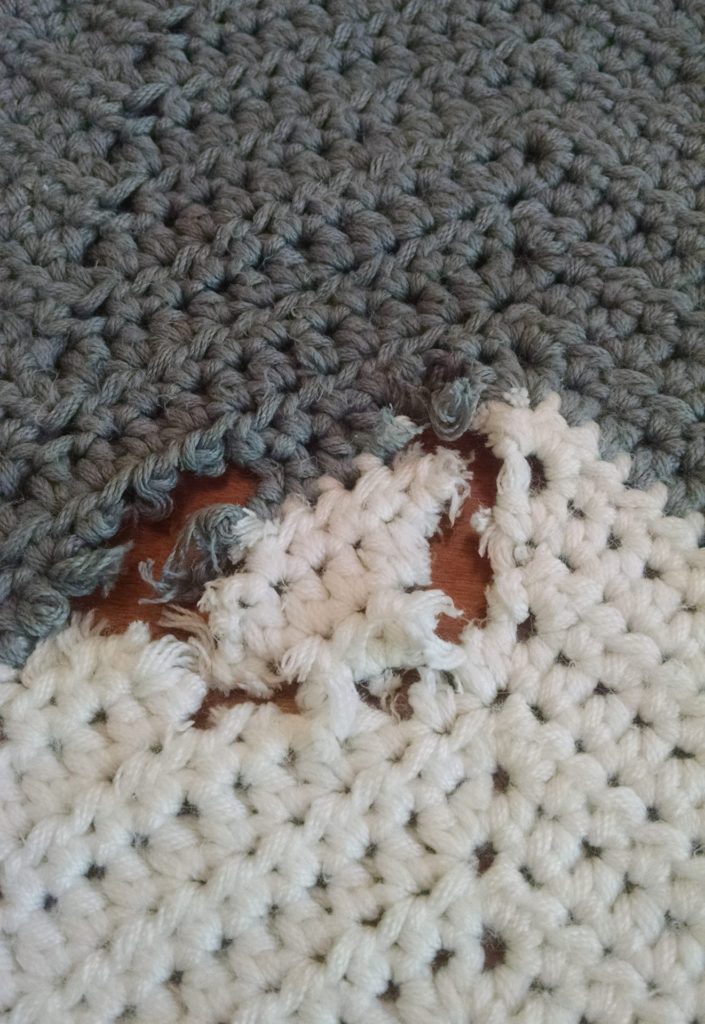
I got your name from the local yarn store.  I have a blanket my wife made for my daughter.  My daughter’s dog put a hole in it (see photos) and now I need a repair to restore peace and civility to my family.  Is this something you could do (I hope)?

Clearly I had to help!

IMG_20170427_151351804

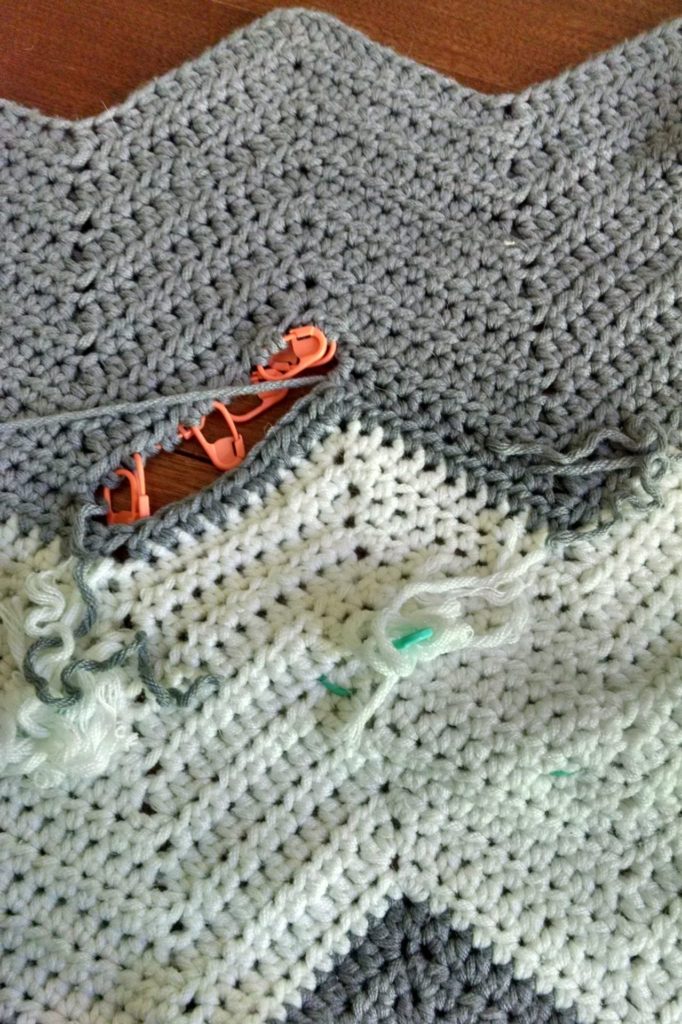
The hole was oriented across two of the different colors in the blanket, spanning 5-6 rows, depending on how you want to count it.  On a big plus, the person who crocheted the blanket had kept all the yarn that was leftover, giving me plenty to work with when making the repairs – a true luxury! I was able to dive into the repairs right away.

IMG_20170427_162743653_HDR

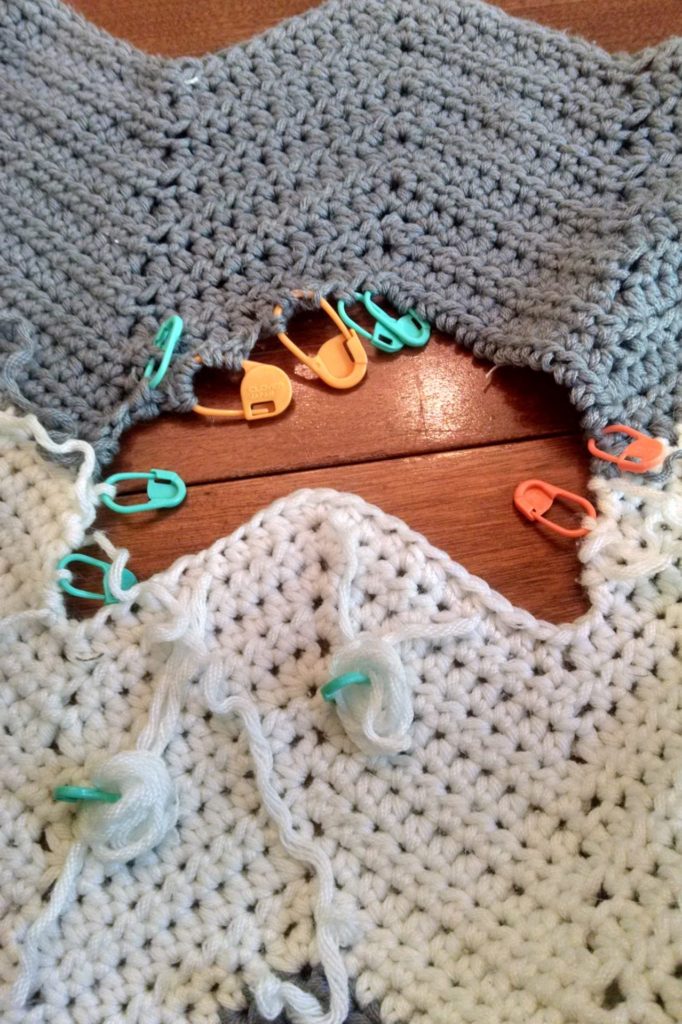
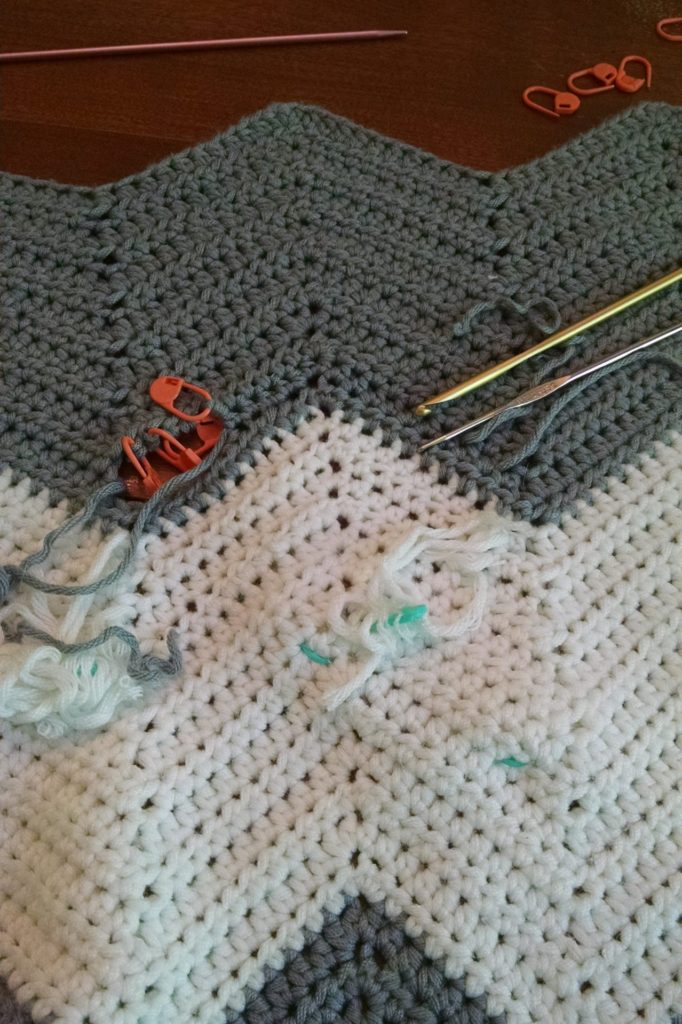
In most cases it’s better to make the hole bigger to make the repair, as long as you have a good amount of yarn to work with.  This way you aren’t working into damaged yarn, and you have enough of the ends to weave in.  Here, I’ve already worked the first row of the repair.  I like to pin my ends out of the way using locking stitch markers.  Because this was worked in rows and turned, I flip the entire blanket each time I repair a row, to work it in the direction of the repairs.  Re-crocheting each row isn’t the tricky part.  The tricky part is the last row when you have to connect the old rows with the new.  You’ll see I’m using stitch markers to hold the base of each of the half-double crochets that have been worked.


IMG_20170502_151107808_HDR

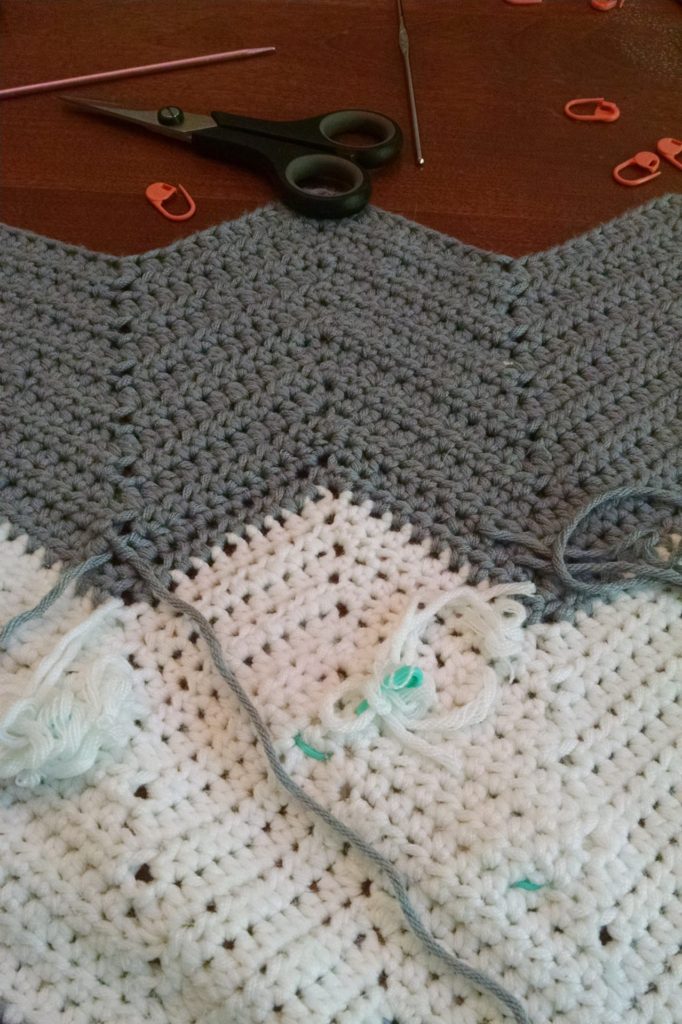
After working a couple of rows normally, it’s time to close up the hole and reconnect the old stitches to the new.  This takes some real patience, as each row you need to crochet a stitch, then take a needle and sew together the newly created stitch through the one above it.  I’m finding that the final row sometimes takes as much time as the entire rest of the repair, depending on how big the hole is!

IMG_20170502_151910461

Getting to the end with all the tools I use in play.  A smaller crochet hook for maneuvering things right where I want them, and the larger crochet hook so I can match gauge.

At this point Mr. Turtle wanders through and asks what I’m doing.  “I’m restoring peace and civility to a client’s home,” was my response.


IMG_20170502_152906802

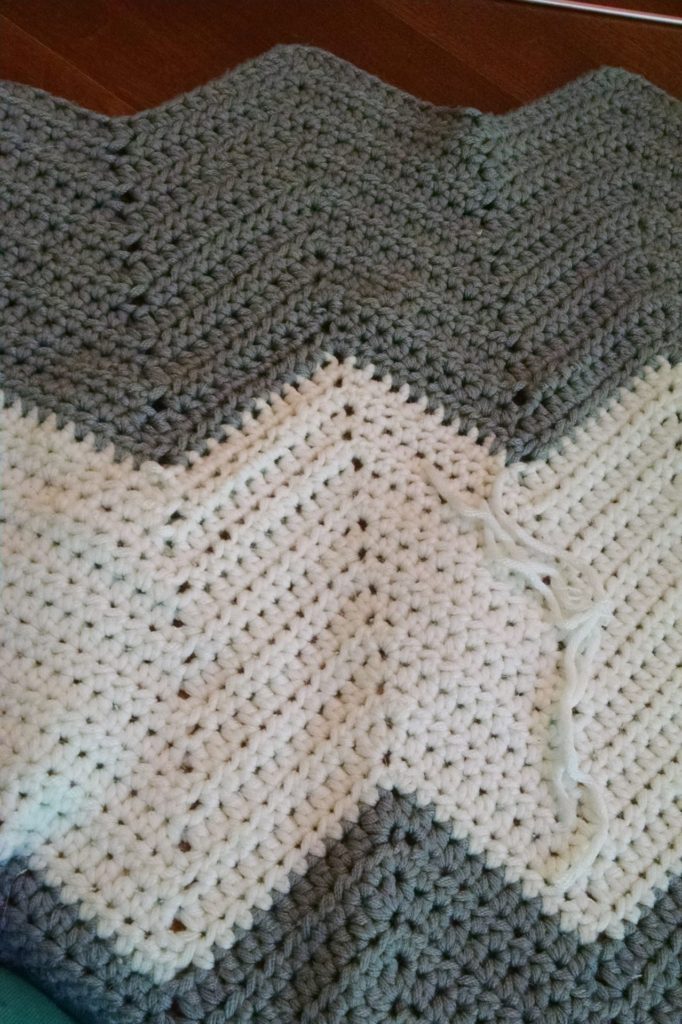
Finally finished weaving things together!  I was so pleased with how the repairs came out!


IMG_20170502_155002822

Now it’s time to finish weaving in the ends and this piece can go back to its owner.


Repair and Restoration: Behind the Scenes

Last Thursday I had a lovely surprise: Jeanne Huber, a reporter in the Washington Post, quoted me heavily in answer to a question about repairing an afghan.  She had been asked a question: was there a way to get the holes in her afghan repaired?  Huber called Fibre Space (one of the yarn stores I often teach at), who in turn recommended her to me.  Huber had gotten in touch with me on a Friday afternoon, and between packing up to leave for a long weekend, I chatted to her on the phone about how I do repair.

Huber did a lovely job with the article, taking my rambling replies and distilling them into the pertinent information.  As a result, I’ve been able to chat with a number of people looking to have family pieces repaired.

Still, it left me realizing that there’s a bit of mystery to what I do, and I wanted to expand a little upon the article.

20479758521_1a7f106415_b

Blanket in the process of being repaired

How I Approach Repair Work

When someone gets in touch with me looking to get an item fixed, I try and have a dialogue with the customer about their goals.  What is it they want from the repair?  What would be the ideal results for them?  Are they looking to have an item repaired so they can use it further or are they looking to have the holes fixed so that the problem doesn’t get worse?  Are they on a budget?   Are they looking for the item to look pristine or are they willing to allow the repair to become part of the character of the object?

Each person has a different idea of what “fixed” means.

21831892331_7742a4b943_bMeanwhile, I’m also looking at the practical part of the project.  How damaged is the item?  How widespread is the wear?  Would attempting to fix the item hurt things further?  When I’m looking into this I’m often learning about the history of the item: if it was stored in a place where a lot of sunlight, heat or humidity could get to it, the fibers may be damaged.  Are the places where wear is showing from use – such as worn out fingers on mittens, or a handle on a bag becoming worn, or because of a different factor?  Often the answers form the type of repairs I can do – mittens that are going to get further wear over each winter are going to receive different treatment than a Christmas stocking that’s taken out once a year.
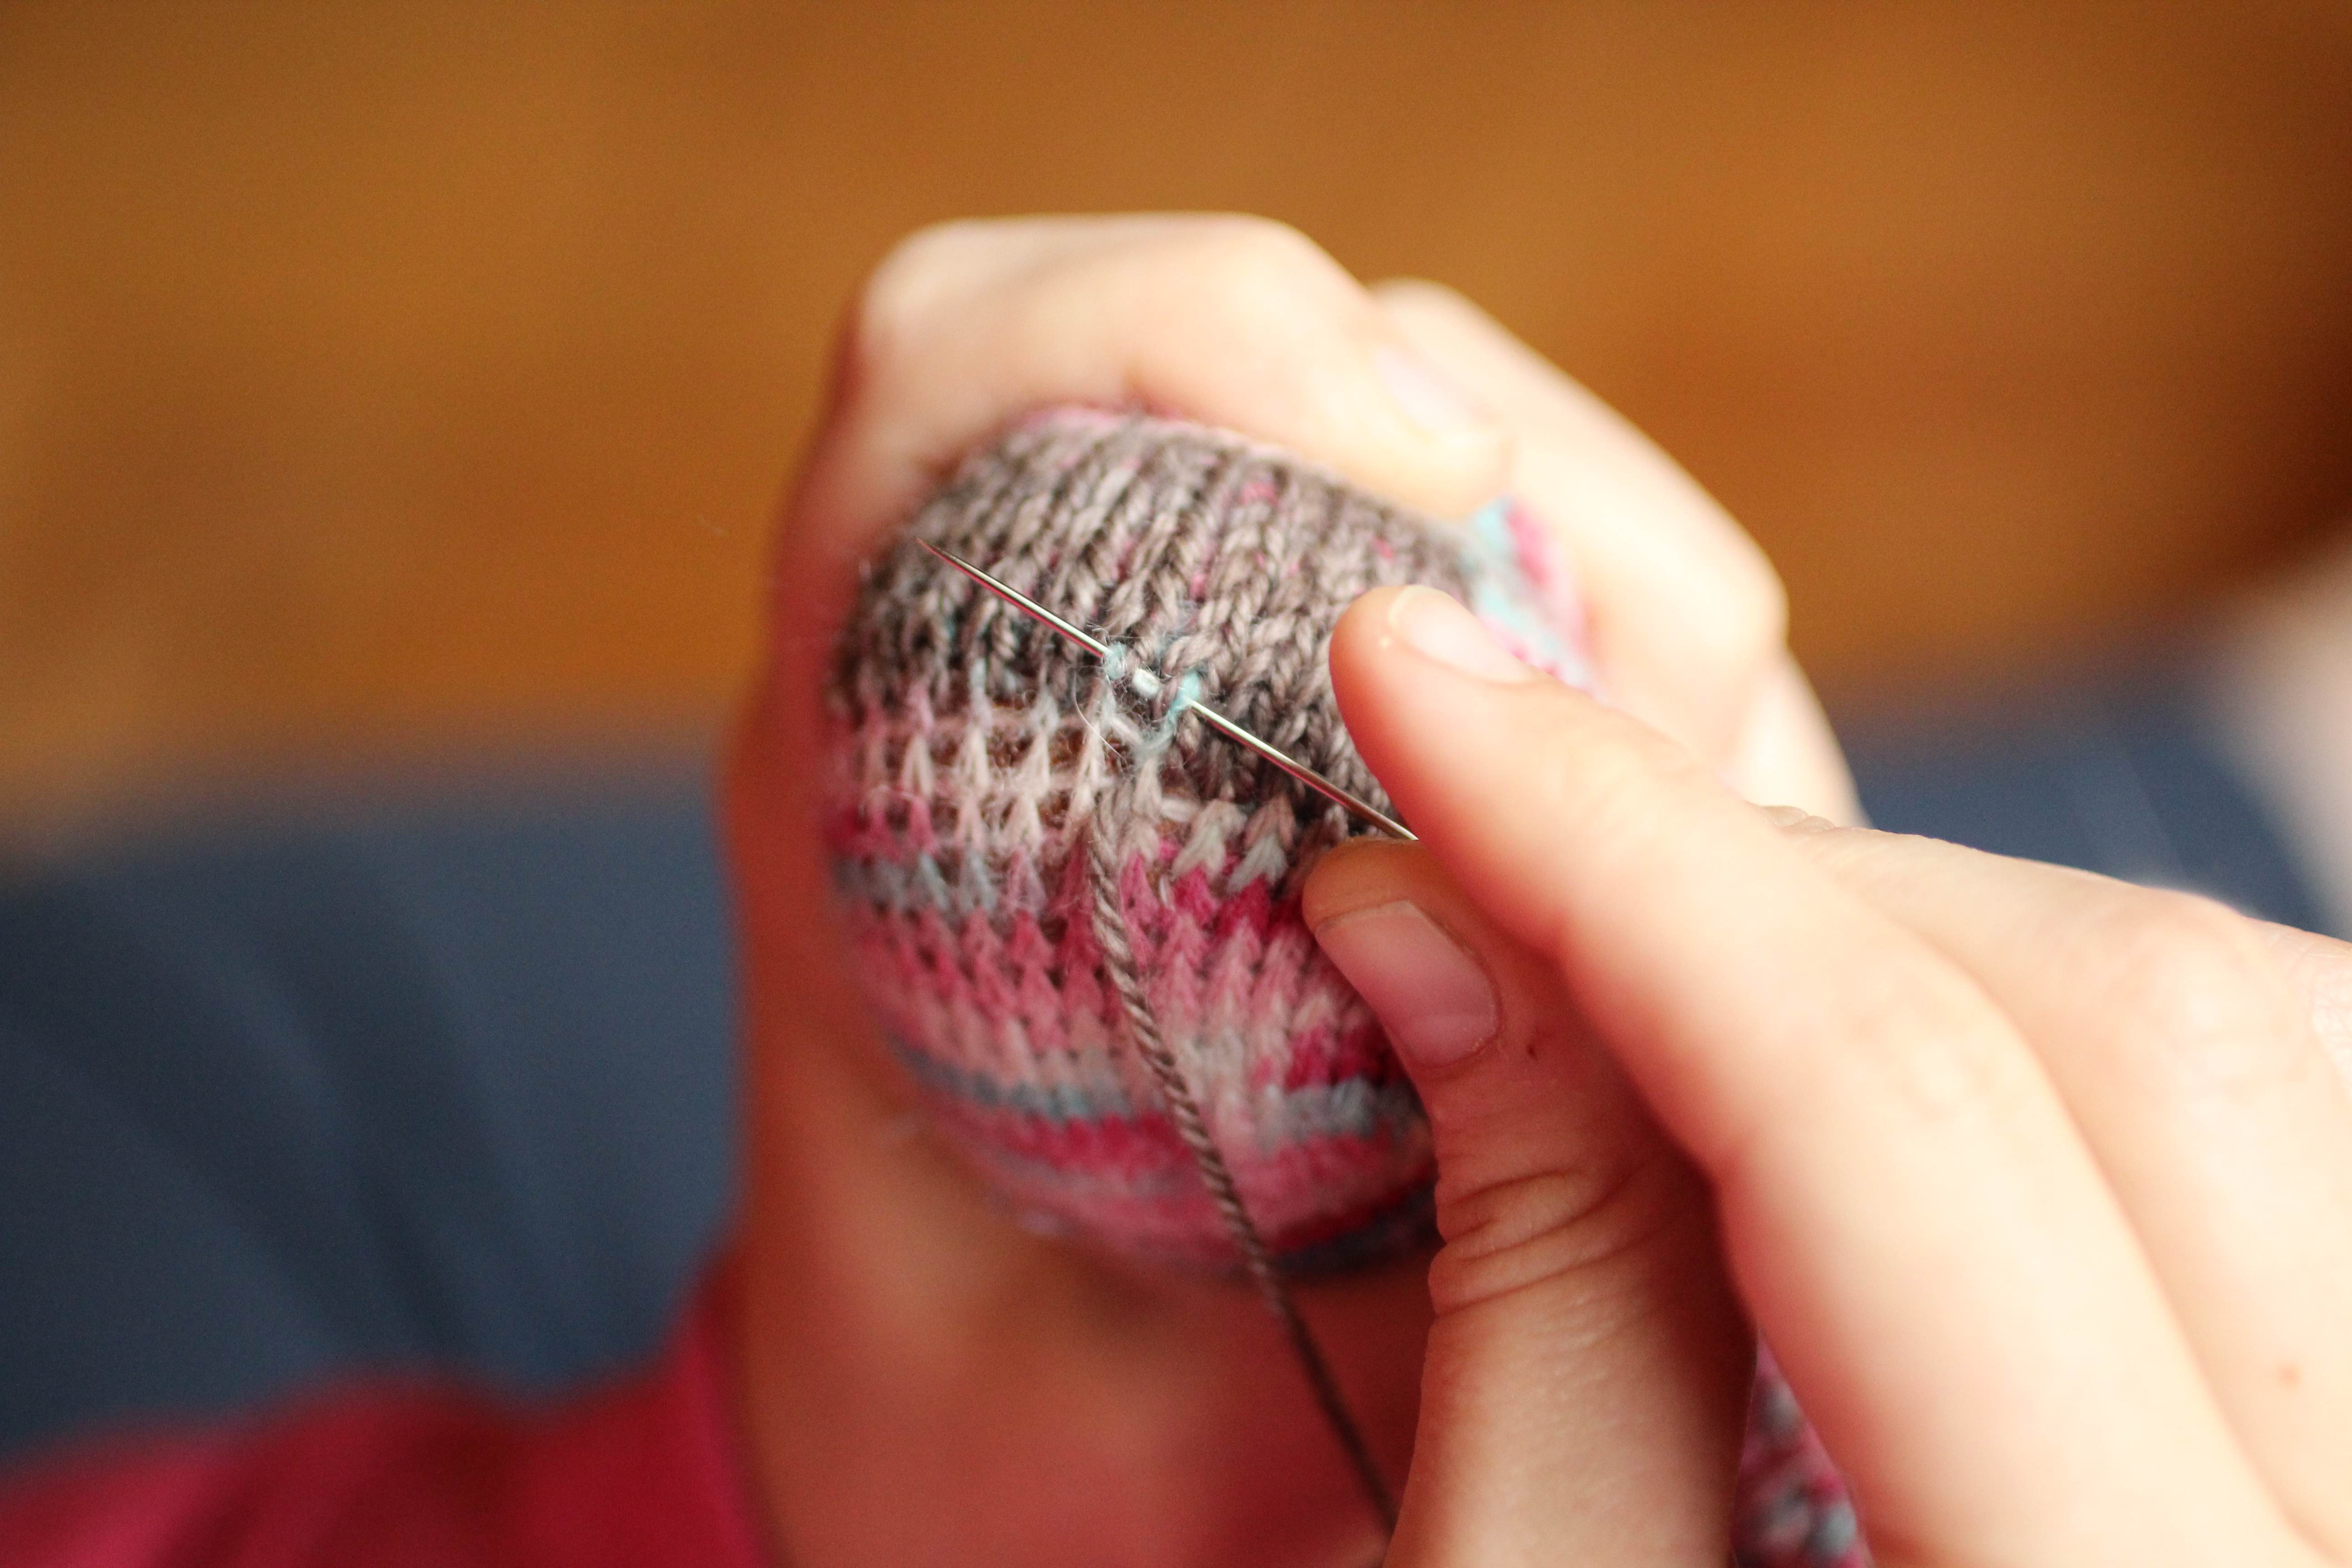
Based on the customer’s feedback, I come back with a number of options.

Sometimes this means the repairs are visible repairs: so that the owners can show where the original piece is, and where the repairs are.  Sometimes this means we transform a piece: adding a cute embroidered kitten over an elbow patch.  Other times the repairs are nearly invisible as I splice new yarn into the old.

Just as I put time and thought into repairing damaged items, so can you put the time and thought into what you want from your repair.  Worried that a piece of yours might need help?  Check out my post on what to look for.  Already decided to have your piece fixed?  Get in touch with me through my finishing form– I’d love to start our conversation!

Rainy Weekend Activity – Darning Socks

Like most of the East Coast, this past weekend was a rainy drizzly grey one.  I bravely left the apartment for teaching classes, but in the evening I snuggled into the couch with my really ugly slippers, a blanket, tea and one of my two current projects.  I’m working a technique that I’m hoping to turn into a design proposal, so I can’t show pictures of that right now.  The other thing I was working on was repairing a pair of socks.

As the old adage goes, “A stitch in time, saves nine.” I’m trying to avoid a more extensive repair by reinforcing the heel right now.  Not a surprise these have worn out – the yarn is stellar, but I wear these socks for 3 days straight.  They get so comfy and nice.
Eagle-eyed readers will notice that the area I’m repairing has twisted stitches, and I’m reinforcing it without twisting my stitches.  While I could repair every row and twist the thread as I’m working, I was feeling lazy.  The twisted stitches were part of an experiment to see if adding twisted stitches on the sole of the sock would reinforce the sock – and my conclusion is, it doesn’t really matter that much.  The sole would be worn out at this point (going on 4+ years that I’ve been wearing them, I believe) no matter if the stitches were twisted or not.
On another note, it’s a really precious thing to get pictures of me working on a project from this angle.  Whenever I try and get this angle on my own, with a tripod, it ends up looking rather awkward.  If not, it takes me an hour and a half to get a shot I’m happy with (seeing as I don’t have a remote trigger). Yesterday, I was up in the morning, and the light coming in the room was just beautiful, and I was looking at my project wishing I could get a picture of what I’m doing, because I never get a good picture of me darning something.
Then Becca, my best friend who is visiting, wandered out of the guest bedroom looking sleepy, and I co-oped her into taking some photos.  Best friend for the win.  Despite being a Nikon girl, she managed to bear with me while I set the settings on my Canon and handed her the camera.
I also tried to persuade her that it would be a good idea to wake up at 6 am and go for a walk so I could take some project photos on her.  She nixed that one.  Smart girl.