MENU

November and December Roundup

I feel like it has been a sprint to the finish from the first week in November until now, but I can say with pleasure, as of the wee hours of today, I have all my deadlines finished until after the New Year.  The finishing is done, the patterns are mailed off, presents are wrapped, Holiday cards are distributed, and I am officially very tired.

A collection of November and December Pictures

In case you missed it the first time, the most popular posts from the last 2 months:
Tutorial: Mattress Stitch or Ladder Stitch
The Importance of Customer Relationship Management
Crochet Reinforcing for Steeking
Warning Signs Your Family Heirloom is Falling Apart
A Helpful Tool to Set in Sleeves

Over at Jordana Paige’s Blog:
The Low Down of Plies: What to Know when Choosing Yarn
What you need to know to set a Zipper in a Sweater
Tutorial: Re-sizing a Finished Sweater 
Changing the Sleeve Silhouette on a Set in Sweater
Magic Sleeve Recipie

Things I pinned.

May you have a Happy Holiday!
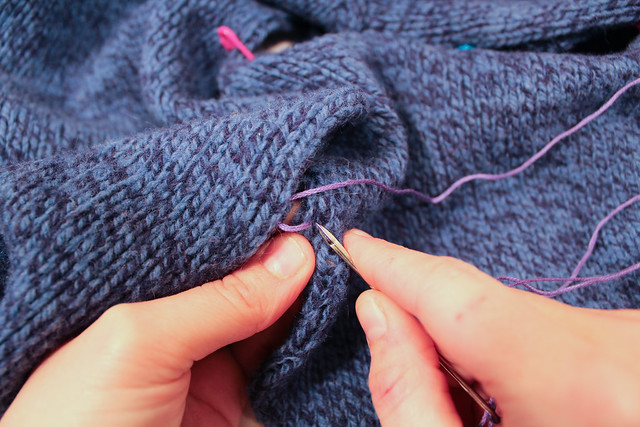
Photo Tutorial: Mattress Stitch

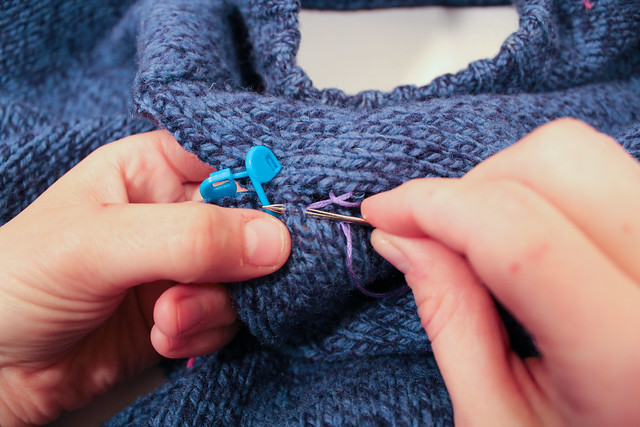
When I’m seaming a sweater, one of the most used stitches I use is the Mattress stitch.  Also known as the Ladder Stitch, I love this stitch because when done right, it’s nearly invisible, adds very little bulk to the seams, is quick to do, easy to take out, and practically perfect.  Let me tell you how I do the mattress stitch.

2 quick notes: here I start in the middle of a project.  Normally I start at the beginning of the seam and work my way up, but that’s hard to photograph well.  Also, I’m using embroidery floss in the tutorial, both because it’s in a contrast color, and because it’s cotton, and easy to pull out.  Most people like seaming with the yarn they used in the project, but if it’s too delicate, or too bulky, embroidery floss in a similar color works beautifully.  Mattress stitch done right should be practically invisible.

mattress stitch photo tutorial, ladder stitch photo tutorial, seaming knits together

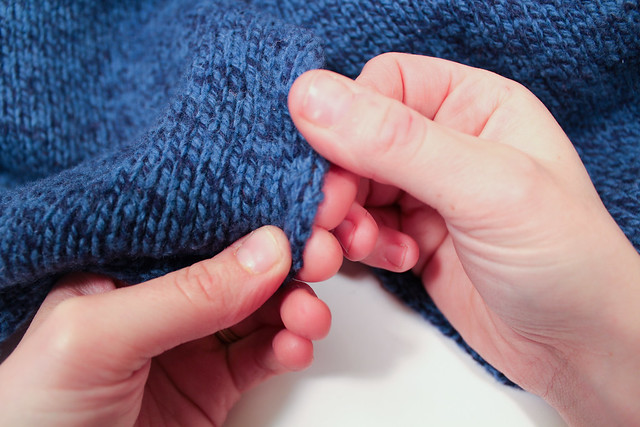
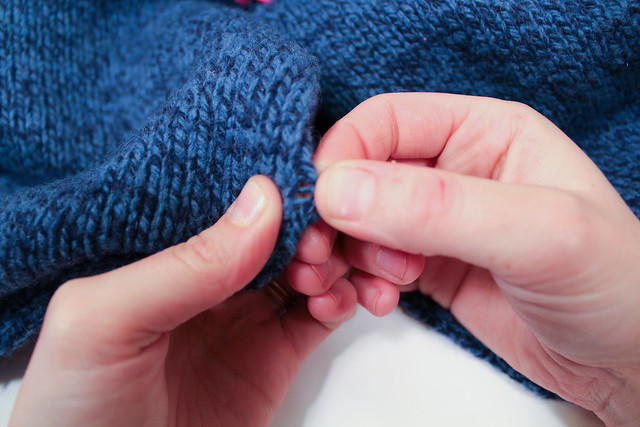
The first part of learning the mattress stitch involves taking a good look at your knitting.  Look between two stitches.  See the horizontal bars that run between the stitches?  This is where the sewing action will take place.  You’ll want to be working the mattress stitch between the 1st and 2nd columns of stitches on the edge of your work.  See Below?

mattress stitch photo tutorial, ladder stitch photo tutorial, seaming knits together

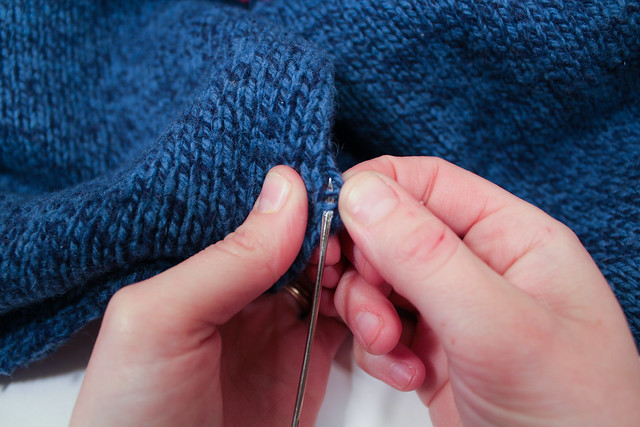
Don’t quite see it?  Let me show you with my sewing needle.  I’ve put 2 of the horizontal bars on my sewing needle.

mattress stitch photo tutorial, ladder stitch photo tutorial, seaming knits together

Okay, so that’s what the bars look like on the knit side.  What about the purl side?

mattress stitch photo tutorial, ladder stitch photo tutorial, seaming knits together

The bars that run between the stitches on the knit side are the purl bumps on the wrong side.  If you are having trouble ID’ing the purl bumps, turn your knitting over with your needle placed where you think the stitch should go.  The needle should be running between the 2 columns of stitches we found before.  See?

mattress stitch photo tutorial, ladder stitch photo tutorial, seaming knits together

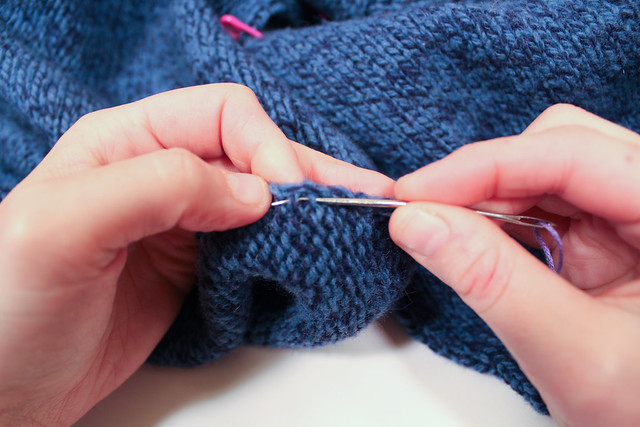
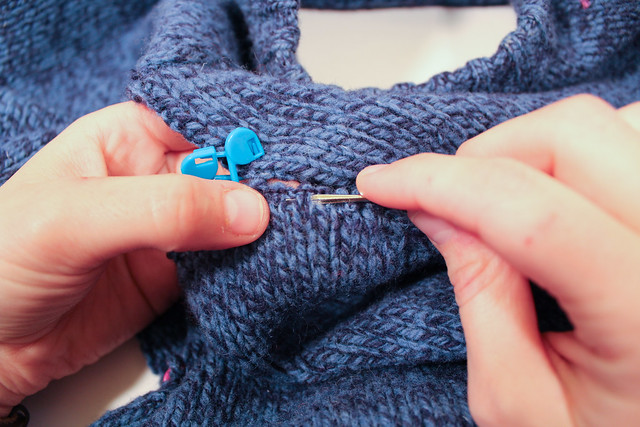
Right, so we now know where the stitches are supposed to go.  When I teach the matress stitch, I always say to go beneath 2 horizontal bars each time.  Some directions will tell you to go underneath only one bar, but when you’re first learning, it’s easier to go underneath 2.  I normally go underneath 2 bars if the yarn is an aran weight yarn or lighter, just because mattress stitch goes a lot more slowly when only going underneath 1 bar.  For aran weight yarns and higher (like bulky) I’ll go underneath only one bar, because each “stitch” is so big. So in most instances, just go underneath 2 bars between the stitches.  I like to start with the right side, just because I’m right handed.

mattress stitch photo tutorial, ladder stitch photo tutorial, seaming knits together

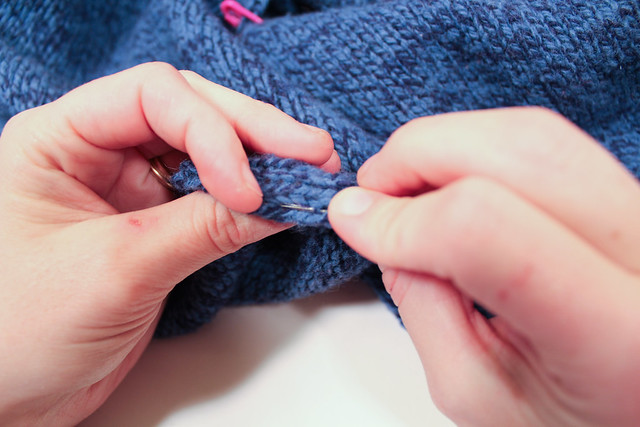
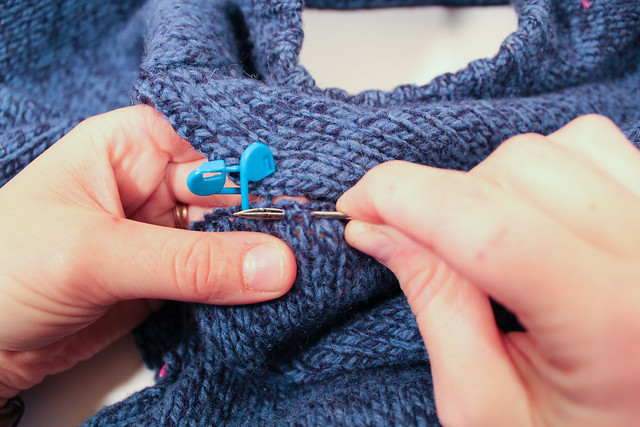
Now pull the needle through, leaving enough thread at the end for a couple of inches of tail.  Don’t pull the yarn through!  See how the thread goes underneath 2 bars?

mattress stitch photo tutorial, ladder stitch photo tutorial, seaming knits together

Now I go to the left side, and put my needle underneath 2 bars.

mattress stitch photo tutorial, ladder stitch photo tutorial, seaming knits together

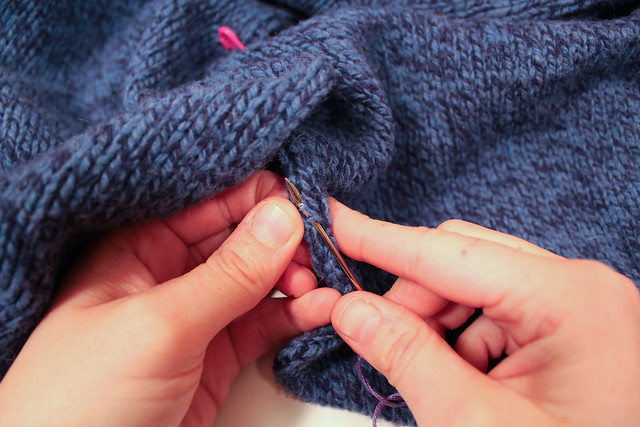
Pull through again.  Congrats, we’ve gotten started!  Now we’re back to the right side.  How do you know where to put your needle next?

mattress stitch photo tutorial, ladder stitch photo tutorial, seaming knits together

Look at the thread that’s coming out from the right side.  Put your needle down through the hole that thread is coming out of, and run it up under 2 more bars.

mattress stitch photo tutorial, ladder stitch photo tutorial, seaming knits together

Pull the needle through.

mattress stitch photo tutorial, ladder stitch photo tutorial, seaming knits together

Now we go back to the left side, find the thread coming out of the left side, and put our needle through the same way we did for the right.

mattress stitch photo tutorial, ladder stitch photo tutorial, seaming knits together

And pull the needle through again.

mattress stitch photo tutorial, ladder stitch photo tutorial, seaming knits together

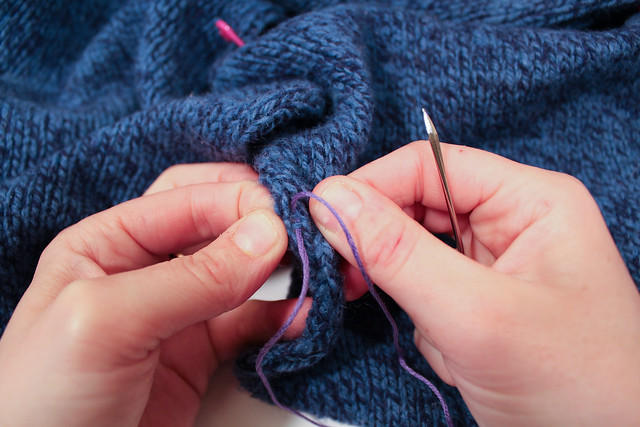
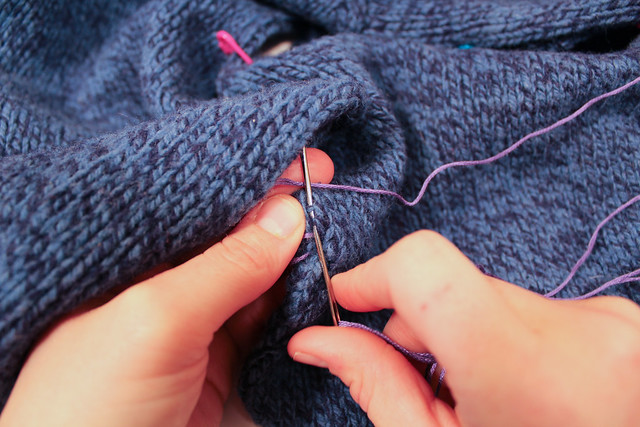
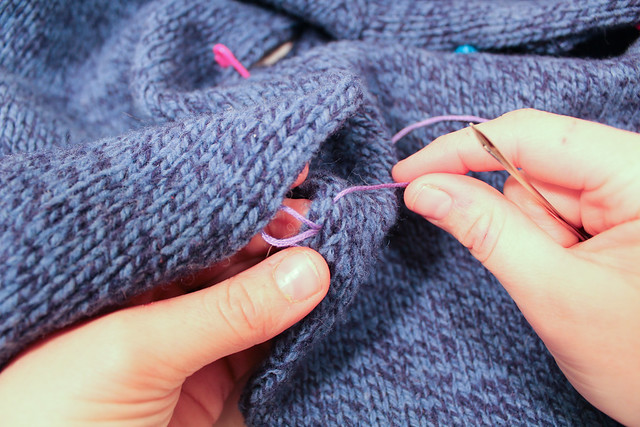
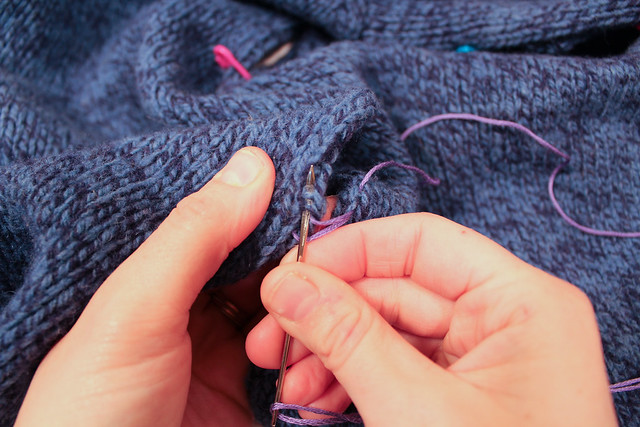
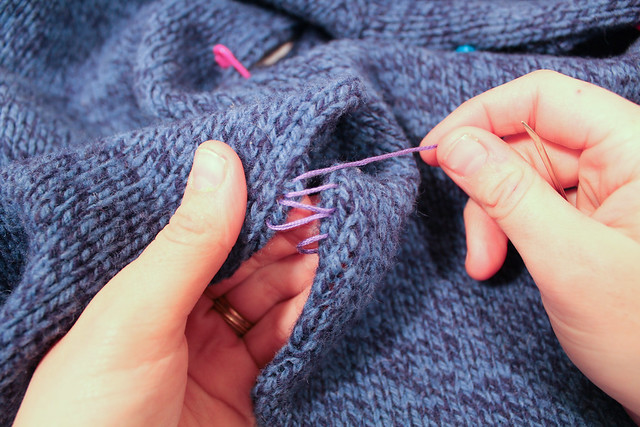
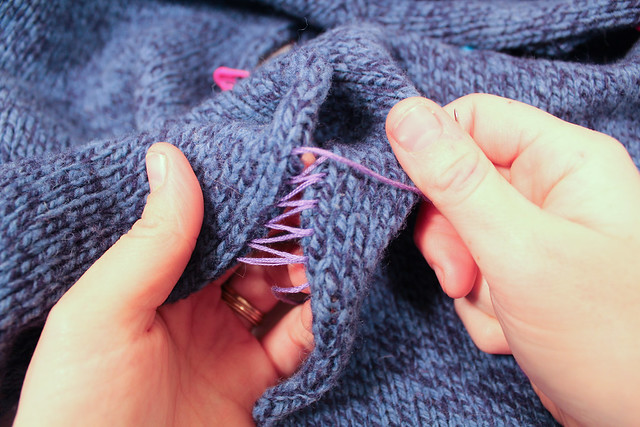
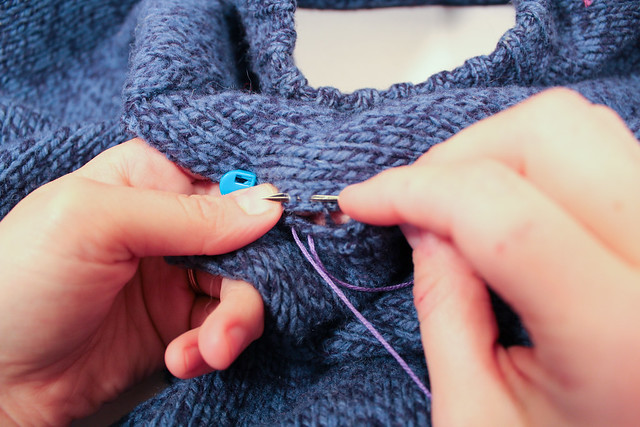
Now, we repeat the pattern, going under 2 bars on the right side, then two bars of the left side.  The stitch starts to look like rungs on a ladder, hence the alternative name “ladder stitch.”  Notice this whole time I’m not pulling the stitches tight, I’m leaving them loose.

mattress stitch photo tutorial, ladder stitch photo tutorial, seaming knits together

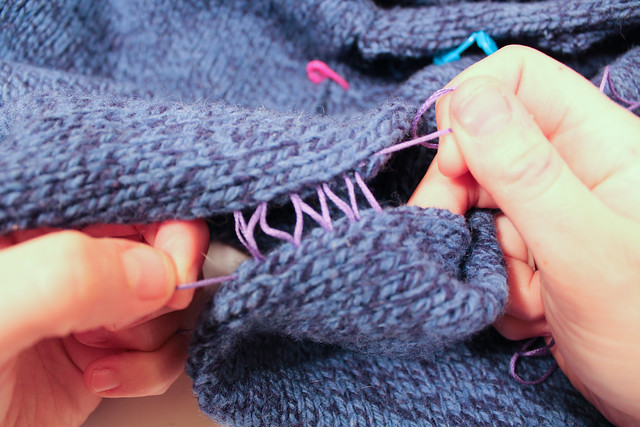
When I’ve got about 1″ to 2″ of stitching, I stop and admire my work, and make sure everything looks right.  Then, I take the tail, and the thread that’s attached to the needle?

mattress stitch photo tutorial, ladder stitch photo tutorial, seaming knits together

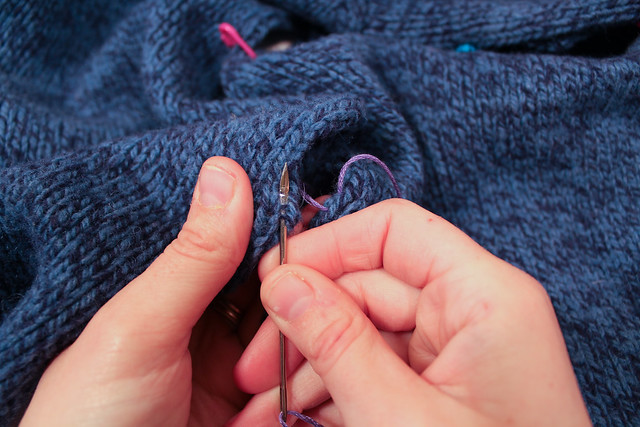
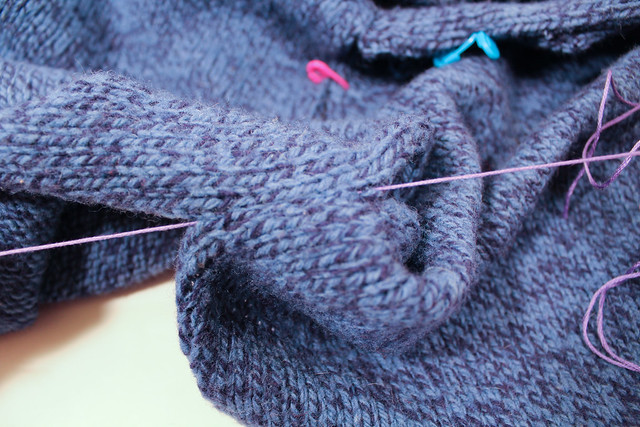
I pull both ends tight.  Note that I’m not letting the fabric wrinkle or scrunch.  I’m just pulling on the thread.

mattress stitch photo tutorial, ladder stitch photo tutorial, seaming knits together

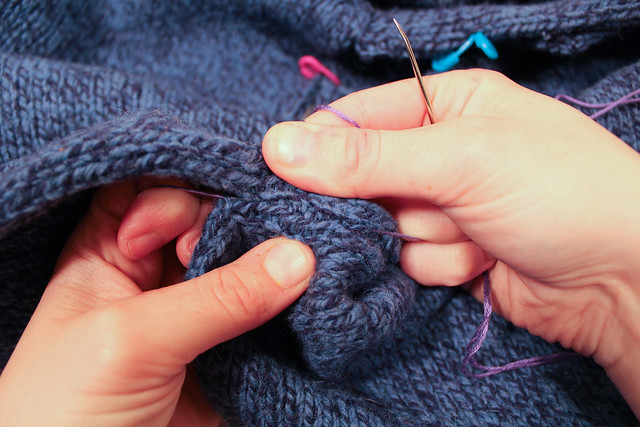
There’s a quick trick to find out if you’ve pulled the thread tight enough.  If  you can pull the 2 pieces of fabric apart and you can see your stitches, it is still a little loose.  Pull both ends again.

mattress stitch photo tutorial, ladder stitch photo tutorial, seaming knits together

Now those stitches are tight.  See how I’m holding the thread with both ends?  At this point, neither end is secured, so if I pulled on the fabric without holding the ends tight, the stitches would again loosen up.  This will mitigate when you work more of the seam.

mattress stitch photo tutorial, ladder stitch photo tutorial, seaming knits together

Now, I loosen up the last stitch I did, so I can find where I need to go next, and I continue.

mattress stitch photo tutorial, ladder stitch photo tutorial, seaming knits together

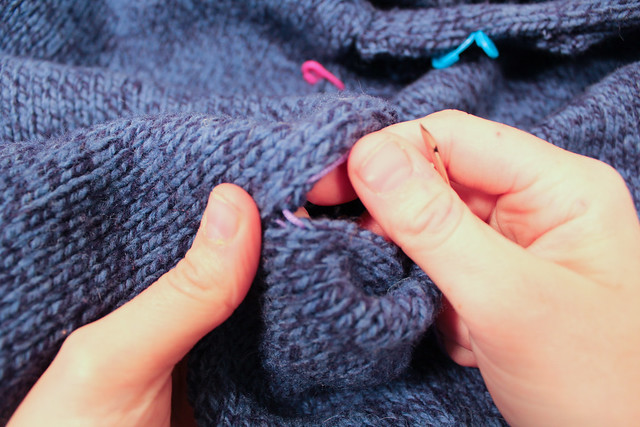
Now, what happens if you are working columns of stitches to rows of stitches?  You still use the mattress seam, the placement on the row side is just a little different.  Take a look at the edge of your knitting, where you bound off or cast on.  See how the v’s connect to make a zig-zag?  This is where we’ll be working.  Let’s look at an individual stitch.  Here, I’ve got it lifted up by my needle.

mattress stitch photo tutorial, ladder stitch photo tutorial, seaming knits together

You are going to go down through the middle of that stitch, between the 2 sides of the “V.”  Then, you’ll come up from under the fabric through the next “V.”  See how you still have 2 strands on the sewing needle?

mattress stitch photo tutorial, ladder stitch photo tutorial, seaming knits together

Pull the yarn through, leaving the same type of tail you left when working the mattress stitch before.  Now, on the column side, work the mattress stitch as normal.

mattress stitch photo tutorial, ladder stitch photo tutorial, seaming knits together

Now, go back down to the row stitch side.  See how the thread is coming out, same as it did with the other matress stitch?  You’re going to go down through the stitch with the thread, and go up through the next stitch.

mattress stitch photo tutorial, ladder stitch photo tutorial, seaming knits together

And repeat over and over again, until you run out of fabric to stitch on.

It’s important to note, you can switch between working columns to columns, columns to rows, rows to rows, and back again.  You can be seaming on the stockinette side, and then switch to seaming on the row side.

Got questions?  Please ask in the comments, on twitter, or on facebook.  Or, if you liked the tutorial, tweet it, facebook it, or share it!