MENU

Updates to the Business

:

I’m currently experiencing a high number of potential clients reaching out for repair estimates. While I’m looking into hiring a digital assistant, please be aware that I will be extremely slow to get back to new client communications. This will extend through the end of February, as I finish two very large repair projects.

I will also be on vacation Mid December through the first week in January.


The Longer Explanation

I’ve been honored to be trusted by a few clients in the past year to work on creative, large projects that have taken up the majority of my time. It has been refreshing to be able to do repairs that are in a slightly different wheelhouse. Meanwhile, the practical side of running my business: responding to emails and generating estimates and billing clients has become to wear on me.
It’s never been my forte, but in the past, Mr. Turtle has been able to pick up the administrative slack. However, between his commitments to the Navy Reserves and an increase in responsibilities for his day job, he hasn’t been able to help with that side of the business. I’ve been putting off hiring someone to take over those tasks, and thus they have been falling to the wayside. It’s not ideal, and I have some time set aside the beginning of March to figure out how to hire a part time assistant. (Do you know someone? Reach out to me! I’d love a suggestion or two!) Hiring an assistant will mean training them and figuring out what tasks I’d like to offload. It has seemed like a daunting task.

An Example of a Great Repair Request

Have you ever wondered what goes on before I take on a project to repair?

Before I accept an item to fix, I like to have a dialogue with clients about the piece, their goals, and my ability. All of this starts with the Repair Request I have on my Contact Me Page.

So what makes a good repair request? I often have to clarify to potential clients what I need to come up with an accurate estimate to repair the item they’d like me to work on. When you, the client, fills out our contact form, it asks you a series of questions such as:

  • How important is matching color or matching fiber content?
  • How important is it to you that the repair be machine washable vs. needing to be washed by hand?
  • How are you intending to use the item?
  • How fragile does the fabric appear?
  • How important to you is cost?
  • How important is it for you to preserve as much of the textile as possible?

When you answer these questions, they help me understand where your priorities lie in the the repair. Some repairs can be functionally stable, but the color or fiber content might not be the best match. Finding a good color match can be time consuming – are you willing to reimburse me as I purchase different yarns to find the best match for the repair? If you are intending to put the item on display vs use it everyday, that may influence how much of the object needs to be repaired – daily use means I should also prioritize areas I see are going thin, because with more use they may easily become holes soon.

One of the best ways I can get a sense of the item (aside from sending it to me) is to take good photographs. Take a look at the photos below as I show what was really helpful about them.

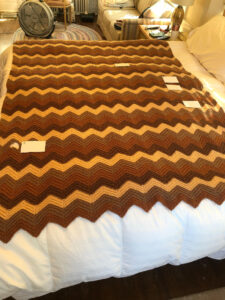
This is a great overall photo of the piece. I can see the pieces of paper that mark the holes, and I know where the holes are in relation to each other. It gives me a sense of the scale of the piece, the overall pattern, and if there are any edgings or other factors I have to take into account while working.

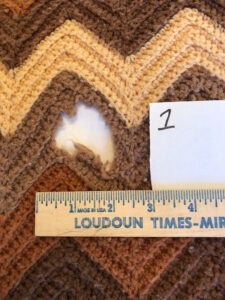
Great photo with a number. The ruler provides a lot of detail for me: I can tell the size of the yarn and how big the hole is. The hole is filling enough of the frame that I can zoom in to look at how the fibers are worn away (ie: frayed, cut, ragged).

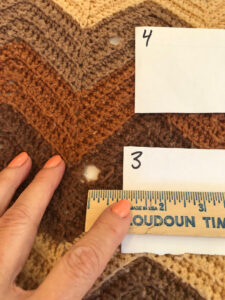
Again, the ruler is super helpful. I can also tell the customer had their hands on either side stretching the fabric slightly so I could see everything.

So helpful to have number 3 and 4, which are close together, numbered! In cases where holes are close together, the location of the holes can impact how I approach the repairs, so it’s helpful to see that relational information.

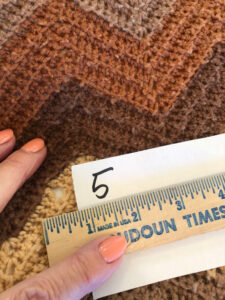
Here the hole was small enough that I couldn’t see it in the overall picture, but can see it here. It was so helpful!


One of the other things this client did was mark each hole with a piece of string. This really saves both of us time. While sometimes people don’t realize there is a hole that I catch, the time it takes for me to find holes that the client already knows about is time I could use on doing repairs. Ultimately it saves us both time, and in the end, the client money.

Got a piece you’d like me to look at? Now that you have a sense of what I’m looking for, head over to Let’s Connect, and get the conversation started.

2021 Changes and Prices

This post is going to be a bit of a tone change, but I hope you’ll bear with me. It’s something I’ve been putting off writing about for the past two weeks, as it’s not the fun part of talking about the pieces I get to work on and posting beautiful pictures.  Instead, this is more the realm of the business side of Tinking Turtle, which is something I honestly prefer to leave to Mr. Turtle most of the time.  But, I’m the owner and face of the business, so this is a decision I need to own up to.

As 2020 draws to a close and we begin a New Year, it’s time for me to take stock of the business and the direction it has been going.  We’ve seen some big changes to Tinking Turtle in the last 2 years, as we’ve added to our family and pivoted away from design work to more repair work.  It’s been a tough thing for me, as I honestly love designing, but the tight deadlines were killing both our family life and my hands.  I’m no longer able to pull an all-nighter to finish a shawl that needs to be sent into the magazine in two days!

Which brings me to the purpose of this post: I’m going to be changing my pricing, and I wanted to share some of the reasons I’ve come to this decision.

What Changed?

  • The type of work I’ve been doing has been shifting.  I’m doing a lot more larger and more complicated and specialized repairs.  I’ve built up relationships with other individuals in the knit/crochet industry, and have been happy to pass comission knitting their way when it’s been more standard.  But I’m doing more specialty art projects and handling more heavily damaged pieces, and I want my pricing to reflect that I’ve shifted to a much more specialized sort of work.
  • I‘ve made investments to be able to take on more damaged pieces. Over the past five years I’ve develped a special space to store and process pieces as they come in.  I’ve invested in specialized equipment, like the ozone generator to treat pieces damaged by odors, smoke, moths, and other materials. I’ve invested in other behind-the-scenes tools to better protect and preserve the heirlooms I’m working on.
  • I’ve also made changes to how we handle pieces from a liabality standpoint; with this I am taking on more risk, and hence, have higher insurance prices and other risk mitigating expenses.
  • My volume of projects has increased! Now, don’t get me wrong – I’m happy about this. BUT! The reality is that knitting, crocheting, seaming, blocking, pinning, etc are all hand and arm heavy activities. I’ve been transparent about how this year I had to have surgery for my wrist.  I’m not saying my career was entirely the reason I had to have the surgery, but I have to be careful and take time to stretch and take care of my hands.
  • I’ve gotten better. As I practice more and learn more, the quality of my finishing and repair has increased, and I believe that my expertise is worth it!

What does this mean for you, the Customer?

  1. Coming January 1st, my prices will be increasing on Finishing & Repair work.  My hourly rate will increase from $60 to $70.  Many of the categories in my Finishing line of services will also change – some won’t change as much as my hourly rate, and some won’t change at all.  But most things will be increasing by a little.
  2. Note: for any of you who have been issued a codeword, as long as you have filled out the customer intake form, you are set! Your projects will be charged under the old system. Unable to fill out the form and get your piece in the mail? Drop me a note and we can work with you.

Got questions about the changes?  As always, you can leave me a comment, or drop me an email, and I’ll be happy to answer them!

Thank you so much for being loyal customers!

Preparing a Hole For Swiss Darning in a White Knit Throw

One of the first steps when I get a piece is an initial evaluation to make sure everything is ready to be worked on.  It always helps when clients secure stitches and mark the areas that need to be worked on.  In this paticular case, a hole had developed in a supremely soft knit afghan… clearly it needed repairing to be used this winter!  I feel like the end of 2020 has been a year of wanting to snuggle under a blanket, especially as in the Northern Hemisphere it’s getting cold.

hole in white knit throw held together with safety pins

hole in white knit throw held together with safety pins

[Read more…]

Mending a Midwest Inspried Crochet Afghan

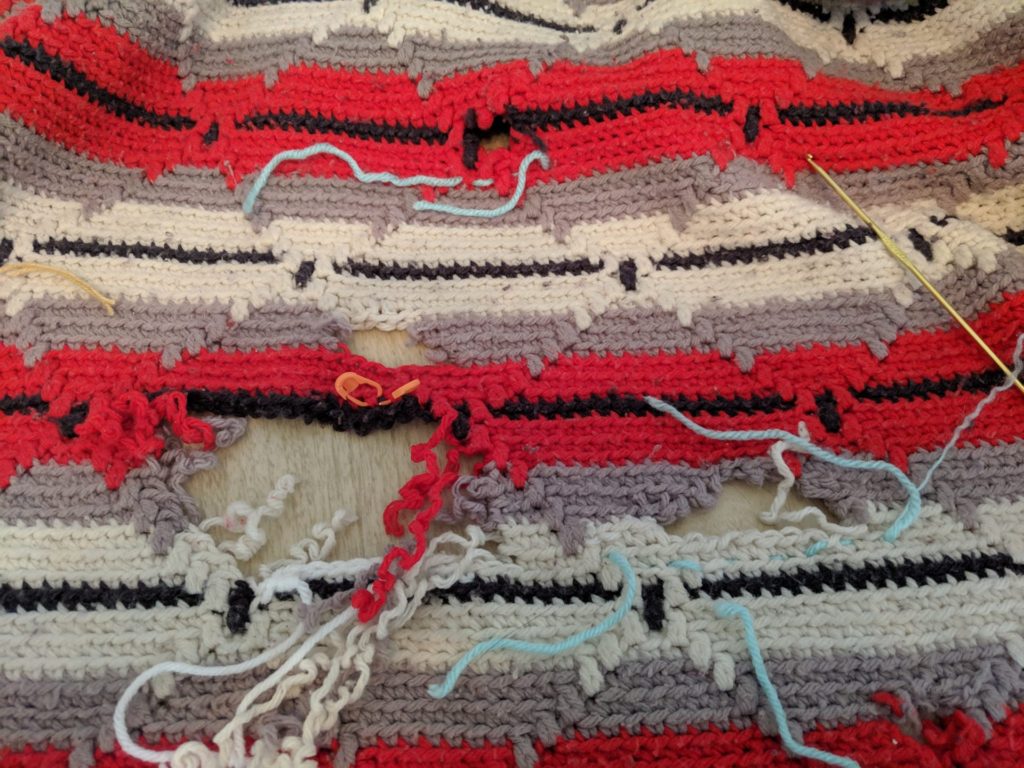
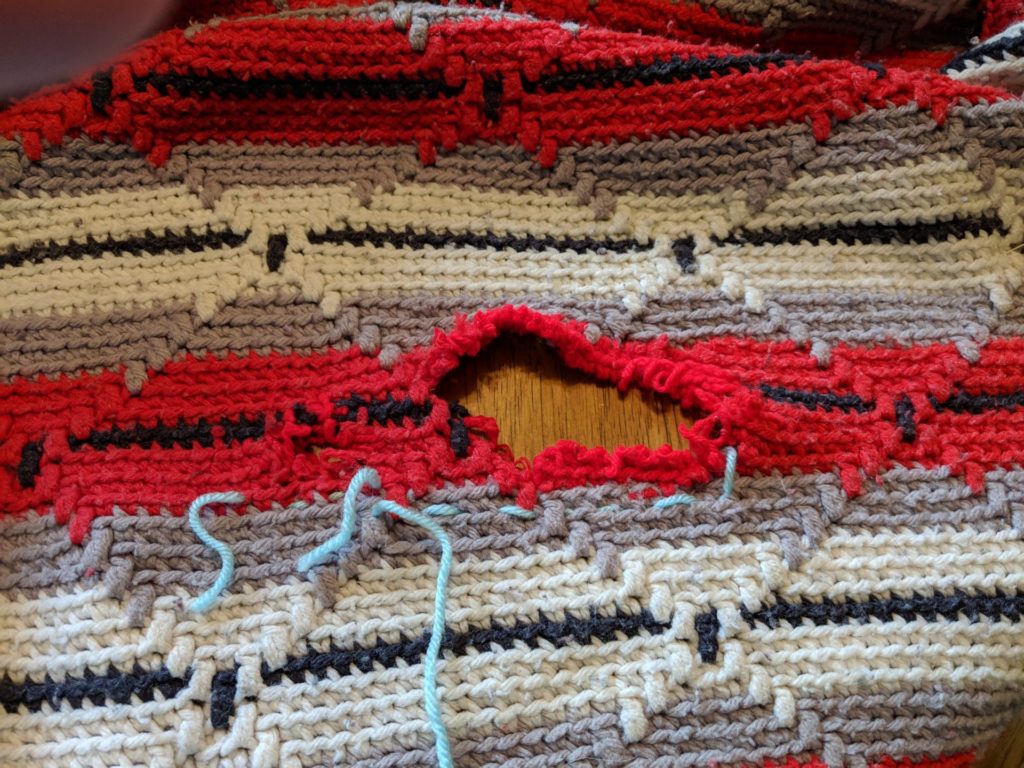
This midwest inspried afghan had a lot of damage done to it over the years, and the owner contacted me about doing some repairs and mending to bring it back up to shipshape! This was an interesting piece – each row was done through the back loop (hence the distinct ridges, and each row the yarn was cut on the end, resulting in the creator only ever going from right to left when working on it.  The cut ends became part of the fringe.

It did make the repairs a lot easier to do, as I didn’t need to flip the blanket over for each row. Working through the back loop does mean that the last row invoves a lot of sewing, though.

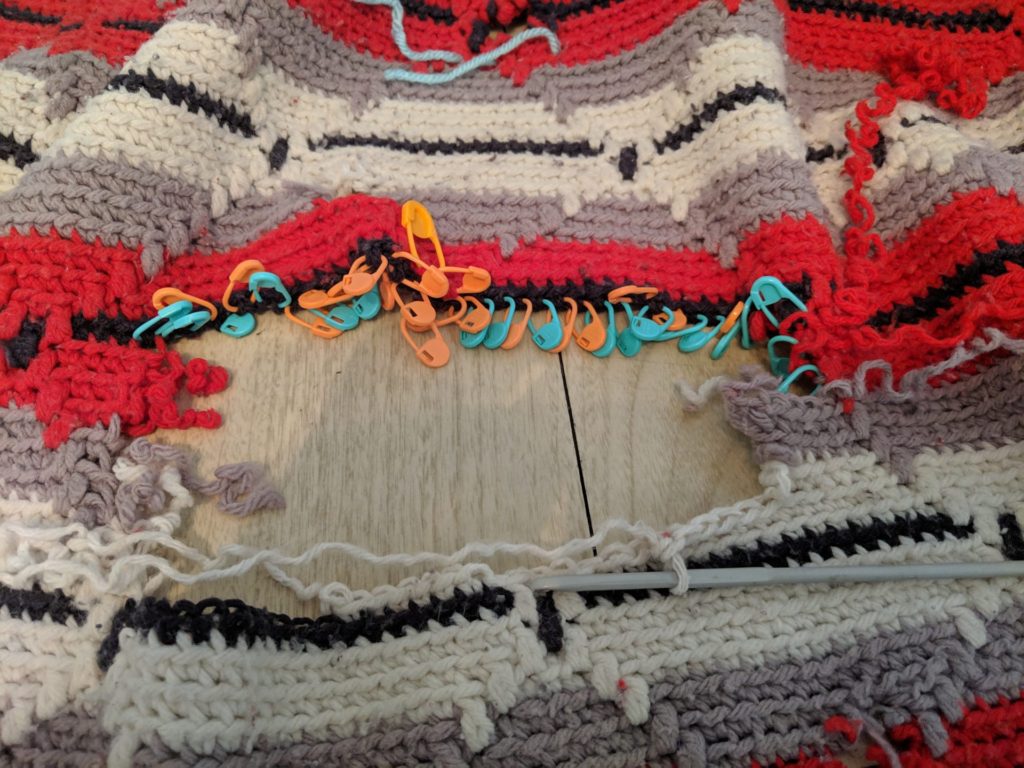
The two holes right above the the black line were so close together it made more sense to pull out the yarn between them and work them as one large hole. I decided to tackle that first.

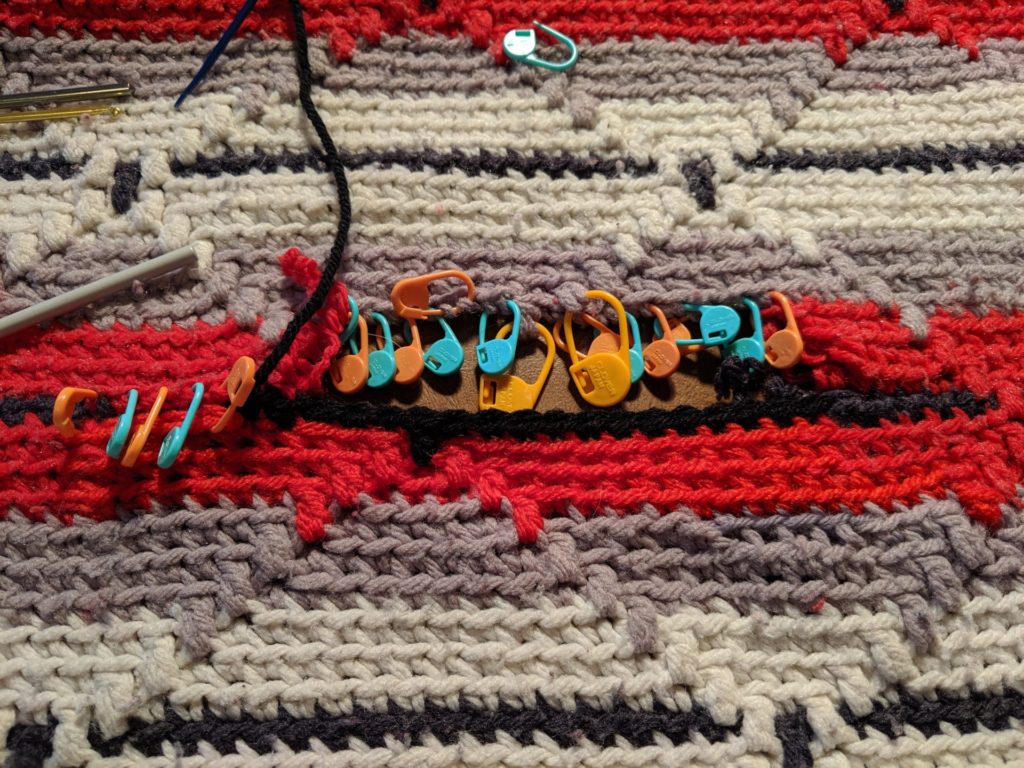
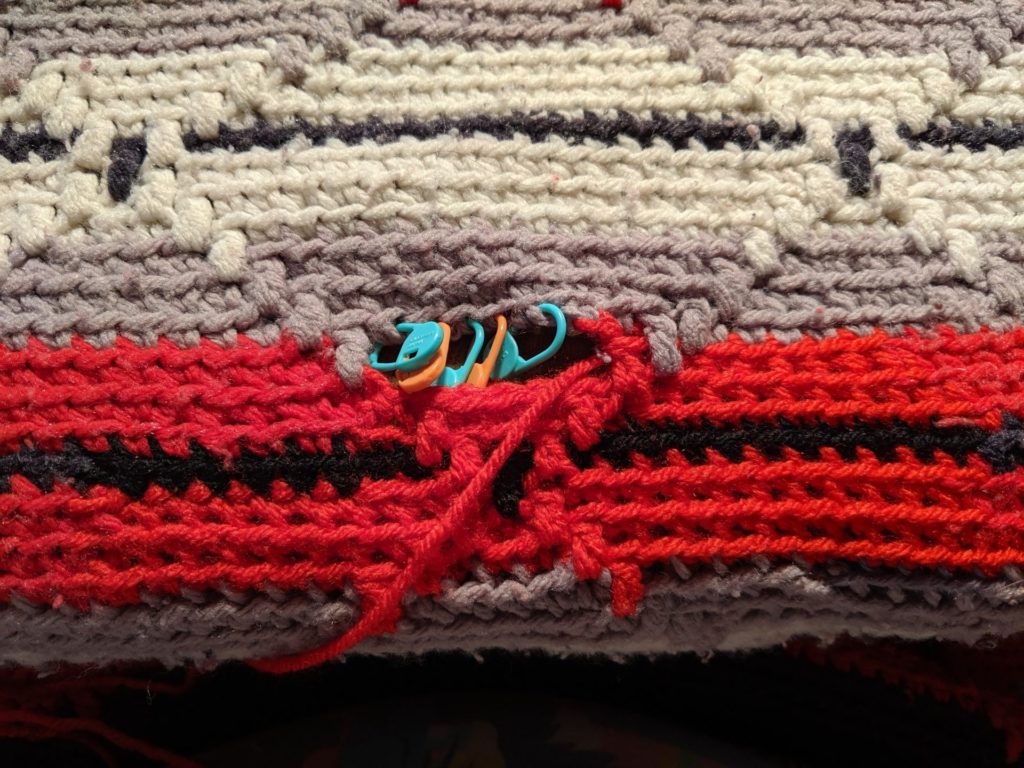
To keep track of each stitch, I used locking stitch markers to hold each leg of the single crochet together.  This will help when I reweave the last row. 

Nearly done! After working each of the rows, I’m finishing up by joining together the last row. I had to take out the black row later in the process as it had more damage to it than I realized.

Finally Done!

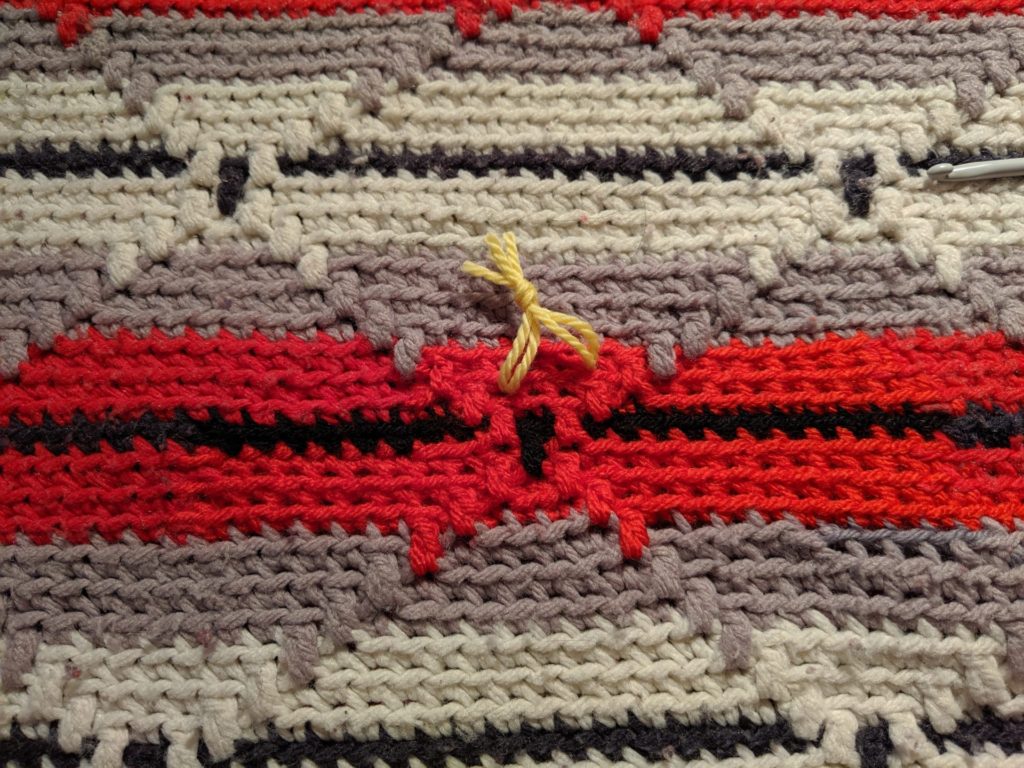
Now I’ve got everything worked up and the ends woven in. I mark each area of repair with a piece of yarn, so the repairs are easier to find. When the clients get the repaired piece they can take the markers out.

See that the stitches look a little more lively where I’ve done the repairs? This will improve as the piece gets used, and the newer stitches gain some wear.

Now I’m tackling the repair that is further up in the blanket. You’ll notice there’s the larger hole, and to the left, another smaller hole. It made sense in this case to also pull out and combine the holes. The yarn in between the two holes was worn away enough that I was concerned about its stablility.

As in many repairs, this is a slow process of just adding the new yarn to the old, crocheting across the row, and then sewing and reweaving the old to the new.  What you can’t see on the backside is all the ends I still need to weave in.

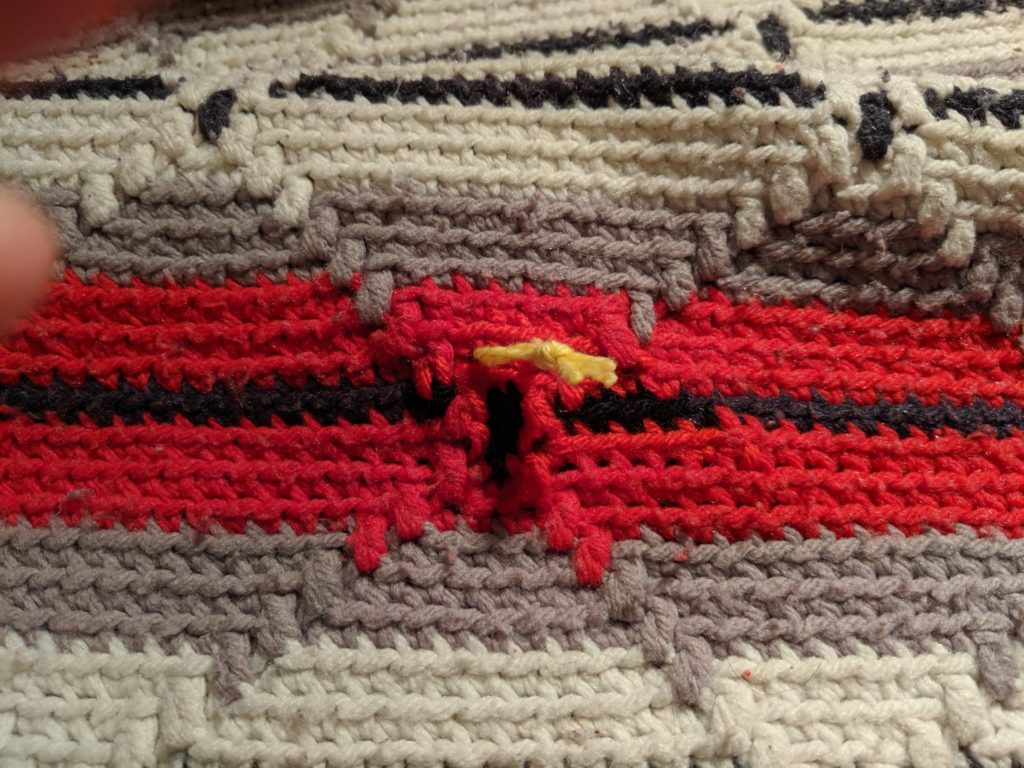
And now we’re at the end: the hole is closed up and the ends are woven in.  A bit of yarn to mark the spot.  Now it’s time for this afghan to have a quick wash before it leaves to go back to its owner.

Recent Repair of a Knit Afghan

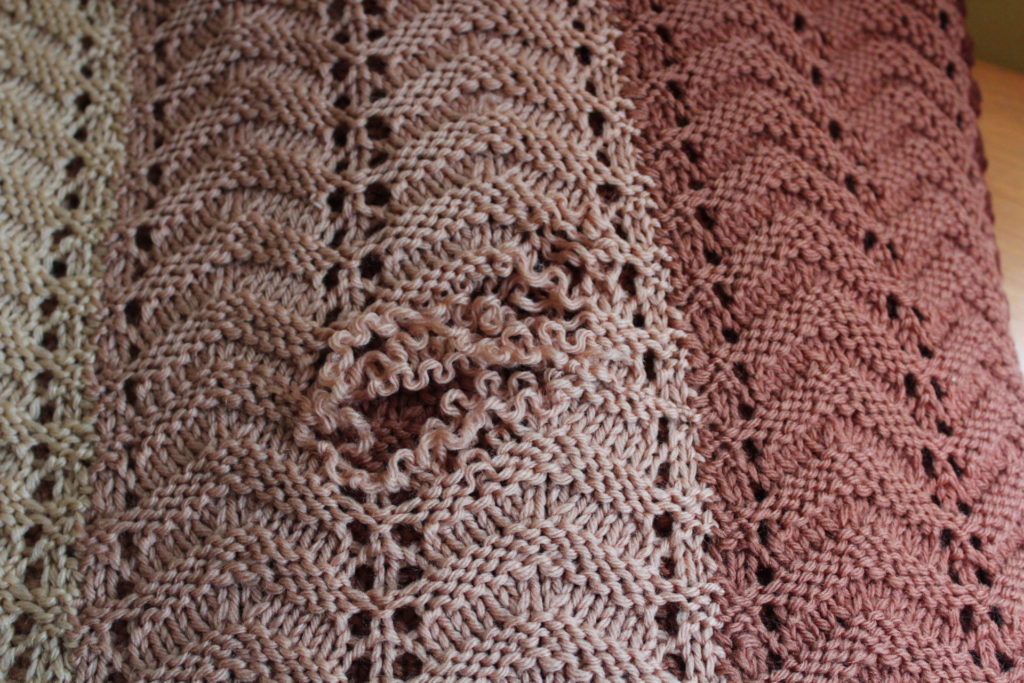
Now that I’m getting back into the swing of things, I wanted to document a unique repair that I worked on.  This 52-year old afghan was in need of some TLC before it got handed off to the next generation.  Working with this piece was a true pleasure, with the yarn in remarkably good condition for it’s age.  The afghan was a huge ripple pattern, with 9 panels joined together by intarsia.

INTARSIA. Think about that… it wasn’t seamed.  It was 9 balls of yarn that were worked on at the same time across the blanket.

But back to the repair!  There were several holes – mostly along the edge where ends had worked loose, but also one spot in the center of the piece.

[Read more…]

Much Beloved Heirloom Crochet Tablecloth Made New

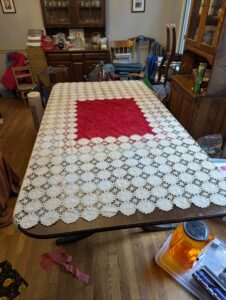
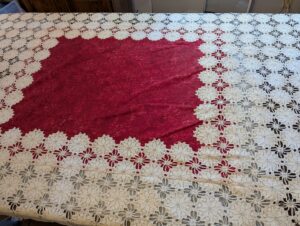
rectangular lace crochet tablecloth with center border and then outer border made up of flower motifs

rectangular lace crochet tablecloth with center border and then outer border made up of flower motifs

One of my favorite repairs, recently, has been a series of two different crochet lace tablecloths I took on.  These two pieces were both at least 30 or more years old, and were in pretty good condition.  Frank from Textile Restoration Inc in Chicago had sent the client my way.  I’ll highlight the first of the tablecloths today, and I’ll be highlighting the second of them a little later.

The first tablecloth, which I thought of as “Field of Flowers” when I worked on it, was a huge piece, at least 5 1/2 feet by 4 feet.  It was made of a center pannel of 4 x 12 motfs, an inner border of triangles, an outer set of motifs 4 deep, and then larger second outer border.

Most of the holes were areas where motifs that had been joined as the tablecloth was worked had come undone and unraveled – not uncommon, even in pieces where every single end is tightly woven in.  The areas where two motifs join together tend to be an area that recieves more stress.

[Read more…]

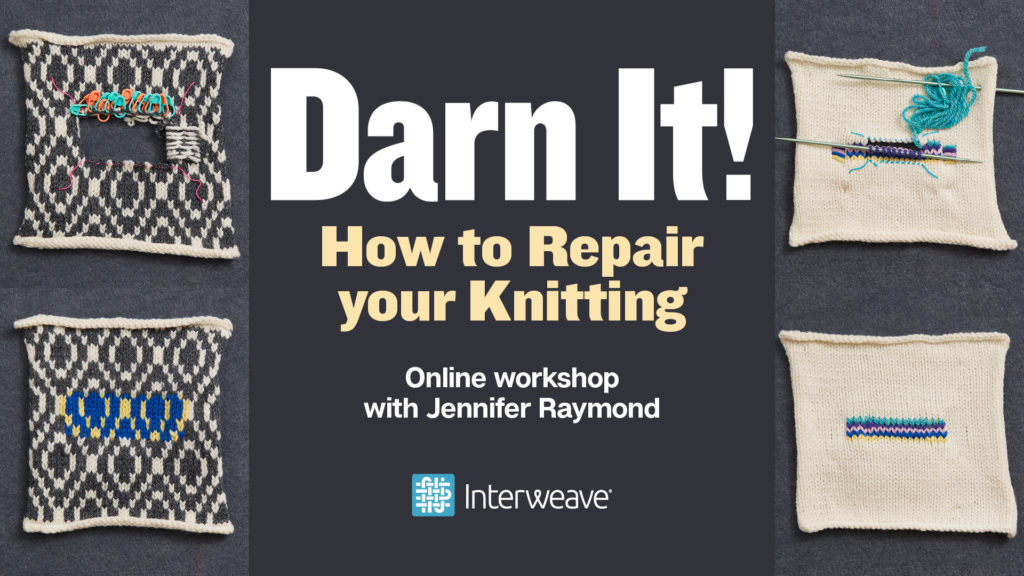
Darn It! How to Repair your Knitting Online Workshop Available

I’ve been working on my new class from Interweave, Darn It! How to Repair your Knitting for several years.  Since I began offering repair courses, I’ve wanted to find a way to get this information to students who were not in my geographic area.  This started when I posted about getting a copy of Rena Crockett’s Flawless Knit Repair.  People from all parts of the globe would email asking how they could get a copy, or asking if I’d be willing to scan a PDF version of the book.  (I was never comfortable with that solution, as I make my living off of my copyright, and I’ve never been able to contact Crockett or her realitives to see if they would be OK with that action.)

But in the back of my brain I was trying to figure out how I could create my own, readily available version of Crockett’s book.  Becasue as much as Crockett’s book was instrumental in my own start into repairing things, I’d found some other methods of working that I wanted to share with people.  More than a year ago I teamed up with Interweave to try and create a course that would answer the need I’d seen.

I’m proud to announce that Darn It: How to Repair your Knitting is finally available!  This class covers a lot of ground: repairing knit fabrics, purl fabrics, cables, lace and (my favorite!) colorwork (which has some special challenges).  It breaks down, step-by-step, how to approach various reparis, and how to make them nearly invisible (if that’s your desire).

Let’s look at what the class includes:

In This Online Workshop You’ll Learn:

  • A variety of repair techniques including duplicate and Kitchener stitch
  • How to fix holes before they even happen
  • Step-by-step repairs for stockinette, Fair Isle, cables, and lace knitting
  • The secret to weaving in ends invisibly
  • Tips for sourcing repair yarn and mimicking original yarns in older or heirloom pieces

Lesson Outline:

  • Intro
  • Darning vs. Reweaving
  • A Stitch In Time: Finding Holes Before They Happen
  • The Duplicate Stitch
  • Repairing Stranded Colorwork
  • Kitchener Stitch
  • Repairing Cables
  • Mending a Hole in Stockinette
  • Weaving in Ends
  • Repairing Lace
  • Conclusion

Skill Level:

Any! Students should have basic knitting skills and some knowledge of knitting cables and simple lace.

Optional Materials for Practice Swatches:

Small amounts of worsted-weight yarn in several colors for practice swatches and repair; Size 7 or 8 knitting needles; locking stitch markers; crochet hook; tapestry needle and sharp-tipped needle; Size 7 or 8 double-pointed knitting needles

Repairing Cables Article in Interweave Knits Fall 2018

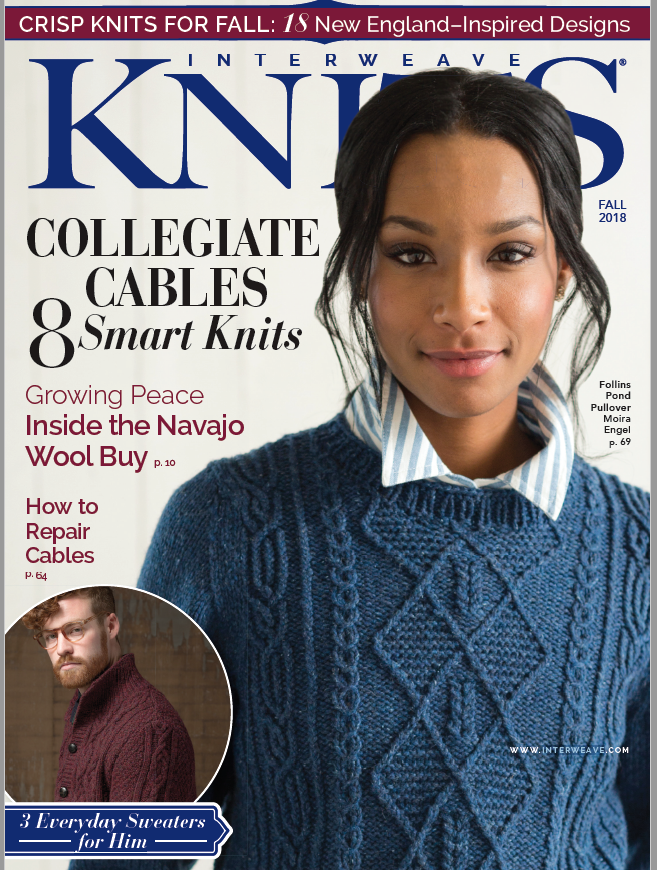
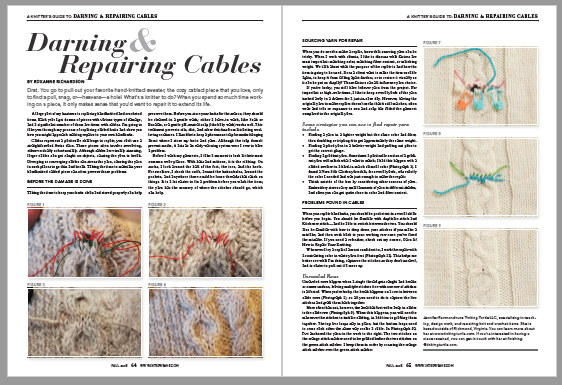
And the releases keep coming!  I’m proud to announce I have an article in the Interweave Knits Fall 2018 issue on repairing and reweaving cables in knitwear.

My piece appears on page 64.  You can also find a copy of the article on the Interweave Knitting Page.

The article offers tips and tricks to repairing cables.  I’ve added in some expert tips about where I source my yarn.  I think the editorial staff at Intwerave did a great job laying out the article and making it the best it can be!

Back from Maternity Leave!

Photographing a project

Hello from the Turtle Household!

Monday marked the end of my self-imposed maternity leave.  I’ve been taking the last month to sort through emails and triage what I needed to do for the business.  If everything goes as planned, the remainder of August and the month of September will be marked by an increased amount of activity as I learn what the new normal for the business and our family is.

The intent is to begin to contact individuals on the waiting list for finishing and repair services and begin taking in items again.  I’m so looking forward to burrying my hands in yarn!

I’m hoping for the ability to return to a little more blogging, a few news emails if you’re on the newsletter, and a somewhat regular teaching schedule.  We’ll see how ambitious this will be!

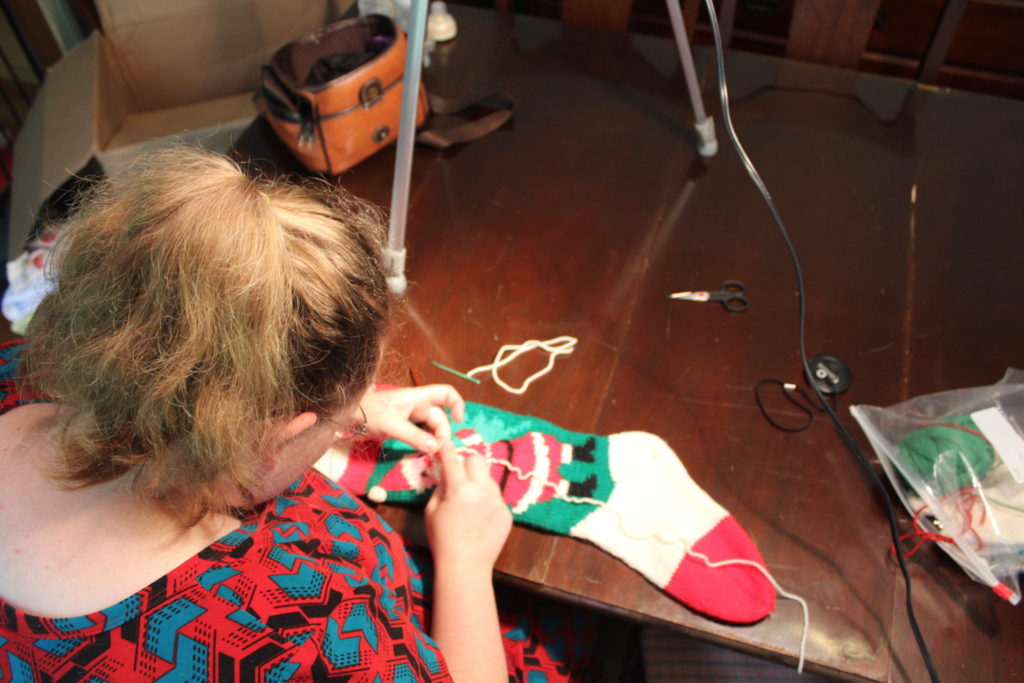
Meanwhile, I’ll leave you with this picture, of a project I worked on during my maternity leave for an article that will be published later this year.