MENU

Dyeing with Food Coloring – A Great (And Safe!) Alternative to Commercial Dyes

I’ve had a couple of people ask how I did the food coloring dyeing with the children in my camp.  This post is how I went about it, which is by no means an exact recipe.

First, I filled buckets with tap water and vinegar.  As a note, vinegar worked but many of the campers complained of the smell.  Next year I plan to try citric acid.  I used, per quarter gallon, about one or two slugs.  The roving (you could also use yarn, as long as it’s 100% wool) was then soaked in the solution for about 15 minutes.

The roving was then removed and squeezed dry.

I used paper and then saran wrap over it to cover the tables, which prevented dye from getting everywhere.

Using the leftover vinegar water, I poured small amounts into plastic cups, and then added the food coloring.  I used super-concentrated gel food coloring, which worked really well.  The children used sponges to apply the food coloring – one sponge to a color.

Results came out best when the children didn’t get their roving overly wet – just damp enough that the color adhered to the places they were applying.  They used the sponges like stamps, soaking up color and then “stamping” it onto the roving.
 When the children were done applying color, we wrapped the roving in a long piece of saran wrap, which then went into a freezer-safe bag.  Freezer safe bags are much sturdier, so they held up better to the next step.

 When I got home, I took the roving, still in the plastic bag, and microwaved the roving for 2 minutes, allowed it to cool, then microwaved it for another 2 minutes.

 After the roving had cooled, the piece was removed from the plastic bag and the seran wrap.  The roving was gently rinsed in cool water, gently squeezed dry (to prevent felting) and then was hung to dry.

 There was no running of dye, and the colors were very bright.

Takeaway:  Sometimes colors do not show true until after microwaving.  This was a source of concern for campers; try to explain that the colors will “settle” once they are fixed to the fibers.
Some people recommend using sugarless cool-aide (as it already has the dye AND the citric acid in the powder).  I preferred doing it this way: the food coloring provided a larger range of colors and the ability to control more variables.

Summer Camp!

Applying the color to the fiber with sponges.

This week is the first week of several camps that I’m teaching through Montgomery County College.  The camp, titled “String Theory” is all about using string in various crafty ways: the children learn to knit, sew, spin and dye yarn.

This session maxed out with 12 children have been absolute rockstars.  In the 9 short hours we’ve had together thus far, they’ve got a project bag half finished, have created their first yarn, and have gotten several inches of knitting done.  It’s pretty impressive.

The hot microwaved fiber, cooling in the sink.

Today was our messy day, and we spent the first part of the afternoon using vinegar, water and food coloring to dye their own spinning wool.  This evening, as I write this post, I’m ferrying their fiber to a from the microwave to fix the dye.  My hands are covered in red, blues and greens which I doubt will fade by the weekend.  I’m exhausted, but happy.

All the girl’s dyed fiber, getting ready to be dried.

It’s so great to be working with children in a camp setting again.  Some of the girls were so excited by what they were doing they went out and got their own supplies so they could practice at home.  I love teaching children – both because I think skills like these should be passed on, and because of their sheer excitement over learning new things.

Look how vibrant the colors turned out!

On Learning Crochet

Sweetness, now 6, has recently been asking me to teach her crochet.  On Tuesday, happy circumstance led to my having extra yarn and a hook with me.

Now, many people will start children on a larger hook and larger yarn – I’m not always of the option that those choices are the best answer.  Sweetness ended up with a size D yarn and a non-splitty multicolored sock yarn.  The multi-color because it was easier to see the individual stitches, the smaller hook and yarn because… her hands are small.  A larger hook and yarn wasn’t comfortable for her to use.

I worked a row of foundation crochet for her to work off of, and started her on double crochet. Why double crochet instead of single?  Double crochet has more of a rhythm; at least when I teach it. (Yarn over, into the “V”, yarn over, out of the “v”, yarn over, pull through two loops, yarn over, pull through two loops. After every step you yarn over.)

One of the luxuries of small children is that I could sit Sweetness on my lap (with adults this is a lot harder to do). At first, I fed the yarn and held the fabric while she manipulated the hook. When she felt comfortable, she took over holding the fabric – I was still feeding the yarn.  We worked for a half an hour.  Sweetness could have kept going, but I wanted her to leave on a good note, and her sister, Light, was getting impatient to have her playmate back.

Yesterday Sweetness and I continued, reviewing the stitch, talking about what happens when she “drops her loop.”  Sweetness’ relief when I showed her that she couldn’t have a dropped stitch the same way she could in knitting was comic.  She’s gotten pretty solid – by today she had worked a row of stitches on her own before getting mixed up about which direction she was going.  Her sister also stepped on the yarn and broke it.

The best part about all of this, for me?  Like many of my beginning students, I gave Sweetness a locking stitch marker to keep her stitches from unraveling when she isn’t using them. (I love locking stitch markers.)  Unlike my beginning students, I told her “The first one is free, but if you want another one, it’s 25 cents.” (I figured a little financial incentive would help her not loose it.)

“25 Cents! With four of those, I could buy an Ice Cream at Ikea!” was Sweetness’ response.

Now, every time I look at my stitch markers, I can only think about how many ice creams I could buy at Ikea.

Why I don’t Recomend Adults to take Knit/Crochet Lessons with their Children

Children behave better when their parents aren’t there.  I’m sorry, but in my experience, it’s true.  Children listen to me better when the parents aren’t there dividing their attention.

Adults are dividing their attention between their children and learning themselves.  It’s just gotta be said.  Knitting and Crochet aren’t easy.  You gotta concentrate on what you are doing.

And the final reason?

Adults get frustrated when their children learn faster than them.  And typically?  Children learn much faster than adults.  Children are hardwired to learn, and they do it well.  It’s hard for adults, who are used to teaching their children, to be the ones that are struggling beside their younger classmates.

And I know, there are exceptions to this rule, but… it happens often enough it bears saying.

7 Pragmatic Tips to Teach Children How to Knit Ages 3-6

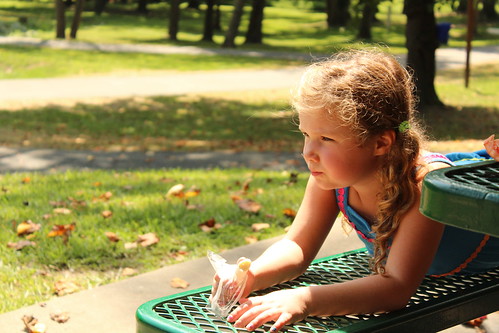
See?  Smiling.  They’re having fun.

People will sometimes come into The Yarn Spot or A Tangled Skein, or when people find out I’m a nanny and a craft instructor, and they will ask me a common question: “How young can you teach children to knit?”  This will be closely followed by, “How do you teach children to knit?”  This series of posts will address some of those questions.  (This also happens with crochet, but I say knit because people assume very often, even when I’m crocheting that it’s knitting.  Depending on my mood and their level of interest, I’ll sometimes correct them.)

Sweetness has been knitting since a few months after I met her, so around 3 1/2.  Light is 2 1/2, and is already showing interest.  She has her own needles, and will ape what Sweetness and I are doing, but she doesn’t quite have the attention span.

As follows, a sweet list of 7 tips for teaching very young children:

Make sure they’re interested.  If you are teaching them to knit at a young age, the desire has to come from them.  At three or four, they only way they will be interested in learning is if THEY are the ones who came up with the idea.  Don’t try to force learning on them.

Keep it Short.  Lessons should only go for at most 10 minutes.  Keep it short.  Stop while they still want more.  The longer you go at it, the more likely they’ll get frustrated and loose interest.  I know it’s tempting to keep going when it’s going well, but you want to end each lesson with a sense of satisfaction and accomplishment, not frustration.

Have them sit on your lap and hold the sticks with you.  Sweetness was (and still is, but it’s a close thing) small enough to fit on my lap when we started.  I would hold the needles with her and do the stitches.  Later, she took over the right hand, and then the left hand.  I still would do the wrapping of the yarn, while she figured out what was going on with the sticks.

Show them several times, then have them “teach” you.  This does two things.  One, you can listen and hear how they are thinking about the stitches and the movements they are doing, and then use the language they are using.  If they think of it more like a wrap instead of a yarn over, call it what they call it.  The proper language can come later.

Take turns.  Have them do a row, then you do a row.  This does two things.  First, you can correct any mistakes they made on the last row, like wrapping the yarn the wrong way and creating twisted stitches, picking up dropped stitches, or evening out their tension.  Second, their square grows faster this way.  Don’t be afraid to do a few rows after they’re done, to keep it growing.

Give them short needles.  Long straights, or even circulars, can be hard for small kids to manage.  I normally use a pair of double pointed needles, 8″ long, and put rubber bands at the end.  This way, if we loose one, I got 3 to replace it (packs of DPNs normally come in 5) and the shorter needle is easier to manage.

Focus on the skill, not on the result.  At 3-6 years old, children are still developing fine motor skills.  They’re first knitting may not even be usable.  Don’t focus on making anything in particular other than a square.  Just focus on getting the skill down.

Please, don’t set their sights on a scarf.  So many people come into the store with kids, saying that they want to knit a scarf and it’s their first project.  I always try to steer them to some different options – some of which I’ve listed HERE.  After the first 6-10″ a garter stitch scarf gets really boring.  Children are young.  The amount of time it takes for an adult, never-mind a child, to knit a scarf is LONG.  Give them a more attainable short term goal.

What type of advice would you give someone who was teaching a young child to knit?

The Ongoing Adventures of Knitting with Wee Ones

It’s about time I give you an update on Sweetness and Light, since we haven’t visited them in a while.

It’s been a rather rough winter for all of us.  There’s been very little snow, which makes it hard for us to go out and play outside… snow is much more fun to play in when it’s cold than going to playgrounds.  As a result I’ve been having to scrape the bottom of the barrel finding ways to keep them entertained.  There’s only so many days we can go into the city to see the Smithsonian or even go the the Airplane Museum, which is closer to home.

(On a side note, Mrs. D, as she’s known at the College Park Library, is amazing)

Hence, Sweetness and I have been working on our knitting.  She’s coming along nicely.  We still haven’t learned purling, but she’s developed on her own a style of knitting that’s a little Picking and a little Throwing, and a lot her own.

Light has decided she wants to learn.  Now, I’m all for teaching kids early, but Light is 2 1/2 (the half is important!) and not quite there yet.  She’s sit in my lap for ten minutes and work with both our hands on the needles, but that’s about it.  Which is actually quite impressive that she lasts for ten minutes.  Then she’ll take up her own needles, and “pretend” to knit.

Well, I couldn’t help snapping this picture the other day, when I realized the picture we made.